This best ever gluten free white sandwich bread is so soft and delicious, just like that Wonder-ful bread we used to love!
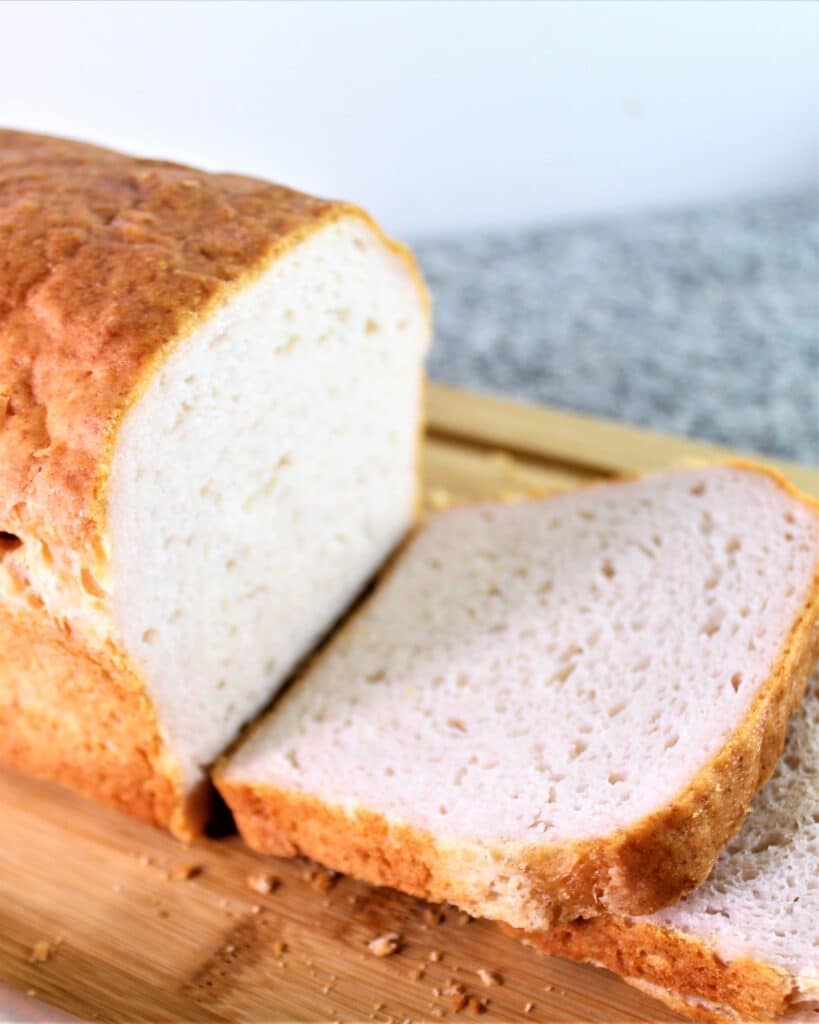
Oh, how I've wanted a great peanut butter and jelly sandwich for so long. Do you remember a regular 'ole pb&j? The one on that super soft bread that all those gluten-eating people take for granted? It's the one my son (and possibly yours) ate almost every day of his young life because he was too picky to eat anything else, haha!
This new bread can be the canvas for the classic peanut butter & jelly. Or a perfect grilled cheese. Or a homegrown tomato sandwich with mayonnaise that gets slightly squished when you bite into it. Who's hungry for a sandwich now? I know I am!!
Creating the Best Ever Gluten Free White Sandwich Bread
After many failed attempts at trying to create this bread (at least 40) I went back to the drawing board. I researched and researched and found that what I wanted was a tighter crumb. In other words, not a lot of holes in the bread.
To get that, I had to use less liquid than normal. But in gluten free baking, especially breads, using less liquid usually means the end result is like a brick. Nobody wants that. So how in the world can we make a gluten free bread that's not only soft, but has a tight crumb and a tall rise?
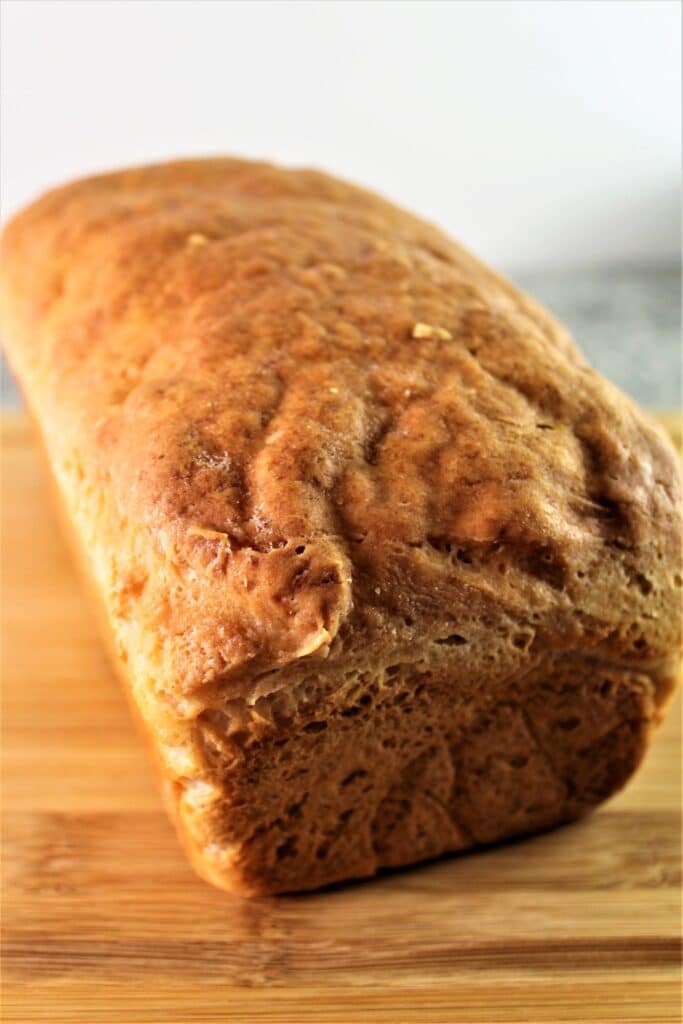
Using a Tangzhong
First of all, what is a tangzhong? A tangzhong is just a mixture of a small amount of the flour and liquid from the recipe that's cooked into a paste. Kinda like a roux. In fact, it's often called a water roux. What this does is pre-gelatinizes the starches in the flour so they can absorb more liquid.
But what does that mean for our bread? Well, for starters it means the bread will be softer because it will retain more moisture. And retaining more moisture also means it will stay soft longer. And it may even rise higher because there will be more moisture to create steam! If you've ever made my Gluten Free Olive Garden Style Breadsticks or the Softest Gluten Free Rolls Ever, you've already had experience with a tangzhong.
To make the tangzhong, simply heat a small percentage of the flour with a small percentage of the liquid (in this case milk) over a low flame until it thickens and becomes paste-like. Let it cool while preparing the rest of the ingredients, and then add it to the dough when it's being mixed together.
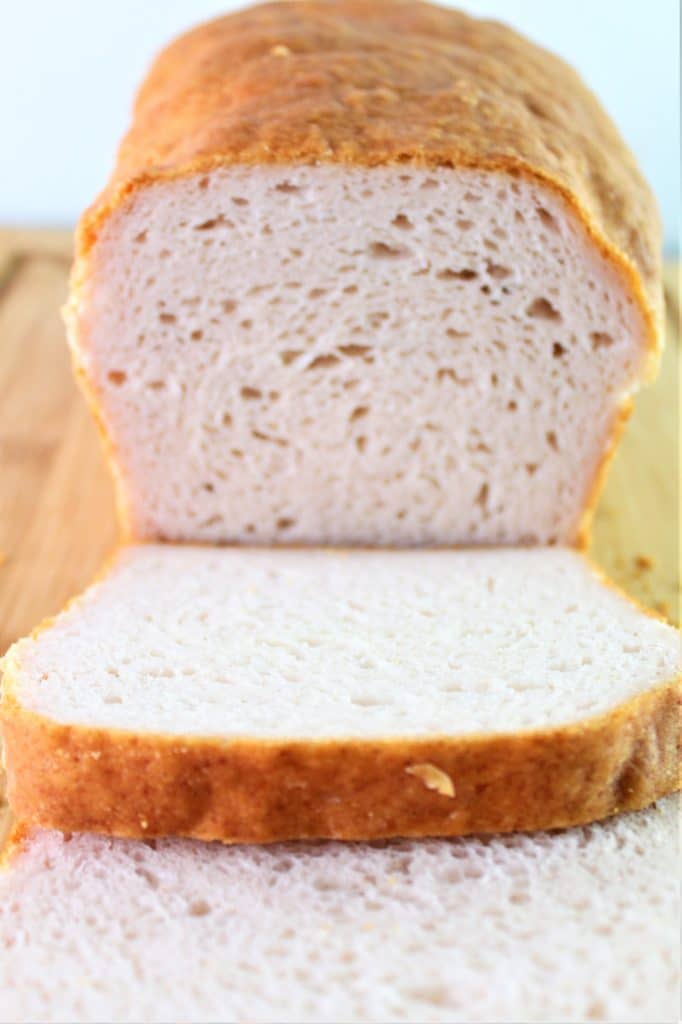
Adding Psyllium Husk Powder
If you've been following me recently, you know how obsessed I've become with psyllium husk powder! I know it's been around a while, but it's rather new to my gluten free baking repertoire and I just love the results it offers!! Extensibility, softness, and a great rise are the attributes I find so appealing when using psyllium husk powder.
What Size Pan is Best?
For the tallest loaf, I would suggest using an 8.5 by 4.5-inch one pound loaf pan. Any bigger of a pan size and the loaf will be squat and dense. You can find this pan size here (affiliate link).
Substitutions
For dairy free--substitute the milk with dairy-free milk (almond, soy, etc) and, as always, see my gluten free flour blends page for subs in the blend itself.
If you have an allergy to coconuts, sub the coconut oil with another type of oil, such as vegetable or canola. I've tried this bread with butter (which you know I'm a fan of), but it didn't stay soft for long enough and I think it had a lot to do with the butter.
I have to say that I really love the flavor the coconut oil imparts in this bread. And when my son, who is my taste tester as he's a gluten eater, said it was the best tasting loaf I'd made, I definitely stuck with the coconut oil.
Tips for Storing the Bread
Like any good bakery bread that's not made with a bunch of chemicals to keep it fresh, a few days after baking it becomes stale. There are a couple ways to keep this bread still at its peak:
After the bread has cooled, slice it into individual slices (about ½ inch thick), place the slices on a parchment-lined baking sheet in one layer, and allow them to freeze (no more than an hour). Once frozen, you can put groups of 2 or 4 together (however many you think you'll need at a time) and wrap them in plastic wrap. Then place them in a ziptop freezer bag, sucking out as much air as possible. Freeze the bread for 2-3 months, removing slices as needed.
Trick for Removing Air from Ziptop Bags
This isn't my trick (I saw Tyler Florence do it a long time ago on the Food Network), but it's a great idea that totally works! I call my mom the Freezer Queen (she freezes everything) and she uses this method all the time.
Close the bag almost fully, leaving just about an inch still unzipped. Stick a straw in that opening and suck out as much air as possible. You may have to do this a couple times to compress the bread and make a nice seal. This is like the redneck version of one of those food saver machines, haha!
Defrosting or Refreshing a Slice (or Two)
Remove however many slices you need from the freezer and leave them wrapped in plastic wrap on the counter until room temp. This won't take long at all.
You can also go straight from the freezer to the toaster if you want to toast your bread. Just add a few more minutes to the toast cycle.

Bake a loaf of this best ever gluten free white sandwich bread and then make yourself a pb&j. Or how about a tomato and mayo sandwich? Those homegrown tomatoes we're all growing should now be ripe for the pickin' 🍅
Best Ever Gluten Free White Sandwich Bread
Ingredients
Tangzhong
- ¾ cup (180ml) whole milk
- ¼ cup (35g) Kim's gluten free bread flour blend
Dough
- tangzhong
- 3 cups (420 g) Kim's gluten free bread flour blend***
- 1 tablespoon psyllium husk powder
- 2 tbsp plus 1 teaspoon (30 g) granulated sugar
- 2 teaspoon rapid rise (instant) yeast
- 2 teaspoon kosher salt
- 1¼ cups (300 ml) whole milk
- 4 tbsp (56 g) coconut oil, solid but soft
Instructions
Make the Tangzhong
- Put the milk and flour in a small saucepan and heat over medium heat and whisk until thickened and paste like, about 5-7 minutes. Set aside to cool slightly while making the rest of the dough.
Make the Dough
- In the bowl of a stand mixer, add the flour blend, psyllium husk powder, sugar, yeast, and salt and whisk to combine. Slowly add the milk and coconut oil and mix to combine using the dough hook. Add the tangzhong and continue mixing, increasing the speed to medium high and kneading for 5 minutes.
- Scrape the dough into a large mound in the middle of the bowl and cover it with plastic wrap (or try a shower cap or silicone lid). Allow the dough to rise until doubled in size, 1-2 hours. Refrigerate the dough until firm and easier to handle. This could take anywhere from 4 hours to overnight. To make the bread the same day, place the dough in the freezer for 20 minutes, which should firm it up enough to shape.
- On baking day, remove the dough from the fridge and knead until smooth on a well-floured surface, adding more flour as necessary to keep it from sticking. Shape the dough into a loaf shape long enough to fit into an 8.5 by 4.5-inch loaf pan. Spray loaf pan with nonstick spray and place the dough in the pan. Cover and let rise until the dough crests above the top of the pan about one inch. This could take 30 minutes or up to 2 hours. Be patient.*
- Preheat the oven to 450° F. When the dough has fully risen, slide the loaf pan into the oven and carefully throw a few ice cubes onto the bottom floor of the oven. Shut the door quickly. Bake the bread for 10 minutes and then decrease the temperature to 350° F. Continue baking for another 30 minutes, or until a thermometer inserted into the center reads 200° F. Remove the pan from the oven and place on a wire rack to cool for 10 minutes. Tip the bread out of the pan and allow it to cool completely before slicing.
- Serve bread within 24 hours for softest results. After 24 hours, slice bread and place individual slices on a parchment-lined baking sheet until frozen. Wrap the slices in plastic wrap and place them in a ziptop baggie. Suck out as much air as possible from the baggie before placing it in the freezer. Bread will keep in the freezer for about 3 months.



Amy Evans
Hi Kim:
Can this bread be made with dairy free ingredients/substitutions? I’m starting an elimination diet and can’t have gluten, dairy, soy, or sugar… I’m not sure what that leaves!
Kim
Yes, it can be made dairy free. I've used soy protein isolate in the flour blend and almond milk in the recipe with great results!!
Mary
When making the Gf white sandwich bread, which oven rack position do you use ie middle or bottom.
Thanks
Mary
Kim
I always use a lower rack position for sandwich bread, mainly because it often gets so tall that I don't want the top to get too dark.
Mary
Hi Kim I have 3 questions for you. I just made my 1st loaf of sandwich bread and followed the recipe to a tee. 1. I watched your video and it seemed like my bowl of ingredients was 2x as much as yours. Did you make a smaller loaf?
2. Are the tangzhong ingredients taken from the recipe amounts ie Tangzhong instruction says 1/2 C of flour: is it minused from the 3 C flour in the recipe and the milk too?
3. Why does the inside of the loaf have a Pink color?
Thanks again
Mary
Kim
Hi, Mary! I'll try to answer all of your questions.
1) I did not make a smaller loaf. What you see in the video is exactly what went into my loaf pan. The pan was an 8 1/2 inch by 4 1/2 inch loaf pan, which is the smaller sized loaf pan.
2) The tangzhong ingredients are already separated from the flour in the recipe so do not reduce the amount of flour in the recipe.
3) I've heard some people might have pink loaves of bread and the only thing I can think of is either the type of psyllium husks used (some will give a pinkish hue) and/or if you substituted the protein in the flour blend with an alternative protein, such as hemp.
Hope this helps!
Kat
Hello Kim, do you have an FAQ on converting your recipes to sourdough? I see people have commented that they have had success doing so with this recipe but no measurements were ever listed by those commenters. Any help you can offer to help me use up this starter is appreciated!!
Shannon
Hi Kim. Thank you so much for the recipe, I am about to start making my first loaf. I was wondering if I could freeze the bread dough and then pull it out and bake it when I need it. Is that a possibility?
Kim
Yes, you can! Wrap the dough in plastic wrap (double wrap preferred) and place in a ziptop baggie. Freeze for up to 3 months. To thaw, you can either thaw it in the fridge overnight or, if you've preshaped it before freezing, you can put the frozen loaf of dough right in the loaf pan, cover it loosely, and let it thaw and rise at the same time (just like the frozen bread doughs they have in stores). It will take a long time, but it works!
Kimberly Wheeler
I do that with all of her breads. I imagine you could. I would say, freezing the unbaked dough will kill some of the yeast. It still always tastes great and rises well!
Kim Wheeler
Thank you soooooo much for all your hard work on these things! I was so sad when my 5yo was diagnosed. It is still hard sometimes but when I can send him things like this, he doesn't feel as singled out. My only issue is that I cannot seem to get it to properly rise the 2nd time so the loaf is dense. I tried the Brioche at the same time and that was amazing! I'm sure it is something I am doing, yeast and I have a love hate relationship.
Again, thank you so much! Our favorite is your cinnamon rolls! My whole family, who are gluten nuts, LOVES those cinnamon rolls!
Kim
Awe, I'm thrilled you're enjoying some of my recipes!!
Sometimes some of the loaves, depending on the amount of enrichments, will take longer or shorter than others to rise. The sandwich bread takes a lot longer to rise than the brioche because there are so many enrichments in the brioche. I would just give it a little more time. My absolute favorite way to proof my bread is (shockingly) in my clothes dryer. Especially if there are dry clothes in there. I "fluff" the clothes for about 5 minutes, just to warm them up, and nestle my bread right in the middle of the warm clothes. It's crazy sounding, I know, but it truly works like a charm. Sometimes I'll have to do this more than once to keep the warmth going, but it really helps.
Phyllis
I have never been much of a baker, so the idea of making something as tricky as gluten free bread is intimidating. But the store bought breads are so expensive and some NOT tasty I decided to go for it. To my surprise my first 🧬 loaf turned out pretty good.it is a little heavy, but a lot nger rise will fix that. Most importantly, it actually tastes good. Thank you, Kim, for bringing real food to the GF community.
Kim
That's awesome, Phyllis! So glad you liked it!!
Olivia
Thank you so much for this wonderful recipe. GF bread has been so expensive where I live lately and this is delicious, affordable, and easy to make. Got a great rise even while living at altitude! Thanks again <3
Lillian
I’m at the shaping stage and I swear my dough looks lavender out of the fridge 😂 is that a thing? Or are my eyes playing tricks on me?? Anyway, I’m crossing my fingers it rises the way yours did…I never see an obvious difference, maybe I should wait longer than 2hrs if it’s night over the rim of the pan? Can I use my brow Taylor proofer? If so, what temp? Thanks!
Dylan Fichera
Hi! I’m following everything to a T and this bread is way better than anything I’ve bought at the store. I’m just noticing the loaf is a little dense and heavy. I let it rest for a long time and cooked it until the internal temp was 205. I’m wondering if that’s the texture or if I’m doing something wrong. It’s a big hit, but it just seems heavy and not fluffy. Thanks so much!
Kim
It shouldn't be heavy. Heaviness is usually a result of either under or over proofing, most of the time under proofing.
Irene Frost
Made his yesterday following success with the hamburger buns. The bread was very crusty despite me tenting with foil half way through. I also cooked it till 210 degrees as temperature probe was very tacky at 200. The bread is good I’m just not too keen I think on the coconut oil, could I substitute something else for coconut oil. All butter or something else?
Irene Frost
I guess I Needed to read your page again where you suggest canola oil not butter. Lol.
Angel
Hi kim, I’m new to this gluten free, I just got diagnosed, thank You for your wonderful page, I founded looking for breads on YouTube, today I mix your recipe for the bread. Flour and I made your sandwich bread, it came out very good, but I do have a question for you, my flour and bread are not WITE like yours it has a purple color, can you tell me why?. Thanks in advance and God bless you.
Sincerely
Angel
Kim
Hi, Angel! I think the purplish hue is due to the type of psyllium husks you used, especially if you used psyllium husk powder. I use Anthony's brand psyllium husks (see my bread flour page for the direct link).