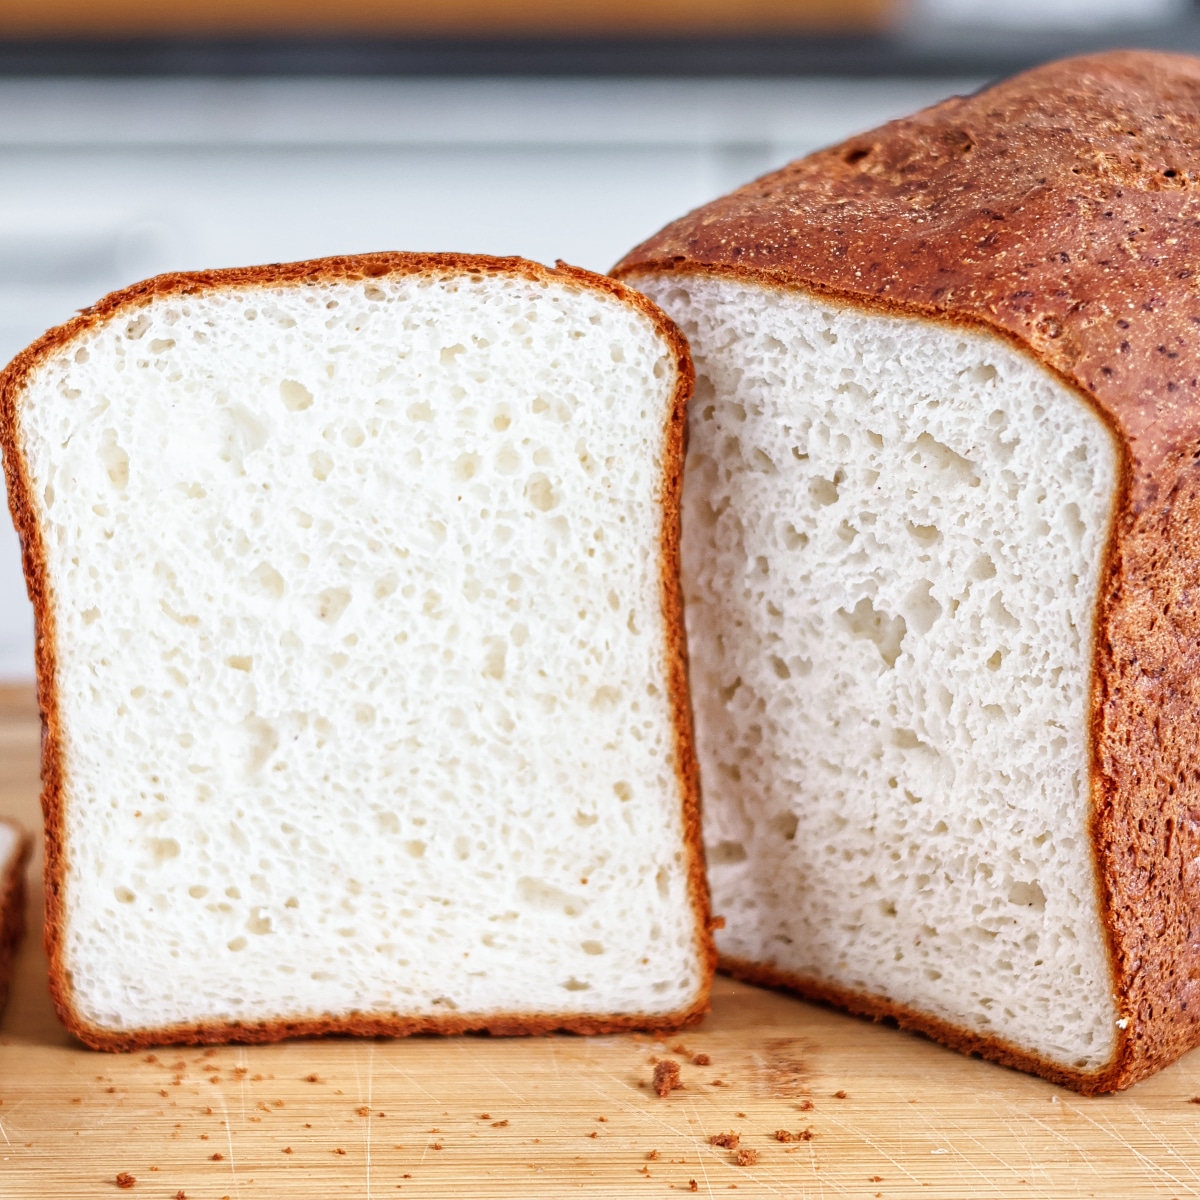
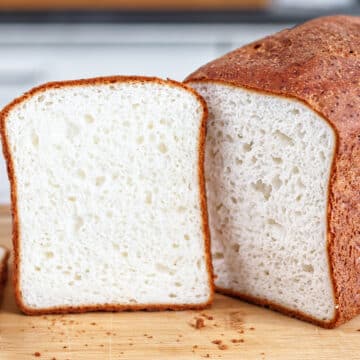
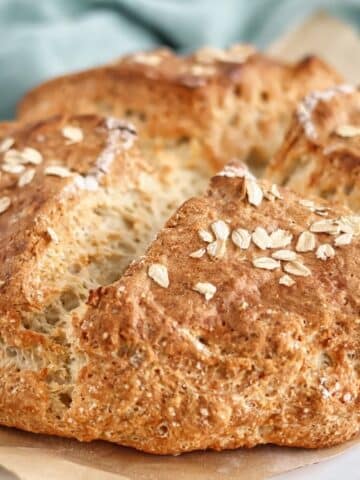
Want an EASY sandwich bread that can be made in no time and is as soft as Wonder Bread? This Gluten Free Sandwich Bread Recipe is the answer!
Some of the items linked in this post are affiliate links, meaning, at no additional cost to you, if you click through and make a purchase, I will earn a small commission.
While I love all of my gluten free breads on the blog, sometimes I want something that can be made in the same day. Because, let's face it, we're all time constrained and could use a recipe that comes together quickly. Maybe you've got young kids with celiac who just want a soft and fluffy peanut butter and jelly sandwich in their lunchbox. One that's big enough to sustain their energy throughout the day (not those tiny little slices of bread you'll find in the stores).
Well, I've gotcha covered. This bread is similar to my other gf white sandwich bread, but a little less involved. In fact, it's so easy you can make it in less than 4 hours, start to finish. That's with two risings! It is also NO KNEAD! Not to mention you can make it dairy free and, therefore, vegan. It's such a great loaf of bread that my own husband and son said it's the best one yet! From the gluten-eating community, that's saying something.
ingredients needed for gluten free sandwich bread
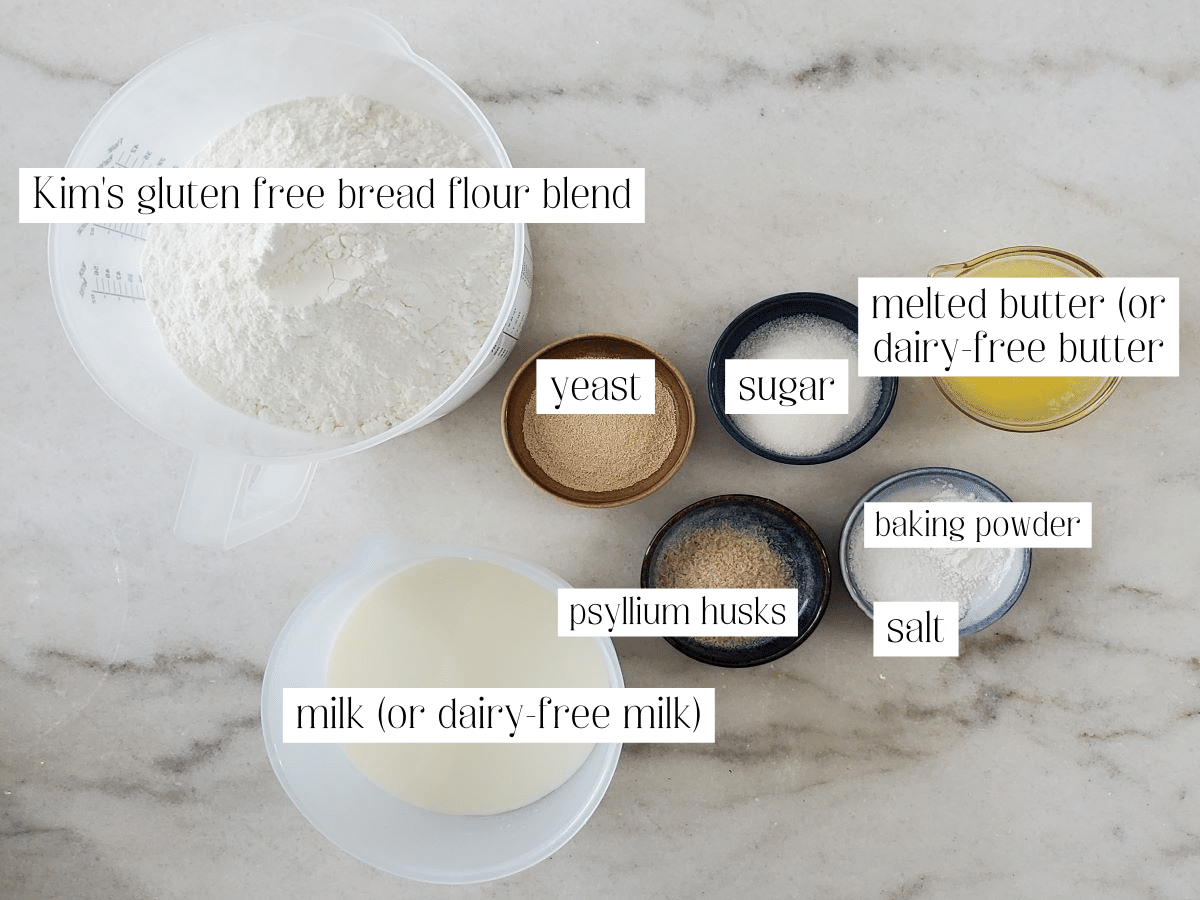
- Kim's gluten free bread flour blend - if you want to make the bread dairy free, simply substitute the whey protein with one of the other choices I suggest in the flour blend post. I've made my flour blend with both soy protein isolate and pea protein isolate. While I love beans, I don't like the taste that pea protein leaves to the finished bread. Soy protein is my protein of choice.
- Milk or dairy-free milk - using milk (or dairy-free milk) as opposed to water makes the bread a little more enriched and softer.
- Butter or dairy-free butter - using butter or dairy-free butter as opposed to oil gives the bread a more buttery taste.
- Sugar - there is a very minimal amount of sugar in this recipe. This feeds the yeast and also offers just a slight bit of sweetness.
a word about psyllium husks
I'm often asked the question as to why I don't make a psyllium "gel" for my gluten free breads, like many other gluten free bloggers do. A psyllium gel is a "gel" made when psyllium husks are mixed with water. It allows many gluten free doughs to be kneaded and shaped, unlike the traditional batter bread of days past.
While I'm all for using what is necessary to make wonderful gluten free breads, I personally do not like the texture of bread made with a psyllium gel. I do use psyllium husks in many of my recipes to give the dough a little more elasticity, but only a very small amount. I understand that making the gel offers the ability to knead the dough right away (whereas most of my breads require an overnight stay in the fridge). However, a psyllium gel is not necessary to be able to knead any of my bread recipes, this one included. It is absolutely acceptable to refrigerate this dough overnight and then knead it and shape it perfectly the next day, if that's how you would like to make it.
here's how easy it is to make this bread
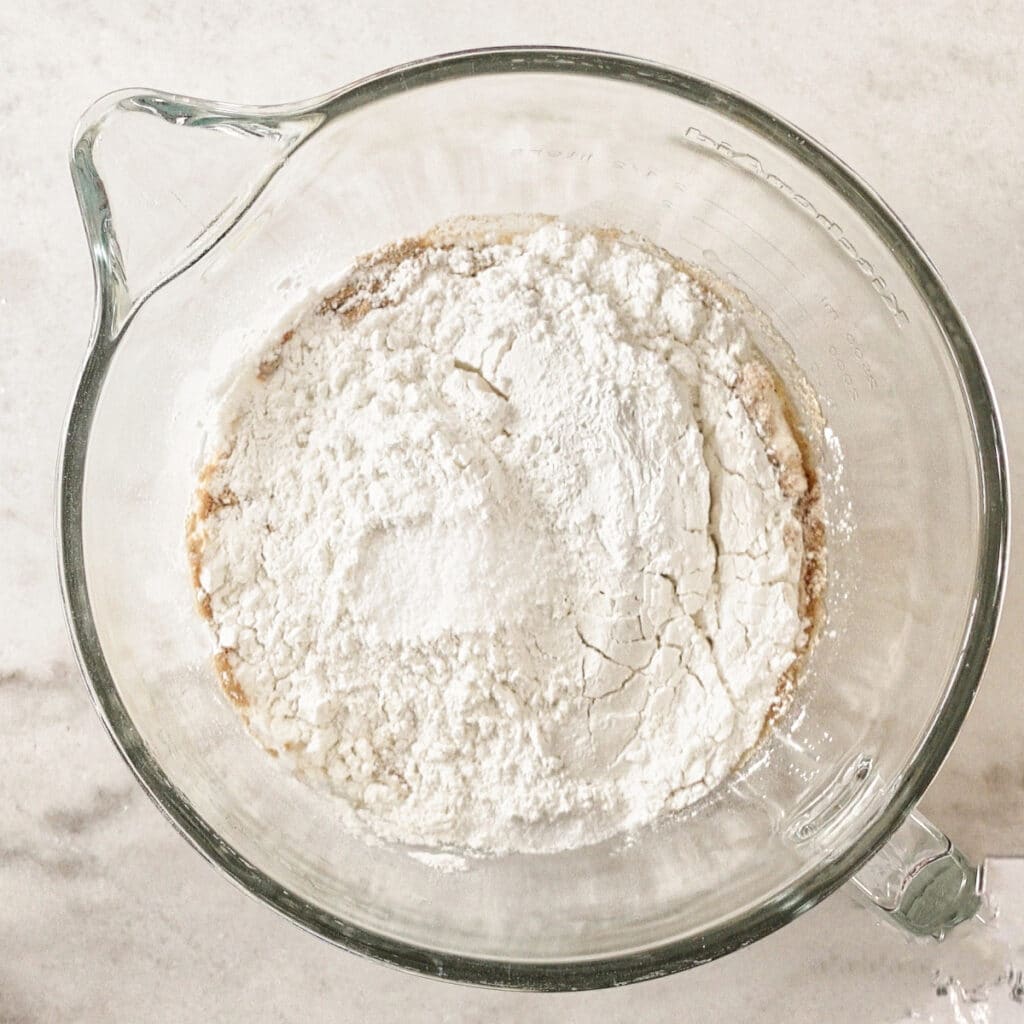
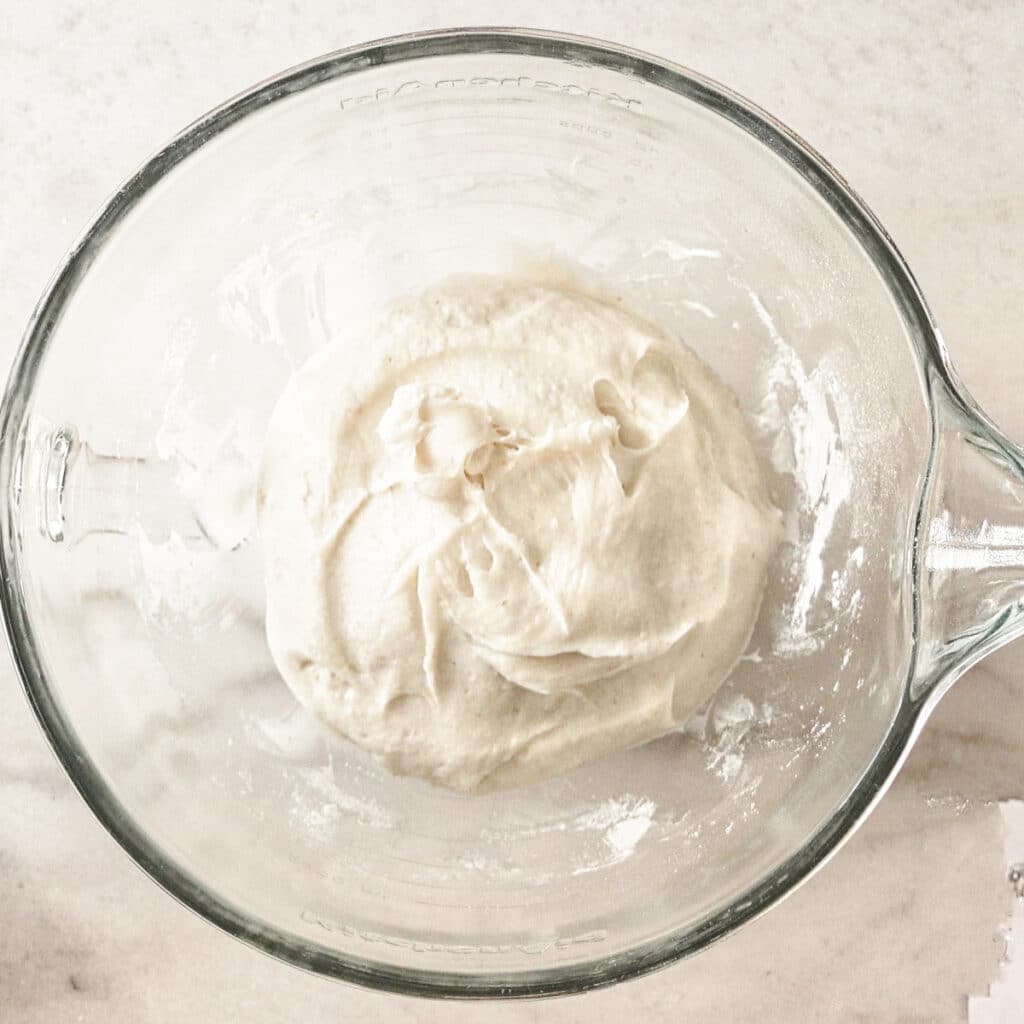
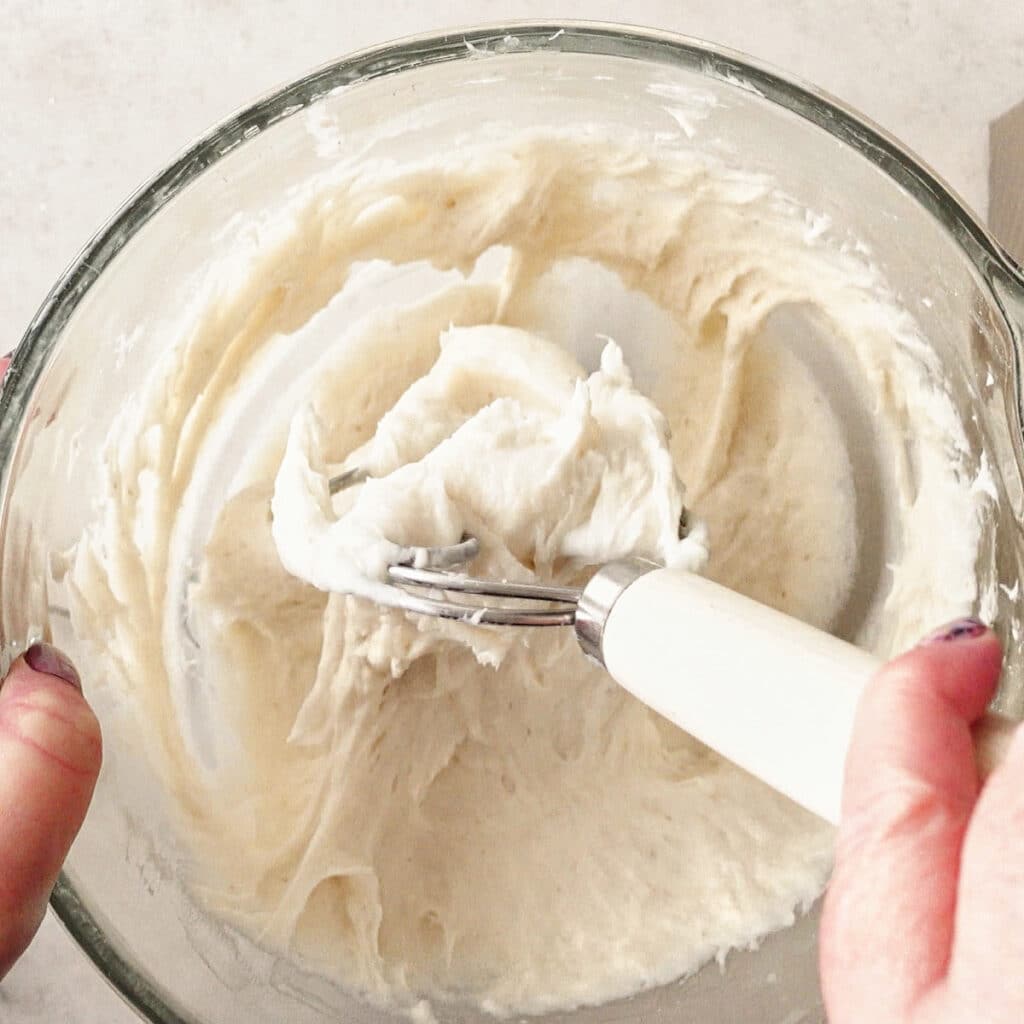
Measure all the ingredients into the mixing bowl and mix on medium high for 5 minutes until smooth and well combined. Scrape into the middle of the bowl, cover, and let rise until doubled in size.
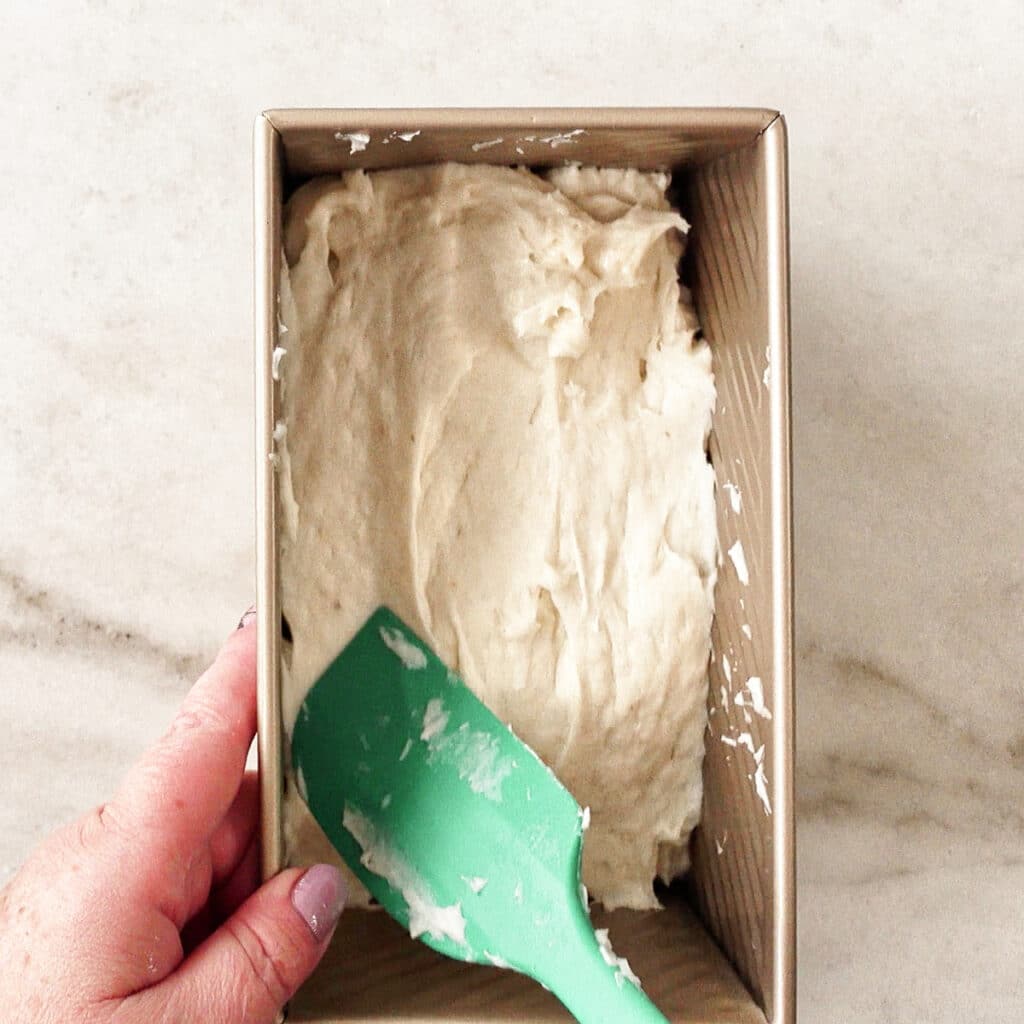
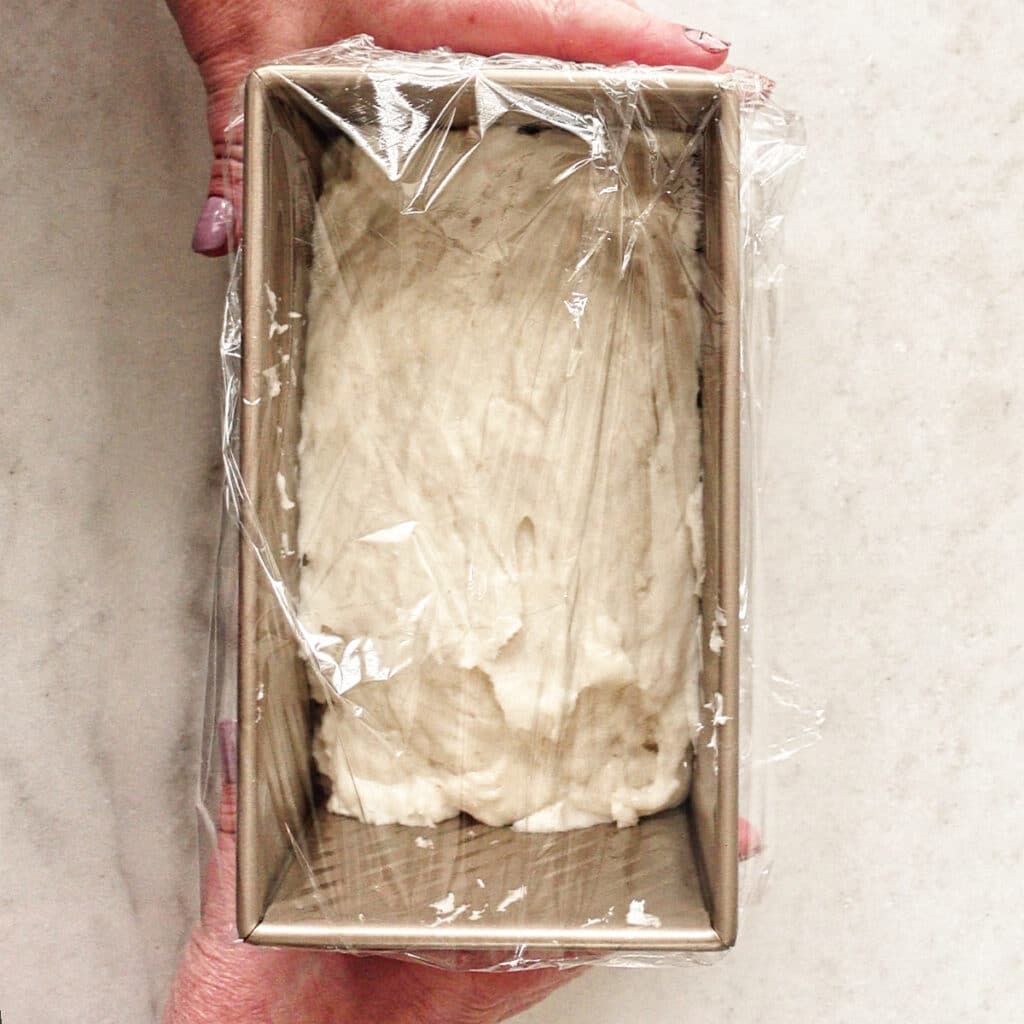
Use a Danish dough whisk (affiliate link) or large spoon to vigorously whisk the dough to remove all of the air bubbles (like punching down gluten-filled dough). Spread into a greased 8.5 inch by 4 inch loaf pan. I bought a set of these Pullman style loaf pans (affiliate link) and they are fabulous! Cover with plastic wrap and allow to proof until nearly doubled in size (dough should rise about one inch above the loaf pan).
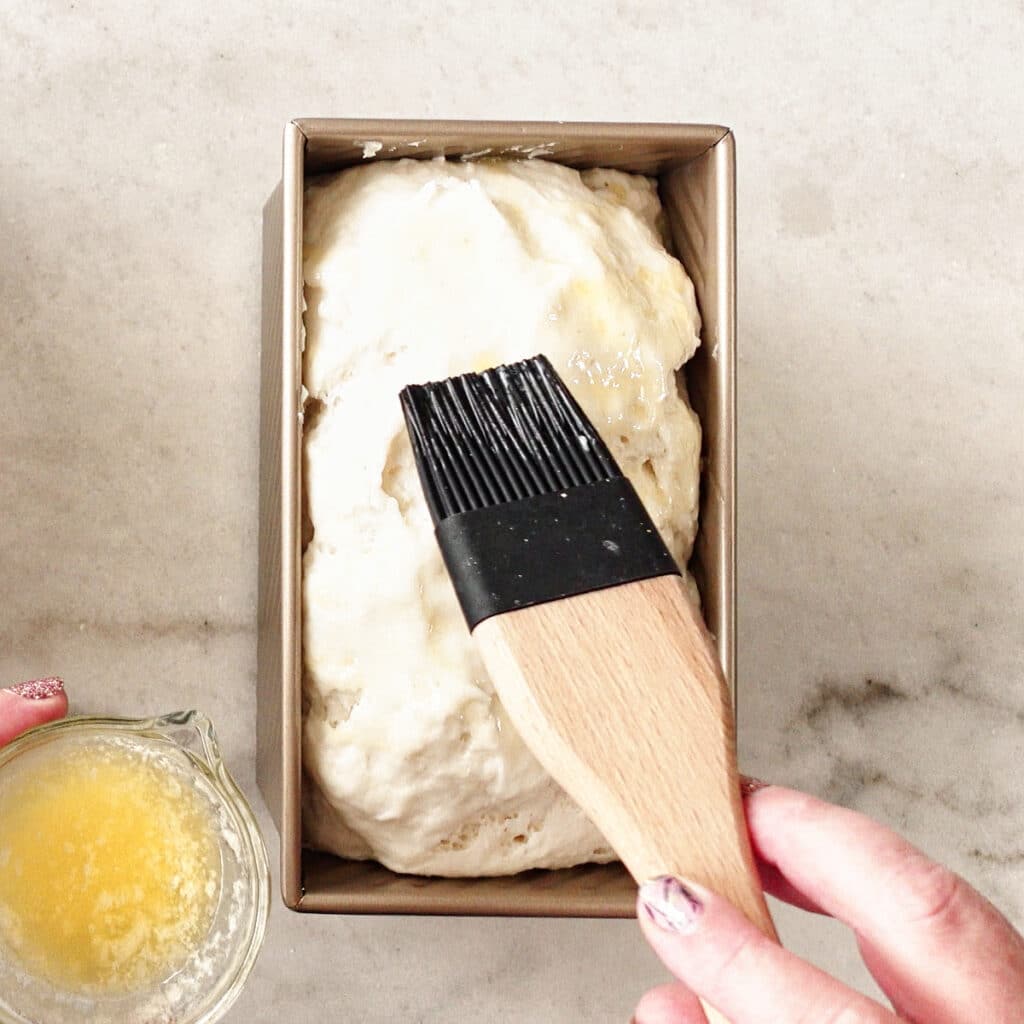
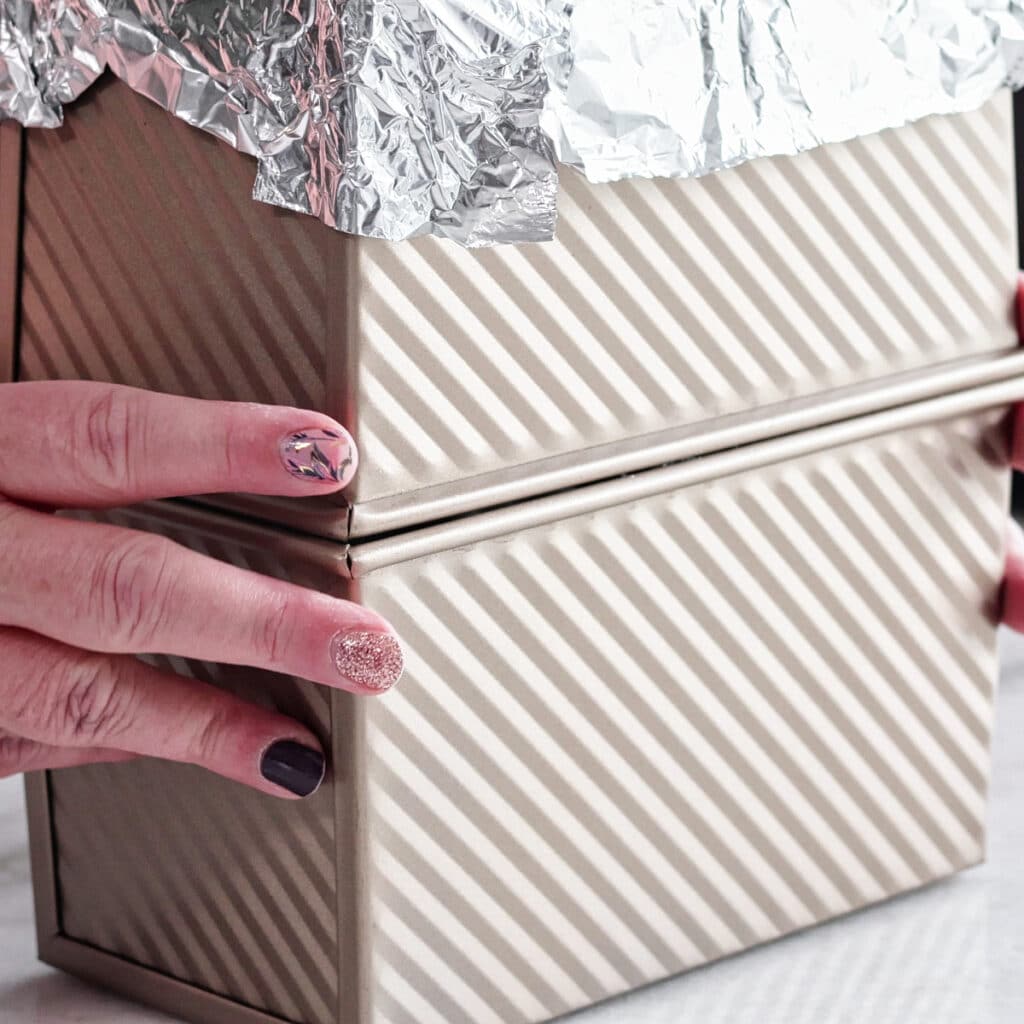
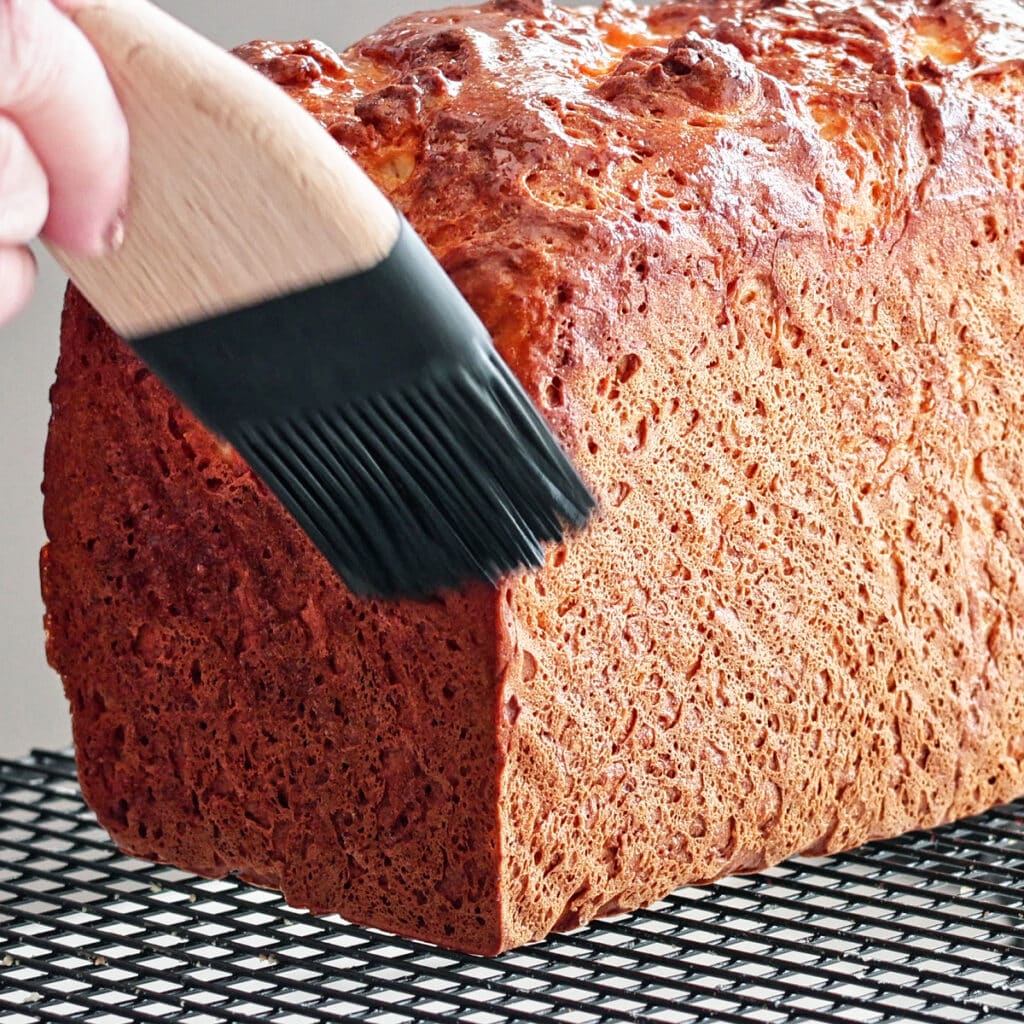
Brush top of dough with melted butter, if desired. Cover with another same-size loaf pan to provide steam (or throw a couple of ice cubes in the bottom of the oven or in a cast iron skillet set on the bottom rack of the oven). Bake at 450 degrees F for 15 minutes. Remove the top loaf pan, reduce the heat to 375 degrees F, and continue to bake for 40-45 minutes, or until a thermometer inserted into the center registers 205-210 degrees F.
Rather Watch?
Easy Gluten Free Bread FAQs
Yes, absolutely!! Double the ingredients and split between two equally-sized loaf pans.
This bread will stay soft for 3-4 days, well wrapped at room temperature. For longer storage, slice and flash freeze slices on a parchment-lined baking sheet until frozen. Wrap frozen slices well and freeze for up to 3 months.
Place an oven-safe shallow pan (cast iron works great) on the bottom rack of the oven when preheating. When ready to bake, throw several ice cubes into the pan and shut the door. Bake for the initial 15 minutes and then remove the pan to finish baking the bread.
WHY IS THIS RECIPE IN GRAMS ONLY?
I now post all of my bread recipes in grams as it is THE MOST ACCURATE WAY TO BAKE. Volume measurements (cups) are not only inaccurate, but they vary worldwide. There is no way to provide one cup measure that works for everyone in the world. Using weight measurements fixes this problem. I found myself spending WAY TOO MUCH time troubleshooting bread baking problems with readers only to find they didn't weigh their ingredients. As soon as they started weighing their ingredients, the recipes worked perfectly.
If you need to convert a recipe to cups, you are more than welcome to do so via google, but please do not ask me to do it for you. I know change can be difficult, but I'm American and once I tried using a scale for the first time, I never looked back. Baking with a scale is EASY, accurate, and uses way less dishes! That right there should convince ya! Plus, if you are using my bread flour blend (as you should be for any of my bread recipes) you CANNOT make it without using a scale. So do yourself a favor and keep the scale out for making any of the breads on my blog. Ideally, I'd love to convert ALL of my recipes to grams, but...baby steps. Gluten free breads are notorious for being challenging, so if I can reduce the number of questions I get on just bread alone, it would free up more time for me to do what I love...provide you with many more gluten free recipes!
more gluten free bread recipes
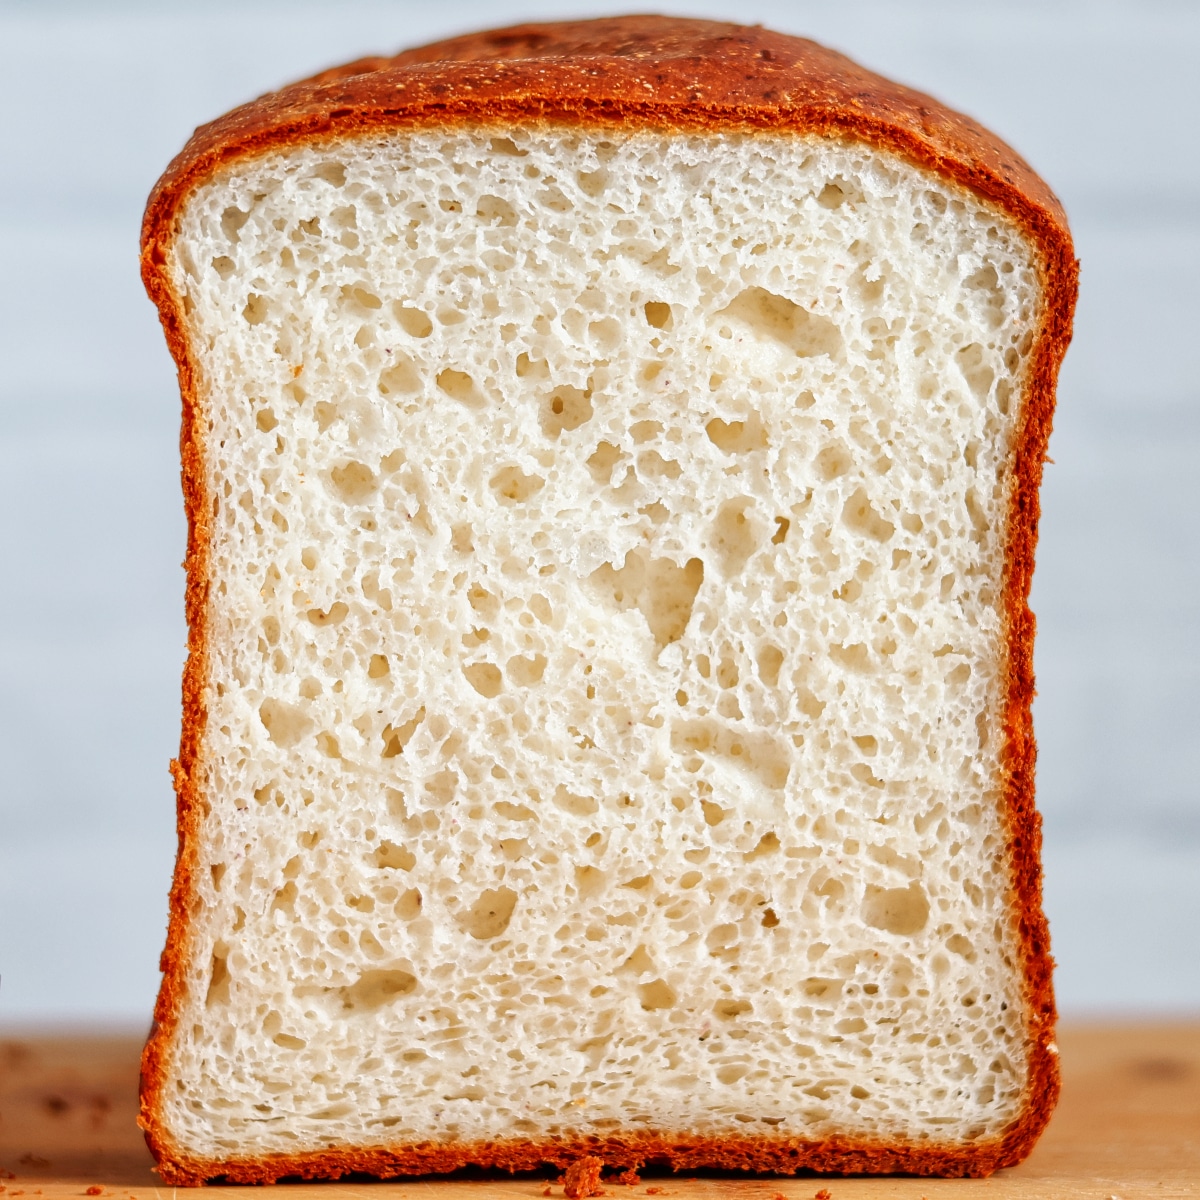
For a loaf of bread that will BLOW YOU AWAY and can be made in under four hours, look no further than my Gluten Free Sandwich Bread Recipe. It's no fail, no fuss, and EVERYTHING we miss about soft sandwich loaves.
Gluten Free Sandwich Bread Recipe
Ingredients
- 540 grams whole milk (a dairy-free milk may be substituted)
- 56 grams butter, melted (a dairy-free butter may be substituted)
- 6 grams instant yeast
- 29 grams granulated sugar
- 5 grams whole psyllium husks* (or 1ยฝ teaspoon psyllium husk powder)
- 453 grams Kim's gluten free bread flour blend
- 12 grams kosher salt
- 8 grams baking powder
- extra melted butter for brushing, if desired
Instructions
- In a large mixing bowl, add all ingredients in the order in which they are listed. Mix on medium high (using the dough hook OR the beater blade) for 5 minutes.
- Scrape dough into the center of the bowl, cover, and proof until doubled (nearly tripled) in size, about 1ยฝ-2 hours. For fastest proofing, place bowl in a warm, draft-free area (such as a slightly warmed and turned off oven).
- Preheat oven to 450ยฐ F and place oven rack in the lower third of the oven.
- Using a Danish dough whisk or silicone spatula, vigorously stir the dough to remove as much air as possible. Scoop the dough into a well-greased 8ยฝ-4ยฝ-inch loaf pan and smooth the top. Cover loosely with plastic wrap and allow to proof in a warm, draft=free area until nearly doubled in size, approximately 30 minutes (until dough has risen about one inch above the top of the loaf pan).
- Remove the plastic wrap and, if desired, brush top of dough with melted butter. Cover the loaf pan with another loaf pan of equal size and carefully place into your preheated oven.
- Bake at 450ยฐ F for 15 minutes. Remove top loaf pan and reduce heat to 375ยฐ F. Continue to bake for another 40-45 minutes, or until loaf feels light in weight and a thermometer inserted into the center registers 205-210ยฐ F.
- Remove from the oven and immediately turn bread out of pan onto a wire rack to cool. If desired, brush entire loaf with melted butter. Cool completely before slicing. Crust will soften as it sits, but you can further along the softening by wrapping the loaf in plastic wrap or a tea towel.

Eizabeth says
My second time making this recipe I am so thankful I found you Kim.
I was on a mission for the best methods and I found you!
Iโve already made the baguettes and boules .which were stellar and the multigrain so tasty . I have coeliac disease I rarely would eat gfree bread because of the less than satisfactory renditions.
Untill you and the artisanal glutenfree bakers and experimented
There was no satisfactory replacement for gluten bread
I am so thrilled with these methods .and hopefully soon ill be singing the sourdoughs praisesA+++++i appreciate you
Kimberly says
Best. Bread. Ever!!! Thank you sooooo much for sharing your recipe!! โค๏ธ
JJ says
ok so I'm on try two of this bread and struggling. The first time I used a Pullman but it was leaking out the bottom so I made sure to wrap the bottom holes in foil. My bread rises high. Used another pullman on top and followed the recipe. Ended up with a big air bubble.
Second try is in the oven. Use an 8 x 4 loaf pan and it overflowed the pan on the second rise. I can already see where the middle has the divot where it's puffed up but fallen.
Any ideas? Go back to the Pullman and ensure I'm wrapping it well. Proof it less? Most GF bread recipes I've tried previously only had one rise, does this need two?
I am following all ingredients in the recipe (including making your flour mix) other than using soy milk and plant butter since we can't have dairy.
Kim says
What did you use in the flour blend as a dairy sub? I'm gonna take a guess and say that maybe you are overproofing it, but also I believe that you're not knocking out enough air after the first rise. I've found that if I don't knead the dough enough and knock out enough air, I'll get huge holes in the bread.
angela says
How important is it to add the ingredients in order?? I wanted to make a batch of the dry mix to give as a gift for someone but if the ingredients must be added in a certain order, I don't want to risk combining all the dry ingredients together and then having them dump that into the wet. Please let me know. Thanks!
Kim says
It's not that important if you're doing it for this purpose, but I don't know if premixing it with the yeast and salt coexisting together would work. The only way to find out is to do it and see what happens.
angela says
Ok. I will leave put the yeast and maybe just make a note about adding in yeast. Thank you!
Rose says
Hi Kim, I would like to make this bread, but I want to leave out the psyllium husk because I donโt like the taste of it. Should I replace it with something else or just omit? Thank you ๐
Kathryn says
AMAZING! Thank you so much! Literally cried when I had my first bite. I can finally have some good sandwiches again! You are a Celiac Goddess!!
Question, can the dough be frozen? I know you mentioned the baked bread can be sliced and frozen but if possible Iโd rather batch make the dough and bake when needed for that fresh baked goodness. ๐ค
Kim says
Yes it can!! You may lose a little bit of volume, but not much really. I do it all the time with nearly ALL of my bread recipes. My freezer is constantly full of bread doughs that I first wrap in a layer of plastic wrap and then place in a ziploc bag. If you can also shape them into a loaf shape before freezing, then you can thaw and proof at the same time in a loaf pan (just like the frozen bread doughs you find in the supermarkets!).
Stephanie says
This is truly the best gluten free bread! Better than my favorite store bought! I do have trouble getting it to rise to the top of the bread pan. Today it sat in a warmed oven for 4 hours and maybe got to 3/4 before I ran out of time and needed to bake it. I have bought new yeast and store it in the freezer. Any ideas on why it isnโt rising as much as the recipe calls for? The only time itโs reached the top of the pan is when I put it outside to rise when the temp here was about 108.
Kim says
Try boiling a pot of water and placing that at the bottom of your oven (or the rack above it) and proofing your read in the humid environment. That seems to work like a charm for me!
Stephanie says
Even though I didnโt get a full rise, it did help to have hot water in the oven during proofing! I do live in a dry climate. The loaf I made yesterday was great!
Valerie says
WOW! WOW! WOW! This bread is the very best I've ever made. Finally true sandwich size bread. I'm so tired of buying loaves with slices the size of a cracker and zero taste. The crumb was perfect, no holes and perfect moisture. I have one question tho. Can I put the other loaf pan on top for the second rise? Ihad trouble getting it on after the second rise as it was squishing out all over. I just used a spatula and scraped it off but thought using the pan before second rise might save the mess. Thanks for coming up with the perfect sandwich bread.
Kim says
So glad you liked it!!! It's one of our favorites!
You might be able to, but I wonder if it would touch the sides and mess up regardless? If you have anything else that you can put over it that's deep enough, you could try that for the proofing time.
Brenda says
Hi,
I love all your receipes and have been making the Italian bread and artisian bread for year. As you mentioned in your discussion of recipe, you use weight vs. cups. I noticed in this recipe that you also have grams for the milk where the other recipes used ml. For this recipe, should we be weighing the milk instead of measuring in mls?
Thanks in advance.
Kim says
Yes, I'm sorry, I need to change that. I have a scale that has both ml and grams and I can put my container on the scale and it will be the exact same for ml or grams, so it really doesn't matter as long as you're weighing it, but I will change it to grams in the recipe to avoid any further confusion.
Amy says
I have made this twice now, following the directions exactly and both loaves turned out perfect.
My son and I both have celiac while my daughter does not. It's a huge hit with all of us. Will continue to make this and try your other recipes as well. Thank you,
Kim says
So glad you and your family loved it!!! Thank you for the comment ๐ฅฐ
Nia says
This is our go to sandwich bread. It's delicious and has a great texture. Your tips and video instruction yield consistent, reliable results every time. Thanks for all the research, time and effort you put into all these recipes, Kim. You make life so much better for our community โฅ๏ธ
Kim says
You are the sweetest, Nia! I can't thank you enough for all of your wonderful comments ๐
Dan says
This is a great recipe! I live in a small apartment without a real oven, but a small dual-purpose microwave-oven combo. It also does low temp fermentation, but I do have to adjust the baking time at least 10 minutes more just due to the small size. I have followed the doubling size recommendations for rise instead of exact times since my kitchen temp is different season to season, but I find that each attempt has a different result. I've had mixed results with the bread, and I was wondering if maybe it was the ambient humidity that has been messing me up.
Do you have any insights on how this might affect the results? I am fairly new to yeast breads, but I do know that GF baking is highly impacted by setting the starches. I reach the proper internal temperature, but it still ends up collapsing. My first loaf came out perfect and I have no idea what I did wrong the last three times :'(
Any insight you might have would be appreciated!
Kim says
It is possible you're overproofing it. Try to cut your proofing time down by 10-15 minutes (or "nearly" doubled in size) and see if that works. I find that in the summer my kitchen gets so hot that my breads tend to proof so fast and I have to really keep an eye on them or they will overproof.
Renee says
AWESOME!! I only had about 30g of potato starch and subbed in arrowroot starch. I only had fat free milk. But other than that, everything was the same. I had to let it do the final rise for about 1.5 hours but it rose just fine and it baked just perfectly. No gummy bottom, baked all the way through. So moist, soft, fluffy and delicious. Will definitely be making this again. I think I like this one better than the one you have with Tangzhong.
Dave says
Hey Kim!
Absolute life saver of a recipe. I make this twice a week for my daughter and the rest of the family can enjoy it too (unlike the cardboard crumbly store bought miniature sizes at $7 a โloafโ).
Few questions, this is so fast and easy so I stick to it but is there a significant difference in your other bread that involves the Tangzhong? Sometimes after a day or two the slices can lose their sponginess and flexibility. I didnโt know if your other loafs had a different texture.
Also, I use your recommended loaf pans with the lid slid on for 375 for just under an hour. Have you tried covered/uncovered/combo of both/different temps to get any different results? I want to use the loaf pan as a cover to have a higher loaf like you suggest but I usually double the batch so I didnโt know if using the slide on lid would be better than any alternative.
Aaaaand lastly, I recently tried superfine brown rice flour which was a lot cheaper than white and it had similar results (for anyone trying to save a few bucks). Not sure if it will change other bread flour recipes but it worked ok for this one.
Thanks again for all you do! God bless!
Kim says
I think the tangzhong would make it absolutely perfect and plan on trying that very soon.
I tried covered once and didn't care for it. It made my bread slices much shorter than I prefer. If I'm understanding what you're saying, you can't put the loaf pan on top because it's being used for the other batch? You could either purchase another pair of the pans, or if you have something like a deep oven-safe bowl, that would also work. For instance, sometimes, if I'm making a few loaves at a time, I will put them under a hotel pan (it's the bottom part of a chafing dish basically). They're very deep. My dad used to do catering so he had tons of them and gave me several and I use them for that purpose.
Good to know about the brown rice flour, too! Thanks for that tidbit of info that I'll be sure to pass on to others.
Rose says
Hey kim I love this bread recipe but alas I can't have yeast as I'm allergic to it. Well I guess you can't help me.
Kim says
Have you tried any of my sourdough bread recipes?
Stephanie says
Iโm so excited to discover your site! Your gluten free flour blends really are the best!
Iโm struggling with this recipe. Iโve never had my dough double in size when proofing and I turn my oven to warm while making the dough, then turn it off so my dough can be in that warm environment to proof. The bread rises very well when baking, but collapses when cooling. Iโm not sure what Iโm doing wrong! Iโve proofed it for 1.5hrs, 2hrs, and 2.5hrs with the same result. Would love this to be my go to for bread!
Kim says
Oh no! Try reducing the proofing time actually. Sometimes when bread collapses after baking, it can be from overproofing (or underproofing, or underbaking) but generally overproofing is the culprit. I never go by time and only go by looks, but I would suggest letting it proof no more than one hour next time and maybe add 10 minutes onto the bake time and see what happens.
Stephanie says
I proofed for 1 hour and increased the 375 bake time to 1 hour and itโs so much better! My current struggle is within a minute or so of taking it out of the pan, it starts collapsing on the side, like itโs sucking inward. How can I overcome this?
Kim says
Try baking a little bit longer. While it could be overproofing still, I have had this problem before and it was due to underbaking.
I like to get a "feel" for when my bread is done by removing it from the pan with potholders and if it feels heavy for its relative size, put it back in the oven for an additional 10-15 minutes.
Stephanie says
Itโs getting better! I only proofed for 1 hour in the bowl, just let it sit in the pan while the oven was heating up (Iโve never had much rise in either the bowl or pan proofing), baked 450 for 15min with second pan on top, removed second pan and baked at 375 for 1 hour, then took it out of the pan and baked it for 10 more minutes. No collapsing!! Next hurdle is the big holes that seem to go all the way through. How do I prevent that?
Kim says
Yay! Usually the big holes are from not kneading the dough long enough. Make sure to get all those big air bubbles out when you're mixing it after that first proof. If you're using the Danish dough whisk, whisk it very aggressively, or just use your mixer and really knock out those bubbles.
I'm crossing my fingers for you ๐ค
Stephanie says
I figured out what works for me to not get big holes! After the first proof, I put it back on the mixer with the paddle and let it go for a good minute or so and then using a spatula I mush it down to get rid of any more air bubbles. Iโve had 3 good loaves with no holes so far!!
Amber says
Made this bread today. I did something wrongโ the bottom came out gummy so not sure if I over or under proofed. Iโm fairly new to gf baking and so not sure what the issue could be here.
We did use KA bread flour which has protein and I have used it successfully in your recipes before.
The part that did bake properlyโ delicious and fluffy. I made a regular loaf for my family and I prefer the gf one!
Amber B says
Okay. I finally got the ingredients in and made it using your blend. Iโve made it twice now and both times have come out gummy. And feels very moist. The first time I thought maybe overproofedโ and an oven error on my part.
But the second time it was still gummy at the very bottom, not as much. Iโm wondering if maybe I need to adjust the hydration some for my area. We are in the South and high humidity. I have temped the bread and it reads between 205-210. And if you have a suggestion to adjust it byโ ie. Decrease 15g or 30g increments.
Thanks!
Kim says
You could try and that may work, but honestly I'm in a very high humidity area as well. I have had the problem of the gum line at the very bottom and when that happens, it's usually one of 3 things: overproofing, underproofing, or under baking. As far as under baking, what I prefer to do is to remove the loaf from the pan (with potholders of course) and feel the density of it. If it feels heavy for its size, it's not done and I put it back in the oven for an additional 10-15 minutes and check it again. I prefer this method over using a thermometer myself as a thermometer could possibly be off and I just personally like to get a "feel" for bread baking. If you decide to adjust the hydration, I'd start with a decrease of 40g.
Happy says
This recipe is perfect. I cut the sugar in half as I do most of the recipes on the site. However, the recipes always turn out perfectly. I am so extremely thankful for this site. You literally cannot tell that youโre eating gluten-free. Do not substitute any of the flours in the baking mix. I tried it and it doesnโt work. I did exactly what the recipe called for and it works beautifully. I wish I could attach a picture of my sandwich bread that just came out of the oven. One wordโฆ Perfection!! Thank you Kim. You have made my daughterโs life so much easier.
Kim says
Awe, thank you so much!
Nicole says
Wow!! This was better than I had even imagined and I had high hopes after making your king cake recipe! Now my head is spinning looking at ALL of your amazing recipes to choose from, overwhelmed in the best way. Wow is all I can say. I followed the recipe/flour blend to a T but scalded my milk (as I have raw milk and the enzymes can interfere with yeast activity) and I believe that really helped get a wonderful rise as it warmed the dough up. I added all ingredients when the milk was 120 degrees with the flour first to keep the yeast from directly touching the milk at that temp.
Thank you, thank you!!
Kim says
Yay!!!! I LOVE hearing success stories like yours! So glad you liked this recipe. It is one of our favorites๐ฅฐ
Joshua Bogden says
Kim,
This recipe has changed the way our family eats bread. My wife has celiacs and has always struggled finding good gluten free items, especially bread. In the past year we have decided to go gluten free as a household because its seems our kids may have a sensitivity also. This recipe is by far the best taste and texture i have found when baking for her and our kids.
I am having a problem though, the recipe always expands past the loaf pans capacity. I am using the USA pans 13x4" loaf pans. I double the recipe as you describe because these pans are double the size of the ones you use. I use the lids because we like the square shape. I am using your flour blend for the recipe. I go through the first rise and then put it in the pan and bake it before it has a chance to rise again. I do this because it seems to expand even more outside the pan if i let it rise the second time. the issue is no matter what i do it expands so much it bends the lid and leaks into the bottom of my oven. i let it finish and usually i have a very hard time getting the lid off because it bent it. once i get it out it seems OK, but as it cools the loaf sinks in on the sides and the top. Once its cooled i go to slice it and there is usually large air bubbles under the crust sometimes to the point the crust just comes off. the weird part is the part that falls into the oven(i put a pan under to catch it) usually turns out pretty much perfect to the point i use it as a misshapen bun. I don't understand what i am doing wrong. i am considering using a recipe and a half and trying that to see if there is just too much. is it over proofing? do i have to much moisture causing excessive air? i just don't know where to go from here, any help would be much appreciated!
Kim says
I would try increasing the recipe by half, like you said. Double might just be too much dough for your sized pan because 13 isn't quite double an 8.5 inch pan. Do you know how to do baker's math? If not, just add half of each ingredient onto the original recipe, and when the amounts aren't even, you can round up to the nearest whole number. So for the sugar, half of that I would just make 15 grams, and then add 15 to the 29 grams, etc, etc.
I hope this works. Fingers crossed ๐ค๐ค๐ค
Joshua bogden says
It seems to be the right amount now, did not spill out of the pan. Another issue though, in your recipe it says to get out of the pan as soon as the cook is done. My pullman pan was very hard to open and seemed to be releasing steam. When I got it open the bread puffed up outside the pan a bit then popped like a balloon. Should I let it rest in the pan after it's done? I have no way of tempting it if I do but I have found about 15+45 minutes is right. Always temps about 208f
Joshua Bogden says
Tried to let it sit in the pan, completely collapsed. Looks like a squeezed towel, the only think I can think is it didnt rise enough before I put it in. There was a lot of steam coming out when I took it out and it was expanded so much could not open it. If you have any ideas let me know.
Kim says
It's actually possible that it over proofed because bread that's been over proofed can sometimes bake well and then sink after it comes out of the oven.
Believer says
You could always use two Pullman pans and make two loaves that way. I find one recipe fits a standard Pullman pan absolutely perfectly. Depending on your altitude and the weather, you may need to proof it a little longer.
Joshua Bogden says
Kim,
Thank you for responding and the suggestions. I think I figured it out. I don't think the first rose rose enough, I let it rise until at least double this time. Also I let it rise in the bread pan as much as you did about 1/2 to an inch above the pan. Used the second pan like you do instead of putting the lid on it. It came out wonderful! Nice tight crumb just like sandwhich bread and a little but not much collapse. No big bubbles or complete collapse. I think my problem was timing, did not give it enough time to rise. This is awesome!!! My wife and kids will love it, thank you so much.
Kim says
Yay!! So glad it finally worked for you, Joshua!
Patti MacLaughlin says
Hi Kim. I am very excited to say THANK YOU** for coming up with this wonderful recipe. I've just made it and it is WONDERFUL! Not that usual, gummy gluten free bread that ends up in the trash. We both love it. HE even said it looks, smells and TASTES like his mom's used to. (she used to make regular bread and sell it). There's a testimony for you!! I can't wait to try the rye swirl...next!!!
Kim says
Awe, yay!!!! So glad you both loved it!!
Carla says
I have been trying gf bread recipes for 14 years and all of them have been disappointing, except this one. This came out light and squishy and tastes so good! Wow! Thank you so much! I feel like I have bread back. And it was so easy! I can't wait to try more of your recipes
Kim says
So glad you liked it!
Sharron Schwartz says
I have. baked recipe twice using scales and checking temp of oven, purchased pullman pans and both times it sinks in the middle. It registers internal temp as recipe states, looks beautiful but as it cools it sinks in top and on middle of sides. I have used other recipes of yours that have been wonderful. But this one failed twice. Any ideas?
Kim says
It sounds like it was overproofed. That will often happen when a bread dough is overproofed (sinking). Try proofing it for less time.
Ian says
Hey there, iโm wondering if you might have insight into why my dough didnโt rise at all. I am vegan and gf, so the substitutions I made are: Target 1:1 gf flour, almond/coconut milk blend,
imperial butter sticks. I also used quick rise/instant yeast. I have the dough covered with a tea towel in a room thatโs heated to 75ยฐ and waited 2 hours before I peeked at it, desperately hoping it would rise. Iโm assuming if it didnโt rise, it wonโt cook properly - is there anything I can do to salvage it at this point? Iโm going to try to bake it regardless, but wondering if I should let this unrisen dough sit overnight and if that might help or hurt my present situation. Thanks in advance!
Kim says
It's the flour blend for sure. Gluten free breads require a strong flour blend and the only one I've found to work is my own recipe, which is offered for you to make and can be modified to be vegan (I've done it several times myself as my daughter is vegan). If you don't want to make and use my flour blend, two that might work (I haven't tried them) are King Arthur's new bread flour blend or Caputo flour blend.
Peter says
Hi Kim,
Fantastic. Since we worked out my partner is gluten intolerant Iโve tried various recipes. So many of them ask for ingredients that a difficult to get (e.g. potato starch) in a regional town in Australia. The artisan style were working OK, but dense and quite strongly flavoured.
This one is amazing. Simple and easy to make. Keeps well. I made it with a commercial GF Plain flour mix from the the supermarket (White Wings) โ worked fine.
Thanks,
Peter
Dave says
Hi Kim!
As always your recipes are hands down the best! Iโve been making this loaf the past few months and my daughter loves it.
Do you have any idea why the top of the loaf sags down? Kind of caves in? It rises nicely, sits at the top or above the loaf pan pre-bake, but when it comes out and cools it droops and isnโt a full loaf (kind of like the Aldis brand).
(I also cover it after the first 15 minutes at 450โฆto prevent too dark a crust).
Any help is appreciated! Thanks again!
Kim says
Thank you so much, Dave!
First thing to ask, are you using my bread flour blend, and are you substituting anything within it? Superfine or ultrafine white rice flour is very important to the success.
My first inclination is to think that the dough was overproofed, but it could also be underproofed. Unfortunately, sinking can be a characteristic of both of those.
Dave C says
Yep, your flour to a T. Iโve learned that GF flours are overall brutal but yours is spot on so donโt want to mess it up.
Only thing is I didnโt put the husks in the dough because they were made in a factory that processes wheat and didnโt want to to take a chance with my little one. Iโll play around with the proofing, again outstanding bread!
Kim says
I Kim
I have been making this bread about every two weeks since coming across your web site back in Nov 2024 with great results, thank you for all the hard work and research, just wonder if you have the nutrition facts on this.:)
Kim says
So happy to hear! Thank you so much!!
Unfortunately I do not. The nutritional facts is another package added on to my recipe card that costs a lot more and I cannot justify purchasing it at this time. I hope to in the future.
Michele Reynolds says
I too would be interested in the nutrition facts. At least the carbs because my son has celiac disease and type 1 diabetes. I made this bread for the first time today and my son is so excited to finally have a good pb & jelly sandwich in his lunchbox tomorrow that isn't from a tiny loaf! ๐ Thank you for your wonderful recipes!
Sue says
My loaf collapsed during the initial 15 minutes at 450F.
Any thoughts
Kim says
My guess is it was over proofed.
Shelly Kahle says
Thank you so much for all your efforts perfecting these recipes. This bread is so amazing! My non gluten free family thought it was amazing. Just like real bread. I quit trying to make bread after a lot of failures and bought some from a local bakery but the raised the price to $15 a loaf and that is crazy so I thought I would try again. I looked for recipes for a while before deciding to try this one. It's so easy and perfect. I have my second loaf rising now. I am going to try your pasta recipe tonight too. I hope it is as good as this. After being gluten free for 12 years, finally. I was so excited when I tasted it I did a little happy dance! Thanks again
Shelly
Kim says
Awe, yay!!! I'm thrilled you're enjoying it! The pasta is out of this world good, even my husband (who isn't gluten free) prefers it to his own gluten pasta ๐ฅฐ๐ฅฐ๐ฅฐ
Mandy says
We love this recipe! Thank for giving my family good bread again! โค๏ธ
Kim says
Awe, yay! It is my pleasure ๐ฅฐ
Raluca says
Hi Kim, I would like to know if it is possible to do it with a store bought Gf flour blend as well?
Kim says
You will not get the same results.
Bill says
I still haven't got this to come out quite right yet because I'm in Denver but it's still some of the best bread I have ever had!... You gave me back good bread!! ๐ฅบThank you so much !
Kim says
Wonderful! So glad you like it ๐ฅฐ
Amanda says
My husband made this tonight. It tastes amazing but didnโt turn out well. Iโm suspecting the dark pans cooked the outside to fast. Please help! We love your sight for our 5year old celiac boy! Thank you!!! I have pictures too.
Kim says
If you're using dark pans, I would try a lighter pan. You can also try shielding the loaf with tin foil while it bakes. Another option is to reduce the heat even further. I would stick with the initial 450 F for 15 minutes, but then after 15 minutes reduce the heat to 325 and bake longer. Was the dark exterior the only problem?
Matt R says
SOOOO DELICIOUS. Got all the ingredients, made the gf flour blend, followed the recipe step by step, just ate it, SOOOO GOOD. Will not be buying bread anymore, i'm making my own! and sharing it <3 thank you for this!
Kim says
Awesome, Matt!!!!
Jessica says
I've been searching for a while for a GF bread recipe I could make in my bread machine with clean ingredients. Most gf bread recipes come out of the bread machine and are super dense (like a legit brick).
I'm happy to report I used this recipe in my bread machine today (I added in just a little more flour) and it turned out amazingly!!
The only gf bread that actually rose! It is light and fluffy and cuts perfectly!!
Thank you, thank you, thank you!
Kim says
Yay! So glad it worked in a bread machine ๐
Craig H says
Hi Kim, I came across your recipes about a year ago and have been making them with pretty good success. I made a huge batch of both of your flour blends with no substitutions, and I will say they are WAY better than any store bought gf flour blend I've tried over the last 15 years. The cinnamon roll recipe was incredible!
Recently just made this bread for the first time, and it turned out pretty good, but a little dense. Still far better than store bought! I've noticed if I just do one slow rise on most of your recipes I get much better results, with a better rise and zero gumminess. Is there a reason you incorporate a punch down and second rise? Most of the conventional wisdom I've seen for GF recipes is to not do this, since the delicate structure can be destroyed and not re-form during the second round of proofing. Have you tried a recipe side by side with and without a second proofing?
Secondly, which bread to you prefer between your two white sandwich bread recipes? This one, or the one that includes the Tangzhong?
Third, and final, any chance you have a storefront where you sell large batches of premade flour blends? Seems like it'd be a pretty popular etsy or ebay type deal! Or even just lumping your preferred and more affordable amazon affiliate items into a one-click add to cart?
Anyhoo, great recipes. They've definitely been reinvigorating my baking!
Kim says
Thanks, Craig! I've been experimenting with a single rise, but I do find that most of my breads can take a second rise (because of the flour blend with the protein in it). However, if you're finding you're getting better results with just one rise, go for it! I always encourage everyone to experiment and try what works for them. I've found that I don't always like the crumb texture when I only do one rise, and for something like this sandwich bread I was going for a tighter crumb.
I have been working on selling my flour blends for quite a while now and keep running into obstacles. I won't ever give up, though, so as soon as I figure out the best way with the least amount of hassle, I'll be sure to share it with everyone! Fingers crossed it'll be sooner than later ๐
Shelley says
Wow! This recipe is amazing! The hardest part was waiting for it to cool down completely so I could cut into it and eat it. It was so nice to eat a GF loaf of bread that felt like I was eating regular sandwich bread.
Kim says
Awe, yay!!!! So glad you liked it!
Aslan Balaur says
OMFG!! Just had some of this bread fresh from the oven. WOW! I am not celiac, but my wife is. We can share this bread happily! It hits that crusty outside, tender inside spot perfectly! And it tastes like bread! Not "bread substitute." I am never buying another loaf of Udi's or Schaar's.
I have been searching for a recipe that makes a bread I am happy with, and I see grilled cheese, French toast, French dips, hoagies in my future again!
My wife says that, hands down THIS is the best bread she's tasted since she was diagnosed celiac 15 years ago. She even says it beats some of the regular gluten breads she's had.
The tender "flesh" of this bread does not crumble like so many store bot GF breads do, nor have big holes like most do. One you get through that crusty exterior that I love so much, it is a smooth slicing joy to work with.
I have been a home baker for 53 years, starting when I was 7. I could bake masterful, but not gluten free treats and staples almost blindfolded. When my wife was diagnosed, it threw all I knew into the waste basket. I've had to start from scratch. Between your bread flour recipe, and this bread recipe, I have FINALLY gotten my bread groove back. THANK YOU!
Kim says
Awe, YAY!!!!!!!!! I LOVE, LOVE, LOVE stories like yours ๐๐๐๐๐
Kim W says
Love, love, love this bread!! It turns out better every time I make it! I like this better than your Best Ever GF White Bread recipe. My non GF kiddo LOVE this bread! But my GF kiddo is over the moon excited for it. He has 'his kind' of bread that is sandwich sized. I've tried recipes from so many others. Yours hands down is THE BEST! Thank you!
Kim says
Awe, thank you so much, Kim! I'm so glad you and your kids are enjoying it ๐
Shelly says
Just wondering if the milk needs to warmed up for the yeast to rise? Looking forward to making this. I bought all the ingredients and the Pullman loaf pan! Thank you!
Kim says
You can warm it to between 100-110 F, but it's not absolutely necessary.
Jenifer Crader says
Can you tell me if I can use Fleischmann rapid rise yeast for this recipe?
Kim W says
I've used it successfully
Kim says
Yes!
Dave says
Recently had my 5 year old diagnosed with Celiacs and food has been BRUTAL. Your recipes have been a HUGE lifesaver!
my question with this one, I was unable to get the dough to rise. Maybe a stupid question, but should I be warming the milk to activate the yeast?
Thank you again!
Kim says
Hi, Dave. I can only imagine how hard it must be with a young child with celiac.
It isn't a must to warm the milk, but since you are having problems with it rising it definitely wouldn't hurt. The yeast is instant, so there is no need to activate it in the liquid (instant can just be added with the dry ingredients). In the colder months, it can take much, much longer for bread to rise, so don't be surprised if it takes hours. I wish you great success!
O'ree says
I made this bread for the first time a few weeks ago and it turned out fabulous. Unfortunately, subsequent attempts have rendered gummy center with a large hole between the main crumb and the crust. In reviewing the steps, I made sure to follow the recipe to the letter. The only difference I can think of is that I tried doubling the recipe instead of doing individual batches.
I am going to try again, but this time, I will do a pre-sifting of the dry ingredients and then add them to the wet ingredients slowly so as to fully incorporate everything.
While I'm disappointed by the past couple of bakes, I know it's possible to make this loaf and have it look like the one in the video.
Thanks for sharing.
O'ree says
Update:
So I know some folks have had this recipe not turn out (possibly gummy, or just overall not look/feel like it's supposed to. As I stated earlier, I was going to go back and troubleshoot what went wrong with my bake.
Two things I suspected were the culprit: doubling the recipe, and or just piling everything in at the same time and mixing.
As to the 1st possibility, I suspect that since it is possible to double regular bread recipes, this would be no different. I have not tried, as I don't want to throw good money away on excess ingredients. So I stuck with a single recipe.
That left the second possibility. So I added the wet ingredients to the bowl, but thoroughly mixed the dry ingredients separately, then added them in slowly to the already mixing stand mixer. I made sure to stop and scrape down the sides periodically. Finally, I made sure to adhere to the mixing time and speed.
I am happy to report that following these steps, along with extending the bake time by 10 minutes as well as checking the I ternate temp, I was successful in getting the bread to come out perfectly.
Shannon Stover says
Hi Kim. I love this recipe, thank you for sharing it. I have had a bit of trouble with the psyllium husk powder clumping putting it in after the butter. I have missed some clumps in the past only to find them in a slice. Would it be okay to add it before the butter, or would that cause a problem?
Kim says
You can add the ingredients any way you'd like! Whatever is easiest for YOU ๐
Katie Bonczek says
I tried this bread as my first time ever making gluten-free bread and Iโm very impressed! It does seem a little โwetโ but still taste amazing and very versatile. I have a friend that wants to try some, but canโt have corn. Is there a substitute for the xanthan gum?
Kim says
You may need to bake it longer if it still seems wet. I'd add another 10 minutes or so onto the bake time next time you make it.
You can try guar gum or chia seeds mixed with water for the xanthan gum substitute.
C says
I've so much wanted to try your bread recipes and more for that you use a stand mixer. Sadly, we don't have one ๐ I'm unsure a hand mixer will do that kneading volume-wise. Is there another mixing method aside from a stand?
Kim says
For this recipe, the dough should be able to be mixed with a hand mixer or a Danish dough whisk (see the video). It's not an overly thick dough as it's more like a batter.
Karinna says
Kim, you nailed it!!! I cried when I tested this bread! It was soooo good! My gluten eating 24yr old told me it was the best bread they've EVER had, including gluten bread!!! ๐ฒ
My youngest just had the very first true PB and Jelly sandwich they've had since going gluten free 9 years ago! We've been dancing with joy to now have bread we love again! Thank you, thank you, thank you!
Btw, we also have pizza night once a month thanks to your pan pizza recipe, and we have eggs Benedict with your english muffins.
Thank you for making food joyful again!! Much love from my family!
Kim says
Awe, that is so awesome, Karinna!!! I'm thrilled that you are baking your way through my website and enjoying food again ๐ ๐ ๐
Helen Harris says
Hi Kim - Iโve made a lot of your breads with great success, but I had trouble with this one. It didnโt rise very much and I gave it a lot of extra time. I decided to bake it after about 2 1/2 hours and it rose in the even, but as it was cooling the sides collapsed in. I havenโt sliced or tasted it yet, but wondering what might have gone wrong. Itโs possible I may have forgotten to add the sugar. Would that cause it to collapse? Itโs so sad looking!
Kim says
Oh no! If you forgot the sugar, that could make a difference, especially with the rising. I never go by the actual time and concentrate more on how things look. If it takes longer than 3-4 hours, then it takes longer. As far as collapsing, it's usually because it wasn't baked long enough. Add 10 minutes to the bake time next time. Hope this helps!!
Dr Abhi says
First rise was great. Second did not quite happen. Waited several hours for it. Then tried dough whisking it again thinking that I did not whisk it vigorously enough may be. No luck and now because it was1 am, kept it in the refrigerator to use it and see what happens in the morning. Quite disappointed!!!
Leslie says
I've made this bread a few times, using substitutions of several kinds, and despite some setbacks, a number of factors that cause your bread not to rise. Did you use any substitutions or tweak anything?
Kim says
I'm so sorry you're having problems with the recipe. Were you able to get it to rise properly?
January M says
Do you have any experience with Sheep herders bread aka Basques bread? Thank you for all your fabulous recipes and the advice you give. You're amazing.
Kim says
Awe, you're so sweet! Thank you so much ๐ฅฐ I've never heard of this bread you're talking about. Do you have a recipe for it?
Jo says
So exciting to see GF Sandwich bread looking so close to the usual Sandwich bread!!!!! I'm going to try for sure, but I don't have oven. I will try with bread machine instead.
1. Can I use Avocado to replace butter? Would you recommend a 1 to 1 replacement in grams to butter?
2. Out of curiosity, in your video, did you cover the base of the 2nd loaf pan with aluminum foil?
You seriously caught my attention to your blog now! You are amazing!
Thank you so much for sharing!
God bless you!
Kim says
Awe, thank you so much! I think a 1 to 1 replacement for avocado oil would be just fine. It's not enough butter to make a huge difference in the texture and it actually might make it a little softer. The only reason I covered the base of the 2nd is because there are tiny little holes in the bottom of those pans I have (to allow for ventilation).
Kate says
Hi Kim!
I just baked a loaf of this bread and it didn't turn out quite right. It proofed beautifully on rise #1 but after moving it to the baking pan it it only rose even with the top of the pan and after 2 hours of it refusing to raise higher, I went ahead and baked. It didn't rise on the initial 450 bake either. I do have to use pea protein instead of the whey isolate- do you think that could possibly be the reason it didn't rise as expected? I followed the recipe and measurements exactly as written and that was the only thing that was different that I could think of. I appreciate your insight!
Kim says
Oh, no Kate! I'm so sorry it didn't rise! There are a few reasons this could happen, but I don't think it was the pea protein. Many people have had success swapping out the whey protein with pea.
I'll ask the usual questions I ask. Did you use superfine or ultrafine white rice flour in the flour blend? Could it have risen higher and collapsed before baking without you knowing it? It could have overproofed or underproofed, but without being there I don't know which. Both of those can halt oven spring (when it rises initially in the oven).
Nancy Hawley says
Iโm trying to figure out the cost of a loaf of your sandwich bread. Got it all figured out but wonder what a loaf weighs. It would cost be about 56 cents an once
Kim says
Oh, gosh, I wish I knew what one of the loaves weighed. I never though to weigh it, but next time I make one I will do just that.
Kimberly C says
THE ONLY white GF bread recipe I will use going forward. No more store bought GF bread purchases - none compare AT ALL to this amazing recipe, for both the bread flour blend AND this recipe. Made sandwiches complete with sliced tomato that packed up, stored in a cooler, and eaten several hours later WITHOUT falling apart. No need to toast the bread to fortify it for picnic lunch as with most GF breads.
If you don't have 2 pullman loaf pans the same size, just do what I do: before putting the dough to rise in the loaf pan, use it to make a tinfoil mold and use that to top your loaf as it bakes those first 15m.
THANK YOU KIM!!! Trying the pita recipe tonight. SO excited!
Kim says
That is a great tip!!! And so glad you're loving the bread ๐
Golda de Groot says
Your recipe has 540 grams whole milk or dairy free milk. Do you actually weigh the milk on a scale?
Kim says
Yep! I weigh everything on a scale.
Elyse says
I finally got around to making the gf flour blend and the immediately made this loaf of bread. It's amazing! The perfect white sandwich bread. I was blown away by how well the trick of baking it with an overturned loaf pan on top worked for making it rise. Mine collapsed a bit as it cooled, I think next time I will try baking it for 5 mins longer. Very excited to get more recipes on your site, no more $9 for a tiny brick loaf at the store ๐
Kim says
Awesome! I would definitely recommend baking it a little longer for no collapse issues in the future ๐
Gail Albrecht says
Is this sandwich bread recipe appropriate or adaptable to a bread machine with a GF setting?
Kim says
I wish I knew, but I'm sorry. I don't own a bread machine so I can't tell you if it will work or not.
Debi says
Hi, love your siteโฆwas just wondering what kind of whey protein isolate you use
Kim says
Hi, Debi, and thanks so much! I use the Now Foods brand. It's linked in the recipe for the bread flour blend ๐
Ruth Lundrigan says
Hi Kim..I have difficulty purchasing all the ingredients fir your flour blend. I have purchased gluten free flour with all the listed ingredients in your recipe, except for whey protein isolate, so I purchased this whey powder and measured out 75gms and then mixed in my gluten free flour to weight of 700gms. Will this work for me?
Kim says
I really don't know to be honest. Without knowing the amounts, I can't be sure. The only way to know is to try it.
Dawn C says
OMGOSH, just made this bread and let me just say....DELICIOUS!!!!
This is definitely a bread that I will only be making.
Kim, your instructions were right on point, and my husband and I followed them very cautiously and meticulously...Thank you ๐
I already can't wait to try your other recipes ๐
Kim says
Awe, thank you so much Dawn! So glad you liked it ๐ฅฐ
Kee says
Just want to thank Kim for this wonderful recipe. I used Panasonic bread maker (gluten free bread mode) and followed the recipe - yes, the 540g of milk seemed a lot to me in the beginning but the dough was much less runny than other recipes with less liquid. Truly amazed by it. It smelled good and looked and tasted very much like normal bread. My dad told me to make it as the household regular bread from now on. Thanks Kim. And for those who still have doubts, please just go ahead and try it ๐
Kim says
Awe, that's awesome to hear!!!!
Audrey says
Wishing the recipe was also listing ingredients by tsp, tbls, cup etc. for those of us that don't measure by grams๐
Kim says
If you're using my flour blend (which you should be if you're making any of my breads), then you MUST measure by grams so there is no reason why you can't measure this using grams. Please read through the post and you'll see why I use grams for all of my bread recipes. It really is essential.
Sara J. Dupont says
Is there a way to use a bread machine for this recipe?
Kim says
I haven't tried it (I don't own a bread machine) but I bet it would work just fine. I'm not sure of how they work, but if you try it, I'd love to hear how it does.
Tory says
Finally an actual sandwich bread that isnโt flat or too crumbly to use! Different types of bread have been easy to make GF but this was the first sandwich bread recipe that was a success! I just hate spending $8 for a bad loaf of GF bread at the store.
Neal Kofahl says
Your blog is one of a kind, i love the way you organize the topics**-~
Jon P. says
My celiac wife LOVES this, as does everyone else whoโs tried it! Any idea why as my bread cools is falls in on itself? Still tastes amazing just doesnโt look as good as yours does.
Thanks for everything you put out!
Lauren says
Could I knead this by hand if I dont have a stand mixer/dough hook?
Kim says
It definitely doesn't lend itself to kneading by hand, but if you have a Danish dough whisk or even just a wooden spoon, you should be able to get by without a stand mixer with some elbow grease ๐
Dona McKinley says
Hi Kim - Iโve been (successfully) making your best ever sourdough bread for a while now, and without fail every time the bread is sensational! The best ever. However I am looking for a sandwich loaf for, well sandwiches ๐, the crusty bread is just a bit too chewy.
My question is can I make your sandwich bread using sourdough starter? Iโd prefer not to use store bought yeast for health reasons. TIA Dona
Kim says
Yes, I'm sure you could, but I haven't figured out all the details of that yet. You can check out this post if you want to attempt it yourself: https://homemadeonourhomestead.com/how-to-easily-convert-any-recipe-to-sourdough/
Tracy says
Can you use regular live yeast? I donโt have instant
Kim says
If by live you mean active, then yes you can. You'll need to activate it first in some of the liquid from the recipe.
Joan says
Hi Kim. I have been watching you and had subscribed you on YouTube a long time ago and subscribed on your website (with a different email), but this is the first time I have written you. That's because I had SUCH a block with gluten free baking!! I've been a very good baker for a long time and then came along gluten, corn and nightshade allergies (UGH!!). I waited until my 60's to develop these so you know how many years I had been baking up a storm and everybody raving about what I made (then it was me raving about that awful tasting STUFF I was making). Because of the potato starch in your blends I put them aside and just kept watching you and drooling all down my screen! Over the years (it's been 11 years) I've learned a lot about different gluten free flours and starches and reading and watching. Most of the breads I made were disappointing and the rest were HO HUM!
Then you came out with your "Sandwich Loaf in 4 Hours" and I knew I had to try it. I traded the amount of potato starch with tapioca and arrowroot for the amount of tapioca to make Kim's Bread Flour Mix, and I added 10 more grams of the flour mix to the mixing bowl. OH MY WORD!!! Thank you, thank you, thank you!! I know all the work you put into this because I know the work I've put into making a loaf for just me, and I wasn't doing it over and over again. I'm so grateful to you.
I got the wrong size pan out to make the bread, but except for the bread being shorter, it worked just fine! There was just a little bit of dip on top of the bread but next time I'll be sure to get out the right size pan (LOL) and I'll add 10 more grams of flour mix. The flavor and texture are so WONDERFUL. I'm also going to try the idea of putting it in the refrigerator overnight (thank you so much for that hint in your video). I love all the hints and tips you have in your videos. I get my printed recipe and watch the video so I can jot down all of those tips. I'll have to eat this loaf first but I'm actually looking forward to making my next loaf!!! Blessings to you and your family - Joan
Kim says
Joan,
Thank you SO MUCH for your kind words! It is such a pleasure to hear such wonderful success stories like yours, and I truly appreciate you sharing it with me ๐ฅฐ๐ฅฐ๐ฅฐ
HJ says
In regards to my last comment about the free sandwich recipe,
it was easy and the bake looked good "but" after allowing it to cool and slicing it, it was very dense, and had a slight purple
tint to it. Would rate the taste a 8 but over all because of the dense character a 6.
Several pre-mix flours might be a 6 in flavor but they are a 9-10 in texture and less ingredients and no wait time to rise..
Good Luck Kim maybe you will get it right in future and I'm always willing to try again.
Kim says
I'm sorry you're having such issues with my breads. I feel when you say "maybe you'll get it right in the future" you think that this bread doesn't actually work like it shows in the video and my pictures, but I assure you that the recipe works if done properly, but sometimes with bread it's such a hard thing to master for some. My mom cannot bake a loaf of bread to save her life that is anything but dense and hard as a rock, but I can take the very same recipe she used and my bread will come out light as a cloud and soft. It's nothing against the recipe, but quite often it's using intuition to figure out when the bread has risen enough to bake, but not risen TOO much to where it will fall when it is baked. With practice, anyone can bake great bread, gluten free or not. I hope you give it another chance and maybe this time use milk and not half and half, and please make sure to use the EXACT amounts and try not to substitute anything within the flour blend. Read through the comments on this recipe because so many people already are having such wonderful success with this bread. You can do it, too!
HJ says
Kim,
In all fairness I just tried your recipe for free sandwich bread recipe and twice as easy as the Best ever recipe.
I just took it our of the oven and it looks outstanding.
I will report back about how the inside looks and most importantly Taste. I am hoping this is the one as the recipe is by far the easiest one I have done out of the last 15 I've tried. Not to mention cost effective.
Dc says
I just turned gFree, tried Aldi's gf bread, and lost hope that gFree was even comparable. This gf bread recipe is some of the best bread I've ever tasted at all gf or not, and gives me assurance that gf life will not only be healthier but just as good if not better! Also the first bread I've ever made, and feels like a home run milestone achievement ! Thank you!
Kim says
Awe, that is awesome!!!!! I'm so glad you liked it so much!
Morgan says
I made this in my breadmaker and it came out moist, but dense. My girls loved it! I was wondering if you had any tips on using this recipe in a breadmaker to get it to turn out more like your pictures.
Ben says
Yes, I'm very interested in a bread machine adaptation, too. We have a Zojirushi.
Kim says
Unfortunately I don't own a breadmaker so I'm at a loss for what to tell you. I don't have enough room to store a breadmaker at this time.
Janice says
Hi Kim My son loved the taste of this new bread but all the sides collapsed a bit while cooling. We're not at sea level, so I'll bake a bit longer next time and cover top with foil. It seems a bit wet so will also try with less milk and see how that goes. Taste is really good, thank you, so I'm happy to keep adapting. Thank you Kim for all your work and great recipes, from Alberta, Canada. Stew with soft bread, he was in heaven!
Kim says
Hi, Janice! I had the same problem, too, when first testing this recipe so I simply baked it a little bit longer. Hope this helps!!
Deb Wolf says
Ok, so after 5 minutes of beating it looks like cake batter. Going to keep mixing until it looks a little more like GF dough (thick frosting).
Deb Wolf says
I followed the recipe exactly, weighing each ingredient. The โdoughโ is thinner than pancake batter. Is 540 grams of milk correct? Thatโs more than the flour weighs. How can I rescue this? What are the correct weights for next time.
Bonnie says
Beautiful bread!!! This is another winner!
marina says
Looked amazing until removing the cover pan. It then completely collapsed and the top burned. I'll be giving this another try with no cover pan.
Kim says
Hmmm, that's weird. I tested this recipe at least SIX times and never had what you're describing happen. Did you possibly bump the dough with the pan when you were removing it? That's the only thing I can think of that would cause it to collapse.
Shannon says
Hi Kim This recipe is fantastic. I made one mistake, I didn't allow my milk warm to room temperature before adding the melted butter and yeast. As soon as I noticed the butter had solidified again I put it over the stove to warm it back up. It was taking too long so I put it in the microwave for about a minute. The bread came out pretty good, except I didn't achieve as much of a rise as you. I thing the microwave may have damaged some of the yeast. But it did rise to the top of the pan and I was happy. Now I'm excited to make more because it was moist and delicious. Next time I will know to take the milk out in advance.
Mike P says
Kim, of all the countless GF bread recipes I have attempted over the past 6 months, THIS ONE, HANDS DOWN, has made the best loaf of bread! And on my first try! Thank you for perfecting and sharing it. I canโt wait to try the others. Thanks a million!
Kim says
Awesome, Mike!!!! I'm so glad you liked it! Thank you for your wonderful comment ๐ฅฐ๐ฅฐ๐ฅฐ
Sam says
Have you tried this with pea protein instead of whey?
Kim says
Yes, read through the blog post. I talk about this in the ingredients list ๐
Jill Smith says
Thank You for sharing
Marcy says
Do you think this would work with the pullman lidโ sliding it into the groove of the pan to create a square loaf, or would there be too much dough for that to work?
Garry says
I made a batch and a half and baked in an old bakery Pullman loaf pan with lid. Came out beautifully. Very happy!