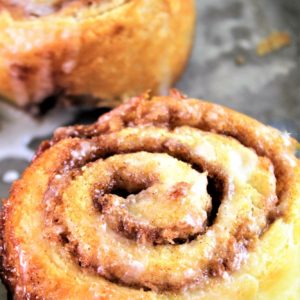
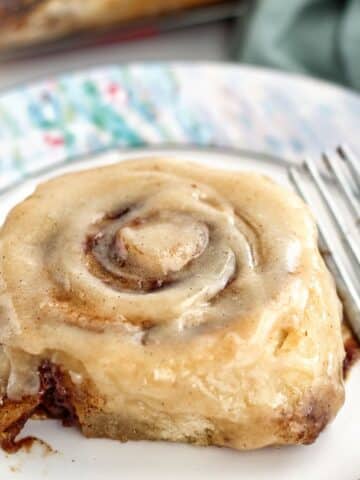
Don't have any yeast and stuck at home? You can still make these flaky and soft gluten free yeast free cinnamon rolls and you'll love them!!

I've been thinking about making these for so long. When I finally did, I could have kicked myself for not making them sooner! They're flaky and soft just like a biscuit.
Nothing beats a real gooey and soft cinnamon roll and my ultimate gluten free cinnamon rolls are just the recipe you MUST try if you haven't yet. It's one of my top recipes of all time for a reason. The cinnamon rolls are just as good, or better as my son and husband claim, as a Cinnabon gluten-filled roll. Btw, neither of them have to eat gluten free.
But what if we don't have all the ingredients for those and we're stuck at home with no way of getting them? Or what if we just want something that's like a cinnamon roll without all the waiting that's required for those??
Then this is the recipe we need. It's so easy to make these rolls you may just find yourself making them all the time. And that's not a bad thing. That's a good thing!!

The Dough for Gluten Free Yeast Free Cinnamon Rolls
Believe it or not, the dough for these rolls is just my simple gluten free buttermilk biscuit dough. It's made up of the usual suspects for biscuits, plus a few more:
- Kim's gluten free flour blend -- you can use another blend if you'd like. Just make sure it has xanthan gum in the mix.
- Baking powder -- the amount of baking powder seems like a lot, but it works (trust me).
- Baking soda
- Salt
- Butter -- this dough is loaded with butter, which makes the rolls nice and flaky. Shortening or butter-flavored non-dairy (vegan) butter can be substituted.
- Eggs -- nontraditional for a biscuit dough, but we need help sometimes when it comes to gluten free baking and the eggs really work to bind everything together. If you can't have eggs, or can't find eggs right now, you can try an egg replacer such as a flax egg or something I just read in this article, the baking powder/water egg replacer OR carbonated water!
- Buttermilk -- if you don't have buttermilk, you can make your own by adding about 1 tablespoon of lemon juice or white vinegar into milk and letting it sit for 10 minutes. You can also try almond milk, coconut milk, or any other non-dairy milk alternative.
Mix the dry ingredients in a large bowl. Add the butter chunks and squish (technical term, ha!) them between your thumb and forefingers, distributing them throughout the flour mixture. Continue mixing the butter through the flour mixture until large pieces the size of marbles still remain.
Whisk the eggs into the buttermilk and then dump the entire amount into the flour mixture. Use a spoon to carefully combine everything together. It will be a fairly wet mixture. That's what you want.
Cover the bowl with plastic wrap and let it rest in the refrigerator for at least 30 minutes, or up to a couple of days.
Making the Filling
The filling for these cinnamon rolls is so easy, as it is for most other cinnamon rolls. Simply mix the brown sugar and the cinnamon together until fully combined. The butter will be used separate in the next few steps.
Rolling Out the Dough
Remove the dough from the fridge and dump it out onto a well-floured surface. Knead it briefly just to bring it together and then roll it out to about ½-inch thick. It doesn't need to be perfect.
Fold the dough over like you're folding a letter. Again, this part isn't about perfection. It's just about getting those layers, as if you're making a laminated dough.
Now get serious and roll that thing out to a very large rectangle, about 20 inches wide by 18 inches long. It doesn't need to be exact. It should be about ¼-1/8 inch thick. The dough is very forgiving, but keep moving it around and sprinkling flour on the underside as needed.
Filling the Dough and Rolling it Up
There's finally a use for that melted butter in the filling! Brush it all over the dough until it's all gone. Then sprinkle your filling completely over the dough, pressing down lightly with your hands to adhere it to the butter.
Start rolling the dough up as tightly as possible along the wider side. Continue rolling all the way to the end and pinch the ends to seal. Cut the roll into 12 equal-sized pieces. I like to first cut the dough in half (using my handy dandy bench scraper). Then cut each half in half again, making 4 small rolls.
Take the bench scraper and mark each of the 4 pieces into thirds and then cut completely through to end up with 12 individual rolls. Place each roll in greased muffin pans (I used jumbo muffin pans like these, but you can also use regular muffin pans).
Place the muffin pans on a larger sheet pan to catch any drippings that may bubble out from the filling. Bake the rolls for about 25 minutes or until fully risen and golden. Remove them from the oven and allow them to cool for about 5-10 minutes before carefully removing them from each muffin well. Frost as desired, or dip the tips of each roll in granulated sugar.

Remember this recipe when you want a quick fix for a cinnamon roll or have no yeast (or just don't feel like dealing with yeast). It's the perfect yeast-free cinnamon roll for times like these 🙂

Gluten Free Yeast Free Cinnamon Rolls
Ingredients
DOUGH
- 4 cups (560 g) Kim's gluten free flour blend (a store bought blend may be substituted, but hasn't been tested)
- ¼ cup (45 g) baking powder
- 1 teaspoon salt
- 1 teaspoon baking soda
- 3 sticks (¾ pound or 339 g) butter, cold and cut into ¼-inch thick slices
- 2 large eggs, cold
- 1¾ cups buttermilk, cold
FILLING
- ⅓ cup (75 g) butter, melted
- 1 cup plus 2 tablespoon (250 g) packed light brown sugar
- 1 tablespoon ground cinnamon
FROSTING (IF DESIRED)
- 4 ounces (113 g) cream cheese, softened
- 4 tbsp (½ a stick or 57 g) butter, softened
- 2 cups (250 g) powdered sugar
- 1 teaspoon vanilla extract or vanilla bean paste
SUGAR DIP (IF DESIRED)
- ½ cup (100 g) granulated sugar
Instructions
- Preheat oven to 350° F. Spray muffin tins with nonstick baking spray and set aside.
- In a large bowl, measure flour. Add baking powder, baking soda, and salt and mix well. Add butter pieces and, with fingers, press and smoosh butter into flour mixture until butter pieces are about the size of large marbles.
- Combine eggs and buttermilk in a separate bowl and whisk to mix well. Add all of this mixture into the flour mixture and stir until all of the flour mixture has been incorporated and dough comes together.
- Press on top of the dough with your palms and cover the bowl with plastic wrap. Refrigerate it for at least 30 minutes, or up to a couple of days.
- Make the filling by mixing the brown sugar and cinnamon in a medium bowl with a whisk. Set this aside.
- Dump dough out onto a well-floured surface and knead very briefly until dough comes together. Roll out to about a ½-inch thick rectangle and fold top ⅓ of dough over onto itself, and bottom ⅓ over onto the top ⅓, just like folding a business letter. This will allow for layers in the dough.
- Now roll the dough out into a large rectangle that's about 20 inches wide by 18 inches long, ¼-⅛ inch thick.
- Brush melted butter all over dough to completely cover edge to edge. Sprinkle filling all over dough and use hands to press it lightly into butter to adhere.
- Roll up dough, beginning on the long (wide) edge. Pinch the seam to seal at the end of rolling and cut the dough in half using a sharp knife or bench scraper. Cut each half in half again to make 4 large pieces. Taking your knife or bench scraper, mark 2 markings in each piece to cut 3 equal-sized pieces.
- Place each roll into prepared muffin pans. Place the muffin pans on a larger baking sheet (or place a very large piece of tin foil on rack in the oven) to catch any filling from bubbling over.
- Bake rolls for about 25 minutes, or until well risen and nicely browned.
- To make frosting, combine all frosting ingredients in a large bowl until well incorporated and smooth.
- Remove from the oven and allow to cool in the muffin tins for about 5-10 minutes before removing from the muffin wells. Frost as desired, or tip over and dip edges into a bowl of granulated sugar. These rolls are best served warm from the oven, but can be reheated in a low temperature oven (300° F) for about 10 minutes. They can be frozen without frosting for about 2 months, well wrapped. Defrost and then reheat as desired and frost as desired.
Inspired by Violet Bakery's Cinnamon Buns


Xenia Borodina
Hi Kim, I'm really like this recipe. I have a question. Can I make cinnamon rolls without yeast and use Sourdough starter? Thank you in advance!
Kim
Yes, you should be able. I've never tried it, but check my sourdough bread recipe for instructions on how to change yeast recipes into sourdough ones.
Xenia Borodina
Hi Kim,
Nancy Carroll
Too sweet. Next time I will adjust the sugar. Kids loved it though.
Jill
Hi Kim,
Haven't made these yet but plan to make ahead.
To freeze, two questions (I'm not experienced with freezing baked goods):
1. Can you freeze uncooked but assembled rolls? Or should they be cooked?
2. When wrapping to freeze, do they get wrapped individually?
Thanks for putting this out there!
Kim
Hi, Jill! Yes, you can freeze them unbaked and what I always do when freezing rolls like this is put them right in the pan they'll be baked in (whether it's a disposable pan or not) and wrap the entire pan with two layers of plastic wrap and then a layer of tin foil.
Hope this helps 🙂
Candice
I am so excited about this new biscuit dough and the variations That it offers. I will be adding pecans to the cinnamon filling to add a little protein when I make this recipe version. I know it will be wonderful like your buttermilk biscuits recipe.
Thanks again
Raneé Jenkins
Can you reduce this recipe? Thats a lot of flour and gf flour is expensive plus it would just be me eating them.
Kim
Absolutely! Just half the ingredients and make half the rolls. You can also freeze them 🙂
IDrina Boban
These look delicious! I want to make them for Christmas morning. If I put the 12 rolls in a 9x13 inch pan (instead of a muffin tin), would I still bake them for the same amount of time? Thanks for your help!
Kim
You may need to check them at the original baking time and see if they're still doughy in the center, but I'm guessing they should be done roughly at the same 🙂
Ellie
Hi Kim, thanks for this recipe!
I had a couple of issues with it, but in general it was basically the first time I successfully made gluten free cinnamon rolls!
The two changes I'd suggest are:
- if you're not using Kim's blend, don't add all the buttermilk + egg mixture immediately, because it was definitely too much for the flour blend I used (universal schar mix + xantham gum), it looked wet and sticky and I ended up adding tons of flour to make it workable.
- don't use normal-sized muffin tins, I did and the rolls didn't have enough space, only the tops rised properly and tasted great, the part underneath remained gummy and heavy.
I'll definitely try this again!
Cheers,
Ellie
Ellie
Ah, when I said "if you’re not using Kim’s blend, don’t add all the buttermilk + egg mixture immediately" I meant not to add all the liquids at once, but gradually, especially checking the desired texture in the youtube video.
Ok, I'm done for real this time, bye!
Anne
Hi Kim,
First, thank you so much for sharing all your experience and knowledge of GF baking! It’s been fabulous to eat some good tasting and good textured bake goods that I haven’t had for decades
Q-do you prefer the cinnamon rolls with yeast or these without yeast?
Thank you again!
Anne
Kim
Hi, Anne and thank you so much for your kind words!! Of course if I have the time, yeast is always going to be my fave. BUT, these yeast free ones are a good sub when all you want is something that tastes like a cinnamon roll 🙂
Margaret Khorey
I am so anxious to try your cinnamon rolls etc. I am planning on using your blend but unfortunately, I haven’t found it yet on your site. I have purchased a scale, yeast and the necessary ingredients.
Would you be so kind as to print it out again.
Thanks,
Maggie
Kim
It's very easy to find on the site. I can't print it out because it's on a page on my site and not set up as a recipe per se. Here is the exact link to the flour blend, but for future reference, all you need to do is click on the name of my flour blend right in the recipe (it will be highlighted in pink) OR you could choose it from the drop down menu item within the main menu on my site. https://www.letthemeatgfcake.com/resources/kims-gluten-free-bread-flour-blend/
Michelle Eisenberg
I have these in the fridge and the dough seems moist. I used Trader Joes GF flour. Is the dough moist and dries out/hardens in the fridge? I so want these to work. They look delicious.
Kim
It is moist when first starting out and then becomes more solid and less sticky, but I've never used Trader Joe's flour blend before so I'm not sure how/if they will turn out.
Michelle
Thank you so much for your prompt response. I will report back to you. I was so excited to stumble across your website. you are years ahead of me.
Take care and stay safe. <3
Kim
Thank you! You too 🙂
Ashley
Can you make these not in a muffin tin? Can you put them in a 9x13 and bake
Kim
Now why didn't I think of that?!?! Of course I'm sure they would work great in a 9 by 13 inch pan! Such a great idea!!