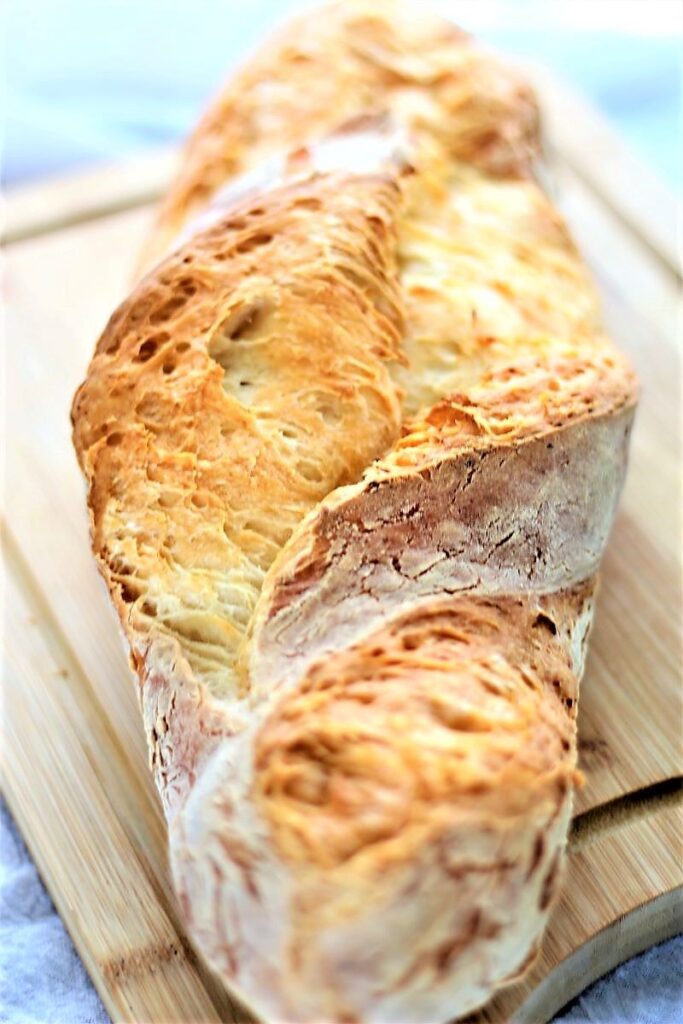
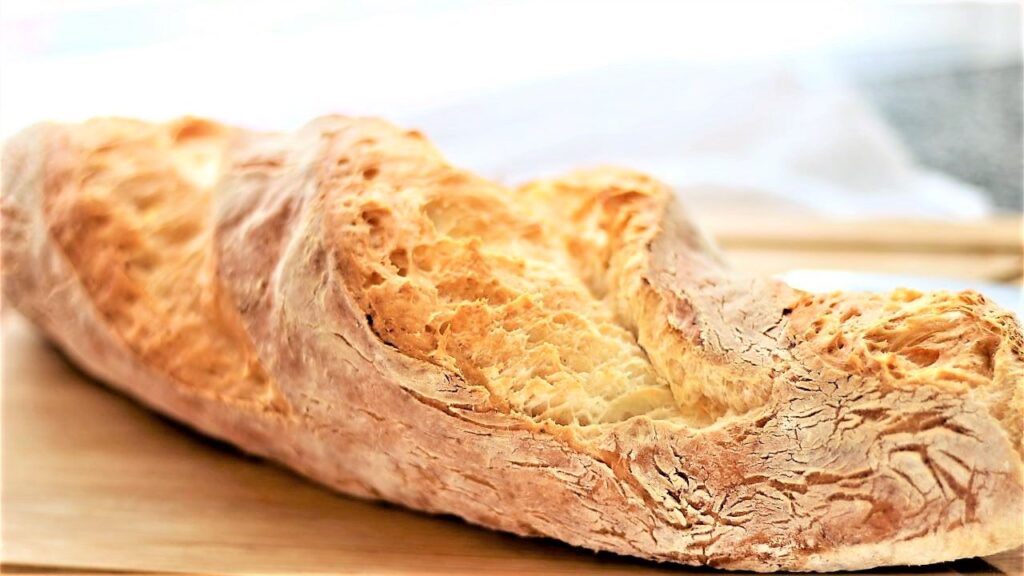
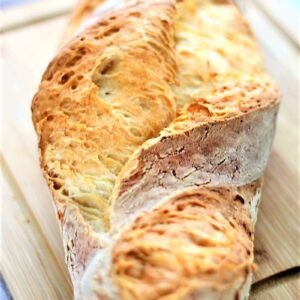
This gluten free artisan bread is the crusty bread you thought you'd never have again. One bite and you'll be in absolute HEAVEN! Better still, NO ONE will know it's gluten free!
Some of the items linked in this post are affiliate links, meaning, at no additional cost to you, if you click through and make a purchase, I will earn a small commission.
This bread started out as pizza. Well, pizza dough. When I created my gluten free pizza dough, the whole family absolutely loved it. And none of them are gluten free, which to me always says a lot. When you feed something gluten free to people that don't need to eat gf and they love it, you know you've done it. So what else could I make out of this dough?
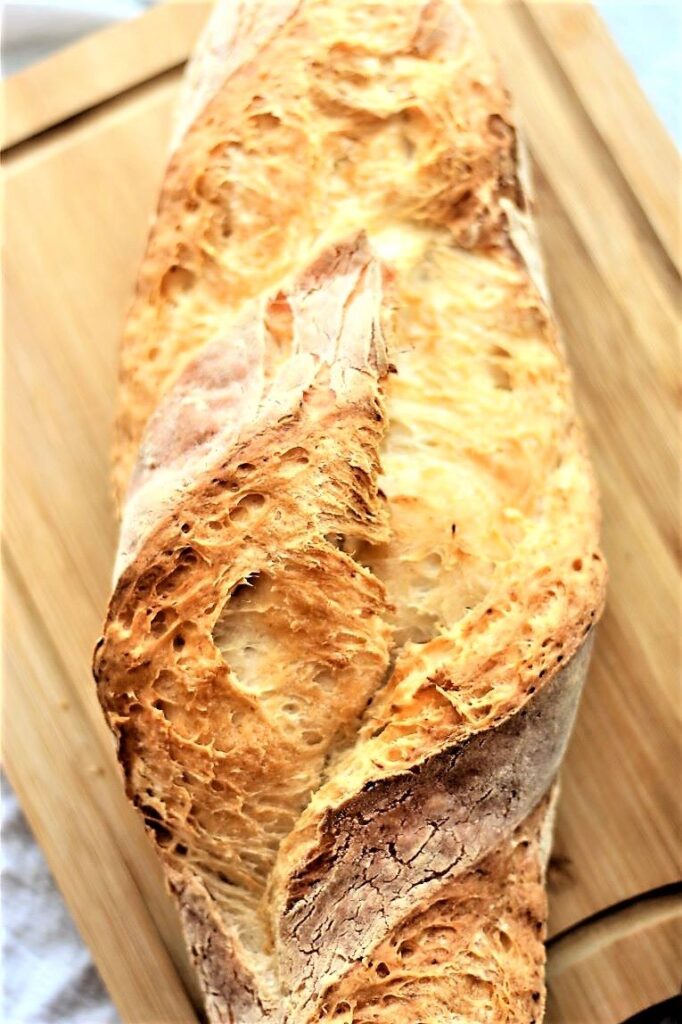
The most logical idea was artisan bread, mainly because it's made with the most basic ingredients. Flour, water, yeast, and salt (with a tiny amount of olive oil and honey) are transformed into something almost otherworldly. It's crusty on the outside with a perfect chew and an open crumb. Would it work though?
The answer is a resounding YES!!!! This artisan bread was the first gluten free bread I ever created, and it's been a staple in our home since.
HOW I CAME UP WITH GLUTEN FREE ARTISAN BREAD
I wish I could say that the whole idea behind this bread was mine and solely mine. But that would be a lie. A while ago I came across the cookbook from Jeff Hertzberg, M.D. and Zoe Francois called Gluten Free Artisan Bread in Five Minutes a Day. Their idea for artisan bread taking only five minutes a day was absolutely revolutionary!!
I decided to use my gluten free pizza crust dough in place of their recipe for gluten free bread dough. WOW!!! The bread was GLORIOUS!! And they were so right about the 5 minutes-a-day thing. It literally takes only FIVE minutes of hands-on time!!
MAKING THE DOUGH
As I stated above, the dough for this gluten free artisan bread is the very same dough for my AMAZING gluten free pizza crust. If you haven't tried that yet, you really don't know what you're missing. My whole family loves my pizzas and none of them are gluten free.
Mixing the dough is just as easy as any other dough recipe on my site. Whisk the dry ingredients together in the bowl of a stand mixer. You can use a handheld mixer, but it'll take a lot longer. You could also use a Danish dough whisk (affiliate link), but just make sure to beat it well so that everything incorporates. Add the wet ingredients and continue to mix on low until well incorporated. Increase the speed to medium high and knead for a solid 5 minutes. I always set a timer and walk away.
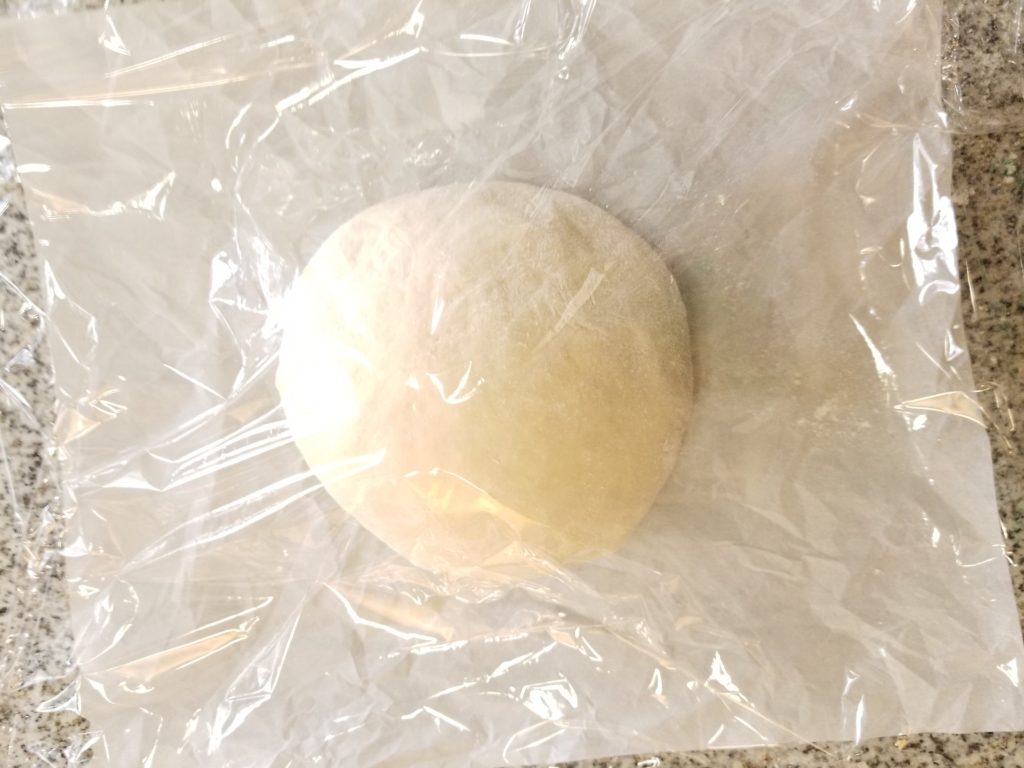
Remove the bowl from the machine and, using a bowl scraper like this one (affiliate link), scrape the dough into a cohesive mass. Alternatively, dump the dough into another bowl for rising. Cover the bowl with plastic wrap and allow the dough to proof (rise) in a warm, draft-free area until doubled in size, 1-2 hours.
After the dough has risen, place it in the refrigerator to chill for at least several hours (5-6) and up to 10 days. The longer it sits, the more fermentation happens and the more it takes on the flavor of a sourdough bread. The extra fermentation also helps with development of the bread structure, which makes for a better loaf of bread. There is no gluten development so gluten free bread baking needs all the help it can get.
SHAPING THE BREAD
The typical shapes of loaves for our family are baguettes and boules, but be creative in your own kitchen and make any size and shape you'd like. I often find myself perusing regular (gluten-filled) bread baking blogs and cookbooks looking for different ways to shape my bread.
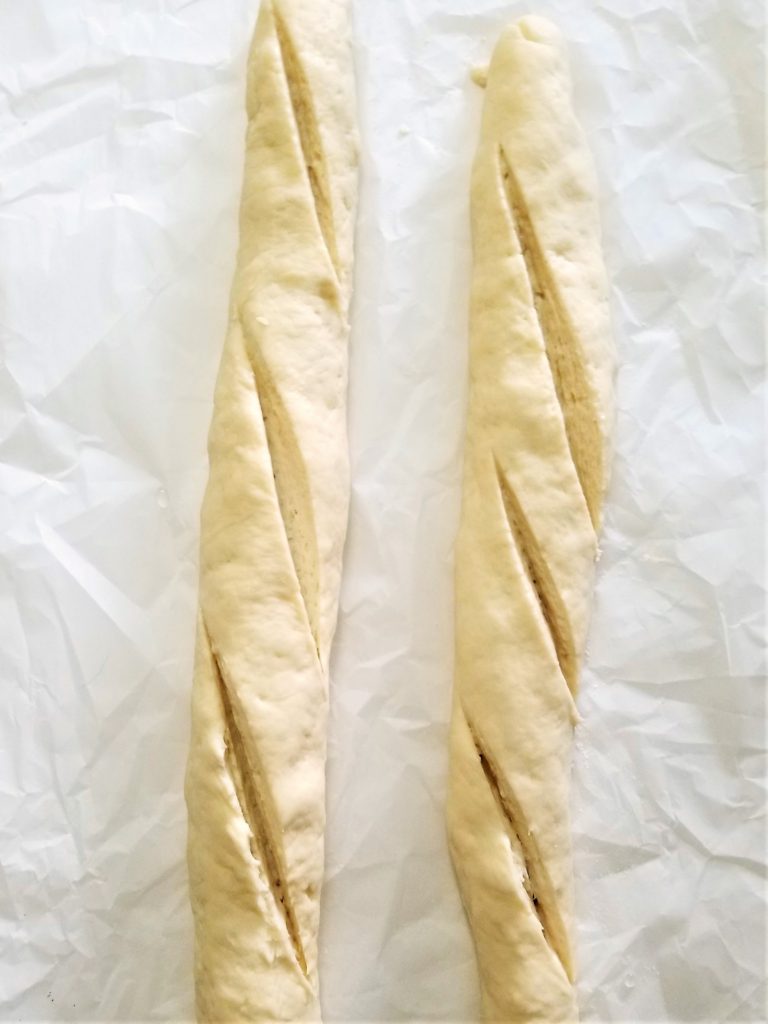
- TO SHAPE A BAGUETTE OR BATARD -- (a shorter, wider loaf), roll into a rope shape, tapering at the ends. Place on a piece of parchment long enough to fit the baguette (you may have to position it diagonally). I like to place mine on a pizza peel (affiliate link) to make it easier to transfer it into the oven.
- TO SHAPE A BOULE -- simply knead the dough as instructed and mold it into a large round, tucking the ends under the bottom of the round. Again, place it on a piece of parchment and set on a pizza peel (or overturned baking sheet) for easy transfer to the oven.
Most bakeries bake their breads in steam ovens. Steam ovens release steam at the right time when breads are baked. Again, I took a page from Gluten Free Artisan Bread in Five Minutes a Day. Take a shallow pan, such as an old broiler pan, and put it on the bottom rack of your oven. Put a baking steel (affiliate link) or baking stone (affiliate link) on the middle rack and preheat the oven to 450 degrees.
When the dough has fully proofed, slash it with a wet, sharp bread knife or lame (affiliate link). You can be creative with your slashing as well. Slide the shaped bread into the oven, parchment and all, onto the steel (or stone). If you don't have a steel or stone, an overturned baking sheet will do in a pinch.
Carefully pour a cup of hot tap water into the broiler pan, which creates instant steam. Quickly shut the oven door to keep the steam in. This allows the bread to gain its initial rise (oven spring) in the oven before the crust begins to set.
gluten free artisan bread fAQs
If you something other than my bread flour blend, or alter my blend in any way, you will NOT get the results that I show you in the pictures and video. This is the main reason I developed my own flour blends, because no store bought blend was able to give me the results I was looking for.
You bet! Baking with yeast requires some patience and often just learning from your own mistakes. So how do you know when your loaf is properly proofed? First, don't pay so much attention to time. Proofing times given for any recipe are just guidelines and aren't set in stone. Sometimes my house is colder and it will take a small loaf over an hour to rise. Other times, like in the summer months, 30 minutes is all a loaf needs.
Covering the dough is crucial because it will prevent a skin from forming, which would inhibit oven spring (the rise of the dough once it hits the hot oven). This will cause a very dense, brick-like loaf.
If you don't have a shallow pan, you can also throw a handful of ice cubes right onto the bottom floor of your oven before quickly closing the door. Another option is to spritz the bread directly with water in a clean spray bottle.
The best judge is to feel the weight of it. If it feels at all heavy, it's not done. Put it back in the oven for another 5-10 minutes. Baking time is usually considerably longer with almost all gf baking than their gluten-filled counterparts. If you've made a larger or thicker loaf and it takes more than an hour to bake, don't be surprised. If your bread is getting too dark, just cover it loosely with foil while it continues to bake.
A word about psyllium husks
In the recipe, you'll find measurements for using this wonder ingredient. However, if you don't want to use it or can't find it in your area (or don't want to order it online), you can make this bread without it and it'll still be AMAZING! You will just have a stickier dough that's a little harder to shape. It won't affect the quality of the baked bread.
What are you waiting for? With a little bit of time and a few tools, you could be in bread HEAVEN!!
Gluten Free Artisan Bread
Ingredients
- 3 cups (420 g) Kim's gluten free bread flour blend
- 1½ teaspoon xanthan gum (in addition to what's already in the blend)
- 1 tbsp (5 g) psyllium husks* (or 1 ½ teaspoon psyllium husk powder)
- 1 tbsp (9 g) instant/rapid rise/fast-acting yeast (not active dry yeast)
- 1 teaspoon kosher salt
- 1¾ cups (420 ml) water*
- 2 tbsp (26 ml) olive oil
- 1 tbsp (21 g) honey
Instructions
- In the bowl of a stand mixer fitted with the dough hook, add all dry ingredients and whisk using a handheld wire whisk. Add the honey, olive oil, and water. Place on mixer and mix briefly to incorporate. Turn the mixer up to medium high and knead for 5 minutes. Remove the dough hook and scrape the dough into a cohesive mass using a plastic dough scraper or a rubber spatula (or scrape into another bowl). Cover and place the bowl in a warm, draft-free area and allow it to rise (proof) for 1-2 hours, or until doubled in volume.
- Refrigerate for at least 6 hours, preferably overnight, but up to 10 days.
- On baking day, remove the dough from refrigerator and dump it out onto well-floured surface. Knead until fairly smooth, adding more flour as necessary. If not using the psyllium husks, it will be a somewhat sticky dough so keep a small bowl of flour on hand to sprinkle the dough and/or surface with extra flour.
- To shape into a boule, simply form into a round ball, pulling the dough up and under the ball and pinching on the bottom. Place on parchment paper. To shape into a baguette, smooth the dough and roll into a rope shape, tapering it at the ends, adding more flour as necessary. Roll out as thick or thin as you'd like and as long as you're able to fit in your oven (make sure it will fit on your pizza steel or stone). Place it on a sheet of parchment paper.
- Place the loaf or loaves, covered loosely with plastic wrap, in a warm, draft-free area to rise until visibly puffed and slightly larger, but not doubled in size, about ½ to 1 hour. This time will vary depending on the warmth of your proofing area.
- BAKING STEEL OR STONE METHOD: Set up your oven for baking. Place a baking steel or stone (or overturned baking sheet) onto the middle rack with a shallow pan on a rack underneath. Preheat the oven to 450° F.
- DUTCH OVEN METHOD: Place a Dutch oven with a tight-fitting lid into the oven and preheat it to 500° F. You won't need the shallow pan with steam as enough steam will be created in the Dutch oven once the bread goes in. NOTE: This will only work with boules or loaves that can fit into the Dutch oven. If you're making a longer batard or baguette, you'll need to use the first method.
- When the dough has finished rising and is visibly puffed, run a serrated knife under hot tap water and cut slits in the dough swiftly but uniformly, about ½-¾ inch deep.
- BAKING STEEL OR STONE METHOD: Fill a measuring cup with one cup of very hot water (from the tap is fine). Using a pizza peel (paddle), slide the loaf (or loaves) onto the baking steel (or stone), parchment and all. Immediately pour the cup of very hot tap water into the shallow pan. Quickly shut the oven door.
- DUTCH OVEN METHOD: Remove the lid carefully and carefully lower the dough, parchment and all, into the Dutch oven. Replace the lid and shut the oven door. Immediately reduce the temperature down to 450° F.
- BAKING STEEL OR STONE METHOD: Bake for about 30 minutes for baguettes, or about 40 minutes for boules, OR longer for larger boules (some larger boules can take up to an HOUR or more). If the loaves are getting too browned, you can cover them loosely with foil. The loaves will look crusty and done on the outside, but will feel light when picked up. If they feel heavy, they're not done yet. Allow them to bake for another 5-10 minutes and then check again, picking up the loaf with two gloved hands. If they're still feeling heavy, allow them to bake for another 5 minutes and check again.
- DUTCH OVEN METHOD: Bake the bread for 40 minutes with the lid on. Remove the cover and continue to bake for another 20 minutes. Check for doneness by picking up the loaf (with gloved hands). If the loaf feels relatively light for its size, it's done. If it feels at all heavy, it's not done and give it another 5-10 minutes before checking again.
- Remove from the oven and place on a cooling rack. Allow to cool COMPLETELY before cutting (or it will be gummy on the inside).
Notes
- The recipe makes about 2-3 loaves of bread, depending on how large or small you make them. You don't have to make them all in one day. You can leave the rest of the dough in the refrigerator for another day when you want freshly baked bread.
- You can double or even triple the recipe (if you have a mixer big enough to handle the dough). A double recipe fits well in my 5-quart Kitchenaid artisan mixer.
- Extra dough may also be frozen. Wrap in plastic wrap and then in foil and place in the freezer for up to 3 months. Thaw in refrigerator overnight and then use as normal.
- The possibilities are endless with this dough. It can be made into so many different shapes and sizes of loaves and you can shape it in about five minutes a day. You can make pizza with half of it, and bread with the other half! If you only want to make one loaf in a day, only take out the amount of dough you'll need for that loaf (usually about a softball to grapefruit-sized amount). Again, it depends on the size and shape of loaf you're making.
- The dough will last in the refrigerator for about 10 days, fermenting even more (like sourdough) each day. It actually gets better with age 🙂
- *If you don't want to use psyllium husks or psyllium husk powder, decrease the amount of water in the recipe to 1 ½ cups (360 ml).
- FOR HIGH ALTITUDE BAKING: Per Beth, who lives in Colorado and graciously offered some high altitude baking conversions, "the crust is perfect – crisp without being like a cracker and enjoyable to bite into. The crumb was perfect, and light which is no small feat considering it is gf. I followed Kim’s recipe for the flour blend. I then adjusted the following in the recipe: Yeast: 2.5 teaspoon + ⅛th teaspoon (reduced each teaspoon by ⅛th tsp). Salt: 1.5 teaspoon (added ½ tsp). Water: 1.5 c. + 3 tablespoon added 2 tablespoon per cup). I followed the rise times and baking directions exactly. I made 2 loaves: one baguette and one boule. I baked them on my baking stone as directions state. My loaves took 2 hours to grow noticeably larger during the rise after being in the refrigerator overnight. I turned the oven on then off, then put the loaves on a wooden cutting board covered with plastic wrap and also a light cloth while rising. I have a family member who has celiacs and I am gluten and dairy intolerant. I used the pea protein, by the way."
Inspired by Gluten Free Artisan Bread in Five Minutes a Day
This bread was originally posted on October 12, 2018 and has been updated with new images, a video, and more step-by-step in depth information.


Nicholas
Hi Kim,
Just wondering if you could help me. I’ve made the dough twice, and it seems like on both occasions the dough is still quite wet.
These are the steps that I followed:
* In terms of the Kims gluten free flour blend, I followed the exact ingredients (no substitutions) and instructions.
* In terms of making the Artisan Bread, I followed the ingredients (no substitutions) and instructions.
* When making the dough, the dough did double in size, and was left in the fridge overnight.
* I removed the dough onto a well floured surface, however, as I was trying to knead, the dough was so sticky that it would get stuck to my hands. I started to add more of the flour blend to the surface to make it less sticky. However, it seemed like no amount of flour would reduce the stickiness (i.e. I would flour the surface of the dough, begin to knead, then it would be sticky again).
Some considerations:
* I am based in Sydney Australia, and followed the grams/mls measurements when documented.
* It’s summer here, so average indoor temperature is around 27 degrees.
* I am using the psyllium husks and in terms of yeast, I am using Lowan Instant Dried Yeast.
Thanks Kim 🙂
Kim
Hi, Nicholas! I'm sorry you're having a difficult time. If I were a betting person, I would bet that it just might be the rice flour you're using. I've found if you use a gritty rice flour, you will be left with almost a soupy-like consistency to any of the doughs. If you can get your hands on a superfine rice flour where you are, that's what really needs to be used. The gritty types of rice flours that are usually found aren't fine enough to soak up the excess liquids.
A workaround may be to reduce the water amount in the recipe by up to 120ml. I don't think the bread will be quite as soft on the inside, but it'll still be delicious!
Jenny
I had this issue too with my artisan dough. I will definitely try this again with super fine white rice flour.
Iva
Hi is it OK to add more salt to recipe? I felt it was a little bland in taste.
Kim
Yes, you can add more salt. I wouldn't go past more than another teaspoon for a total of 2.
Shalindhi
FINALLY! I have found a gluten free crusty baguette recipe with a wonderful interior. I have tried out so many bread recipes, but I never found the consistency I was looking for. So many disappointments...until now.Thank you so much!
One thing I noticed was a bit of aftertaste, more like where the nose and throat meet -- does that make sense? I don't know if it'ss the whey protein or physillium husk. I have used physillium husk before, but didn't get this slightly weird taste. Which brand of whey protein isolate to you use? I live in Canada, I can try to buy it here.
Kim
I use Now Foods brand and no one can ever tell the difference.
Martha
Hi
I live in New Brunswick Canada
Hi
Hi , I used Whey protein isolate unflavoured "Boost by Nestle"
Ordered on Amazon
First time doing it and the result was amazing
I followed exactly the recipie
This is my bread now for ever.
I tried so many recipie and never had a good result.
Kim
That's awesome!! Thanks for following along 😊
Paula
Hi Kim,
Thank you for this amazing gluten free bread recipe! I’ve made it a couple of times now and absolutely love it. I have a question about scoring. I’ve made a couple of boule’s and I find the bread bursts and I can’t get enough of an ear. Any idea what could be causing this? Maybe I’m over proofing or under proofing? Or is it the depth or angle of the lame? Any suggestions would be helpful. TIA
Kim
I'm not that great at scoring either, but I've found that about a 45-degree side angle works best.
Joanne
This is the best recipe for gluten free bread both for home baking or even what I find in bakeries, the best!
Vivienne
Hi Joanne, and Kim...
Sorry to jump in on you - I can't seem to add my own comment here, & I have a serious question:
The recipe calls for 1 tbs(tablespoon) (which recipe says is 5g) Psyllium husks,
then next it says 1 tbs (which it says is 9g) yeast..
then it says 1tbs (21g) honey.
They're all 1 tablespoon, but very different grams - so what did you use? As the recipe calls for, or what? I always use grams (am in Australia, so we're metric).
Here, 1tbs is 20g, 1 teaspoon is 5g, so this has me really flummoxed.
The recipe (and video) looks amazing, & I can't wait to try it - but I need to know how much of everything it needs. Thanks so much.
Simon
It's volume versus weight.
Tablespoon is 15ml (UK).
But a tablepoon of psyllium husks would be a lot lighter than a tablespoon of honey, as honey is a lot denser.
Only for water does 15ml=15g.
So 15ml psyllium husks = 5g & 15ml honey = 21g.
Kim
Vivienne, please go by the weight measurements and not the tbsp/tsp. I am in the process of switching all of my bread recipes (at least) over to metric only. Here in America people are more resistant to use metric, but it really is the most accurate way. However, Simon is right in that there are different densities for different foods.
Kim
Awe, thank you so much, Joanne 🥰
Dr. Proctor
Kim, what is the purpose of the Whey Protein Isolate in your gluten free bread flour blend? And do you think it can be substituted by brown rice protein powder or lactose free protein powder? I am not only gluten intolerant but also Whey absolutely destroys me. I would love to try your bread recipe, and was so disappointed to see the whey in your flour blend. Suggestions?
Kim
There are plenty of substitution suggestions within the recipe post.
Ayla
I have made this a few times. This last time I followed the recipe to a T. My loaf is heavy. It has been every time. Also It does not rise well. I can't figure out what I am doing wrong. I have tested my yeast, I have timed everything as prescribed.
I spent a good amount of time this last time sourcing all the correct ingredients, weighing them properly and such. I just feel disappointed on the amount of time and effort I have been putting into getting this recipe right and it just not coming out as I expected based on your description and photos. I am an experienced gf baker, but have never been able to get this recipe. Any thoughts anyone?
Kim
Don't concentrate on the proofing time as much as how it looks. If it takes longer, that's perfectly normal. In colder months, it can take several hours to proof. I could take a guess that it's either underproofed or underbaked if it's coming out dense and heavy every time. When you take it out of the oven, if it doesn't feel light relative to its size, put it back in for another 5-10 minutes. Every loaf of bread is different, especially gluten free bread. Just as an example, I made sourdough the other day and had to leave it on the counter overnight to proof. That's a long time! It's because my house is much colder now. I also took it out of the oven at the specified time and it felt more heavy than I would like, so I put it back in for another 7 minutes and it was perfect. Sometimes it just eventually becomes a little intuitive. I wish I had other words of wisdom to impart, but start with what I've said already and see how that works for you.
Phi
WOW! You CANNOT tell that this is gluten free. My partner says we have a winner (after several months trying different bread recipes).
If it helps, these are the brands I used: Organic potato starch from "Buy Whole Foods Online UK"; superfine White rice flour from "Pansari"; Tapioca flour from "Now Foods"; Whey protein isolate from "Now Sports": Xanthan gum from "Now Foods"; and Whole psyllium husks from "Sat-Isabgol".
Besides using maple syrup in place of honey and 1/2 Tbsp of psyllium husks previously ground to half its original vol, I followed the recipe as articulated. Used half of the dough for pizza and the other half for batard bread. The absolute best by far. No more store bought packaged GF flours for me. This is it. Can't wait to try some of your other recipes now I've got your flour blend. Thank you Kim. Thank youuu!!
Michelle
I love your recipes Kim but I have a question in regard to the artisan bread. I've made it several times and we love it but it always seems to have a pink or lavender hue do it . What is it that gives it this odd color?
Laura
Psyllium will give it a purplish/pink hue.
Kim
Not the kind I use, which is Anthony's.
amy
mine too ! that totally freaked my gluten free kid out and she wouldn't even try it. my husband loved it.
Angela
I miss bread. I need to try this out.
Rob Page
I am now making my 3rd loaf. Obviously, I recommend it. My one substitution was to use soy protein isolate in place of whey protein (because I avoid casein, which is dairy-based protein). Using the dutch oven method, it yielded great crust and crumb. If you stick with whey protein, it may well turn out even better.
Bonnie
You really do. I made it two days ago and it came out awesome!
Sarah
This recipe is amazing. Everyone I serve it to is shocked when I tell them its gluten free!
Jack-Patrick
Hi Kim! I've been lurking for a long time on this site once I found out that I couldn't have gluten anymore, and I've been so excited to try these recipes! I work in a regular bakery and so to have the chance to continue eating all the types of things I'm surrounded by has been very exciting!
It's my first time trying any of your recipes, and for some reason the bread has turned a gray color? It was a perfect medium-brown all the way through mixing, proofing, and shaping. About halfway through the bake it got discolored somehow? Everything I see on the internet says that perhaps there's too much moisture, but I was wondering if you had every experienced the same, or if you had an idea what could be wrong? Ingredient-wise I used everything on the list, even the same brands and I made sure not to go off-piste. If it helps, its summer, humid, and I live by the water - perhaps like the adjustments people made for altitude, are there any adjustments I should make for humidity?
Thank you so much for putting together this place where people can share knowledge!
Kim
It's my pleasure to share my experiences with gluten free baking!
My guess about the gray dough is oxidation from too much air exposure, as I've had it happen to pastry dough before. With that, I would add a small amount of lemon juice or vinegar to the dough to prevent the oxidation, but I don't think that will work with my yeast dough. Did you substitute anything within the flour blend? Like a different type of protein powder perhaps?
Chuck Carver
Hi Kim and thanks for your amazing work! I just finished mixing my first batch of bread and have a question. I mixed the bread for a full 5 minutes on med-high but still had some residual flour that did not incorporate into the dough. I manually mixed it in but I was wondering if a paddle might be a better choice for this wet dough? Do you always use a hook and if so what is the advantage over a paddle? Thanks again for all you do and I look forward to hearing from you!
Kim
You can use either/or. If you use the dough hook, add the wet ingredients to the bowl before adding the dry and that will help incorporate everything. But using the paddle is just as good!!
Ros
Here you say with the hook to add the wet ingredients first then the dry ones but the recipe above states just the opposite. So which one is it?
I look forward to try it but not till I find out your answer...
Kim
It doesn't really matter. I had one of the old coated hooks and the coating started coming off so when I bought a new one, I found the hook doesn't reach all the way to the bottom of my bowl, so I find if I add the wet ingredients first, that helps. They all work either way (wet or dry first), but you may need to scrape down the bottom and sides once while mixing.
Frances
I was wondering if I could freeze this bread once baked, cooled, and cut into sliced?
Love this bread tho! My household eats it so quickly!!!
Sharon
Hi Kim, just wanted to let you know this is my 3 rd time baking this bread and it is so Good! I’ve tried many recipes on the web and this is the best! Just finished nearly half a baguette already. Made also a larger loaf. I don’t communicate hardly on the social media but I just had to let you know how good it is and will be definitely trying your other recipes.
Kim
Awe, thanks so much, Sharon! You are so sweet!!!
Suzanne
LIFE CHANGING!!!!
Thank you for all of your research and experimenting...this (and I'm guessing, all of your other blends and recipes) recipe and bread blend will be my go to. The artisan bread is amazing! Such a crispy crust and lovely crumb for GF. How can I store my baked loaf? A tad humid here in NC summer and I don't want it getting chewy or dried out. I looked in the recipe but only found tips for the uncooked dough storage. Thanks in advance!
Kim
Thanks so much for your kind words, Suzanne! I'm so glad you liked the bread.
I live in Va Beach, VA so I hear ya on the humidity and it's a real struggle in my house to keep things crisp, even though we have the AC going constantly in the summer. My tip is going to sound really weird, but it totally works. When you want to refresh and re-crisp the bread, run the loaf under water (yep, get it wet under your kitchen sink) and pop it in a 350F oven for 5-7 minutes. It works like a charm!
Hildi
Your Gluten Free Artisan Bread looks wonderful! I do not have a pizza stone or a steel. If made into a Boule instead of loaf will a Dutch oven do a good job of baking this?
Kim
Yes. Check the recipe because I have instructions for how to use a Dutch oven.
Luka
What means "My whole family loves my pizzas and none of them are gluten free."
Mine are also not gluten free, and are perfect! But what's the point on gluten pizza here?
Tanya
Kim means that none of her FAMILY have to be/eat gluten free. All her pizzas use this gluten-free dough, and everyone in her family who have the option of eating regular wheat crust still love Kim's GF crust!
Nathaly
Any idea how the proofing times after shaping the dough would be if using (organic) dry yeast instead of fast dry yeast? I like using the organic dry yeast as it gives my bread a little more bread flour and don't have additives.
Kim
I wish I knew, but I don't see it being that significantly longer, especially during the warmer months.