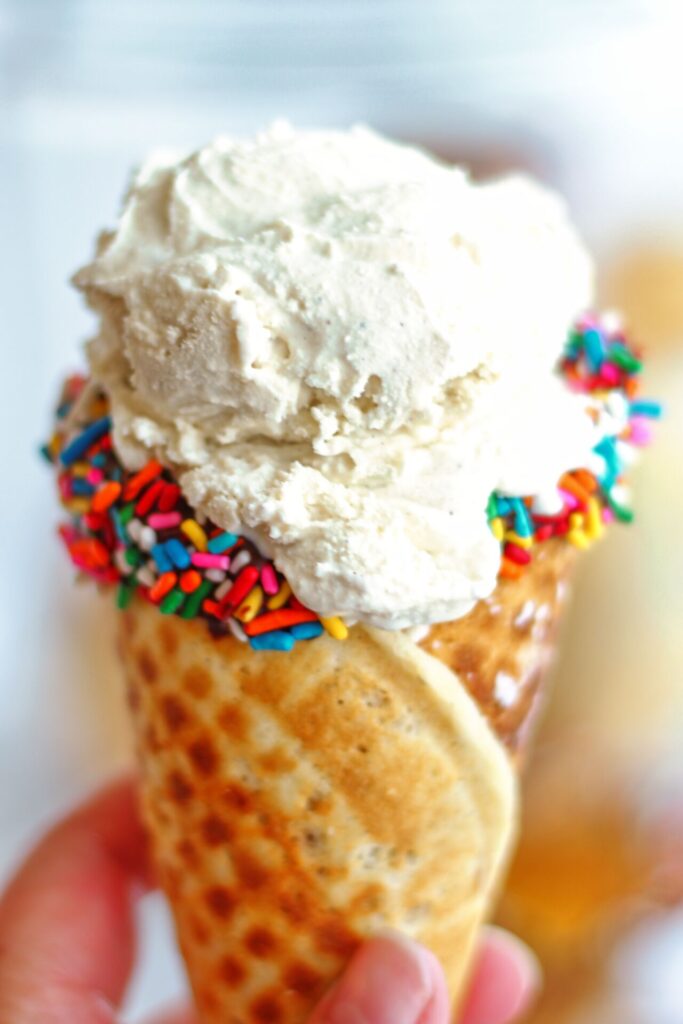
These Gluten Free Waffle Cones are JUST like the ones we remember, crisp and buttery, perfect for a hot summer day!
Some of the items linked in this post are affiliate links, meaning, at no additional cost to you, if you click through and make a purchase, I will earn a small commission.
When was the last time you had a waffle cone? I'm sure there are some gluten free ones out there, but not where I live. I think I've seen cake or sugar cones made gluten free, but never waffle cones. And my favorite was always a waffle cone. I love the texture that waffle cones have, but I also feel like there's a whole different flavor profile to waffle cones that the other cones don't have. They taste just like smell when you walk into an ice cream shop.
These cones are EXACTLY like those ones, the ones we remember having in our pre-gluten free days. Make them large, make them small, dip them in chocolate and nuts or sprinkles, serve them with your favorite store bought ice cream or homemade ice cream. Just make them because you're guaranteed to love them!
here's what you'll need to make waffle cones
- Kim's AP gluten free flour blend -- a store bought blend may be substituted, but hasn't been tested.
- Baking powder
- Sugar
- Eggs
- Butter
- Vanilla extract
- Almond extract
the special equipment you may need
If you're anything like me, you love ice cream! And to be able to make my own gluten free waffle cones is great. However, I'm not going to be eating ice cream every single day, so why in the world would I want another "gadget" to take up precious space? I hear ya. I'm not always about gadgets and extra equipment. I find other ways to make things than to buy some piece of equipment I'll hardly ever use.
If you just can't see spending the money, some have had success making ice cream cones in a nonstick skillet. I tried it and it bombed miserably! But if you have more patience than me for that stuff, watch this video and maybe you'll have better luck. I found it took too much time to make each cone and the time saved was worth the money I paid for the gadget.
other things you can make with your waffle cone maker
There are so many different things to make with your waffle cone or pizzelle maker than just cones! Here are a couple of suggestions:
Waffle Bowls -- instead of shaping the waffles or pizzelles into cones, why not make waffle cones as they're coming off the iron? The waffle cone maker (affiliate link) comes with its own waffle bowl maker, which is just a plastic contraption that shapes the waffles into bowls. You can also use the pizzelle maker (affiliate link) to make miniature waffle bowls by draping the hot pizzelle over the top of a small bowl (like a prep bowl) and letting it cool.

Pizzelle -- leave the pizzelles as is right off the iron and they'll harden into flat waffle cookies. You can also make jumbo flat waffle cookies if you have the waffle maker.
Cannoli -- instead of shaping them into cones, roll them around a cannoli form (affiliate link) to make substitute cannoli shells. If you don't have cannoli forms, use the end of a round utensil, aluminum foil, or even a clean curtain rod.
Sandwiches -- you can also make gluten free sandwich cookies. Make several flat pizzelles or waffle cones. Spread one with nutella, dulce de leche, or fruit jam and top with another for a wonderful sandwich cookie. Or make my pizzelle s'mores sandwiches! If you choose to buy the waffle cone maker instead, make them large and then cut them into fourths.

TIPS FOR MAKING GLUTEN FREE WAFFLE CONES
- Use one regular-sized cookie scoop to drop about 4 tablespoons of batter onto the waffle cone maker. Use about half that on a pizzelle maker.
- Set a timer (I used my phone timer) for 1 minute and check waffle on the first try. If it takes longer, find the time it takes to complete and set a timer for all the rest with the new time. Use an angled spatula and carefully slide it under the pizzelle or waffle cone and lift it off the machine.
- Work quickly to shape the cones. They crisp up very quickly and won't be able to be molded once that happens.
- If your fingers are sensitive, use two layers of latex gloves to form the cones. They are pretty hot when they come out of the cone maker.
HOW TO STORE WAFFLE CONES
Store your cones in a glass container or hard plastic container to keep them crispy. I live in a very humid climate and glass is my favorite way of storing them. It is non porous and will keep them from going soft. If they should soften, put them on a baking sheet in a preheated 300 degree oven for about 5 minutes. They may unroll while reheating, so just re-roll them and they'll be good as new.
Gluten Free Waffle Cones FAQs
In a well sealed glass or hard plastic container, you can keep the waffle cones for up to two weeks!
No, the pattern on a regular waffle maker is too deep and would just make tiny pieces of waffle cones.
Position your cone shaper about 1-2 inches from the edge of the waffle and then start rolling. If you position it right to the edge of the waffle, there will always be a little hole at the end. It takes practice, but if you happen to get a hole in the bottom, just drop a mini marshmallow or a chocolate chip in the bottom of the cone when serving to "seal" the hole!
There are many egg substitutes to try, such as JUST Eggs, chia eggs, or flax eggs. You'll need to test these substitutions as they have not been tested.
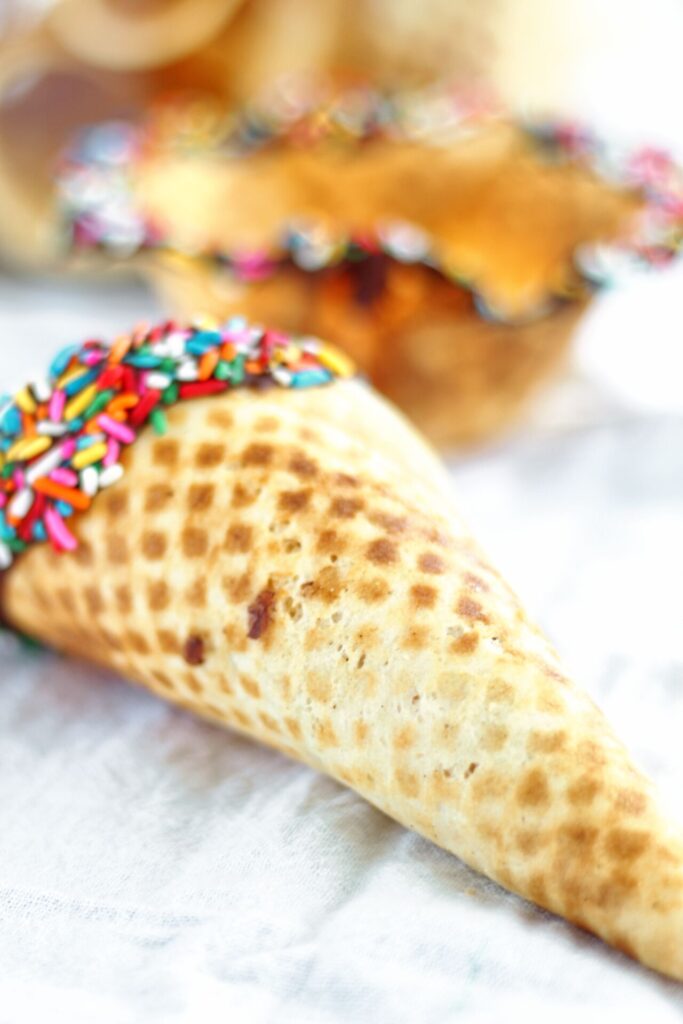
Grab some of your favorite ice cream and make yourself an ice cream cone this summer!

Gluten Free Waffle Cones
Equipment
- Waffle Cone Maker OR
Ingredients
- 3 large eggs
- ¾ cup (150 g) sugar
- 1 stick (½ cup or 113 g) butter, melted and cooled
- 2 teaspoon vanilla extract
- ½ teaspoon almond extract
- 1 ½ cups (210 g) Kim's gluten free flour blend (or any gluten free flour blend with xanthan gum)
- 2 teaspoon baking powder
Instructions
- Melt butter and set aside. Beat eggs and sugar until light in color and slightly thickened. Add extracts. Mix until combined. Stir together flour and baking powder in a small bowl. Mix flour mixture into egg mixture until incorporated. Add melted and cooled butter and continue mixing until combined. Batter will thicken upon sitting.
- Heat waffle cone maker or pizzelle maker as per manufacturer's instructions. Use a regular-sized cookie scoop (about ¼ cup of batter) to place batter slightly off center towards the back of the iron. Close the waffle cone maker and wait about 5-7 seconds and then gently squeeze the top onto the bottom to allow the batter spread. Depending on the waffle cone maker you have, if you don't do this, the batter may not spread and you'll be left with a very small circle for making a waffle cone.
- Bake for 1-2 minutes, lifting the lid to check for browning. If necessary, lift the waffle up off the iron and turn it if certain areas are getting darker or are thicker than other areas. Remove with an angled spatula and quickly roll around the waffle cone shaper that came with your machine (or set into small bowl for waffle bowls or roll around cannoli form for cannoli shells). If using a pizzelle maker, you can leave them flat for pizzelles.
- Repeat process with remaining batter. Allow cones to cool completely before storing in a glass container. If you live in a humid climate, they will soften if left out more than an hour or two. To re-crisp, place in a 325° oven for 5-6 minutes. Cones will last about a week to a week and a half in the glass container. If desired, dip in chocolate and sprinkles, etc.




judy
I am wondering if something was left out of this recipe because it was way to thick and did not spread out in the waffle cone maker. I ended up thinning it with half and half just to make a cone, since the recipe that came with the maker included heavy cream. Willing to try again - tasted good, but frustrating.
Also, very difficult to incorporate the cooled melted butter - I did use the correct amount.
Kim
What flour blend did you use? I'm not sure what waffle cone maker brand you have, but in the recipe I state "gently squeeze the top onto the bottom to allow the batter spread. "Depending on the waffle cone maker you have, if you don't do this, the batter may not spread and you'll be left with a very small circle for making a waffle cone." The Cucina Pro that I have doesn't have a clasp so I have to squeeze the top of the machine down so the thick batter will spread. I've made these more times than I can count and the recipe works as is.
Marcella Holtz
Do you think this would work on a krumkake iron? I’ve made gluten free krumkakes but they are a little too thin and crisp to support ice cream. I’d love to be able to use equipment I already have. I can’t figure out if it’s the recipe or the iron that makes them so thin. I may have to experiment.
Kim
Yes, I do think a krumkake iron would work!
Della bank
I would give this 4 stars because it was very tasty, we did not have a pizelle maker though so we had to use a waffle iron which is why it did not actually turn into a waffle cone sadly. But we are making sure to use this recipie every time we make waffles because this was delicious! We discovered sadly that the way the batter came out was perfect, but the thick texture had nothing to do with that, it was just the waffle maker. Thanks for writing this recipie me and my family liked it a lot!
Rebekah Morgan
Delicious and very easy to make! Sorry for some reason my 5 stars didn't show up.
Kim
Thanks for taking the time to rate my recipe 🙂
Rebekah Morgan
Yummy!!! Thank you so much for this recipe. I made these for my girls' Valentines party, so they could have walffle bowls like the other kids. They loved them, and I love the taste too. Yummy!!! Use the heaping tablespoon size like listed in the instructions. If you use too much it will come out thicker than what you want.
Kim
So glad you and your girls loved them!!!
Rebekah Morgan
Thank you so much for this recipe. I made these for my girls' Valentines party, so they could have walffle bowls like the other kids. They loved them, and I love the taste too. Yummy!!! Use the heaping tablespoon size like listed in the instructions. If you use too much it will come out thicker than what you want.
Peter Janine
Awful. Terrible. So many things went wrong. Dough is too thick, too chewy. Never hardened. Had to thin way out and add way more xanthan gum to make it actually hold its shape. Do NOT try this.
Kim
I'm so sorry you had problems, but I can assure you that this recipe does work and it doesn't need to be thinned out or more xanthan gum added. If you used another type of flour blend, that could have been the problem. I can't vouch for every gluten free flour blend out there because they all have very different ingredients, but I CAN vouch for my own flour blend.
Again, I'm sorry you didn't have success with this recipe 🙁
Sue O’Conner
@Peter Janine-You must have done something wrong. I made these for my daughter’s birthday party and they turned out great! Mine weren’t as perfect as the author’s, but they tasted delicious! Thank you for another great recipe, Kim!❤️
Margaret
How much butter?
Kim
I am so sorry! I must have been having a moment!! It's one stick, or 1/2 cup, and I corrected it on the post.
Thanks for finding the error for me 🙂