Want caramel apples but don't want to stand at the stove stirring caramel forever? Make these Easy Homemade Caramel Apples in the microwave!
Some of the items linked in this post are affiliate links, meaning, at no additional cost to you, if you click through and make a purchase, I will earn a small commission.
I've been making these apples for over 20 years, even selling them on occasion. So when my family sees me with a bunch of Granny Smith apples, the first thing they say is "are you making caramel apples?!?!" And then they usually fight over who gets the first one AND the last one! Haha!!
But as much as I absolutely LOVE these caramel apples, I don't love standing at the stove stirring the caramel for over 30 minutes straight. It doesn't seem like a lot of time, until you're actually standing there and can't walk away, even for a minute, because the caramel might burn on the bottom of the pan. Nevermind the fact that your arm wants to fall off by the end, when you finally reach that temp on the thermometer. Nevermind also that towards the end the caramel gets really hot and starts to spurt and could burn you if you're not careful.
So when I watched this YouTube video where she made her caramel in the microwave, I was incredibly intrigued. Could this possibly work for my own caramel recipe? I didn't want to use a different recipe entirely because my caramel is the best part about the caramel apples. My family would revolt. I set about to give it a shot, but I was only gonna do half a recipe. With food prices these days, I didn't want to waste valuable ingredients if it was a total flop. And you guys, it WORKED!!!! I just HAD to come back to this post and reformulate it to show you just how easy (and QUICK!) it is to make completely HOMEMADE caramel apples using your microwave!!!!
here's what you'll need to make the best caramel apples
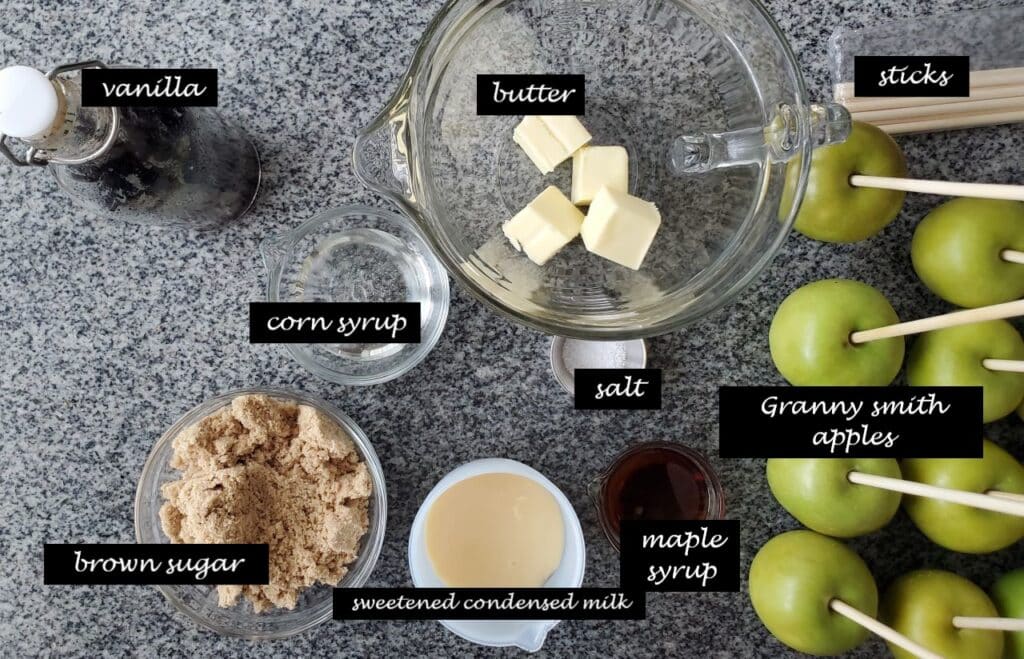
- Light corn syrup -- adding corn syrup to any caramel recipe acts as a sugar crystal blocker. It helps prevent sugar crystals from forming and keeps your caramel smooth. For a darker caramel, use dark corn syrup. Of note, corn syrup is NOT the high fructose corn syrup you hear so much about.
- Brown sugar -- for a darker caramel color, use dark brown sugar.
- Granny smith apples -- in my opinion, the BEST apple to use for caramel apples because they are so tart, which balances nicely with all the sweet we're getting ready to dip them in.
prepping the apples
Before you begin, you'll need to wash your apples to remove any wax. The wax will prevent the caramel from sticking and it'll just slip right off if you don't wash the apples.
- Boil water in a large Dutch oven or stockpot over high heat.
- Carefully dunk apples into boiling water and swirl around for about 10 seconds.
- Remove from boiling water and use paper towels (or a cloth towel) and rub them to remove any residual wax and water. Make sure the apples are completely dry.
- Firmly push dowel (affiliate link) into center of apples, but don't go all the way through the bottom.
- Place the apples on a parchment or silicone-lined baking sheet and refrigerate until ready to dip.
the easy microwave method for making caramel
I feel like a total dunce for not thinking of this method on my own a long time ago. All those hours I spent standing over the stove stirring caramel were wasted! Oh well. Better late than never I guess. I'm just grateful as can be that I found this video and it worked for my own caramel recipe. Here's what you do:
- Melt butter in a tall, microwave-safe bowl. Mine is an old Pampered Chef batter bowl, but something like this (affiliate link) would also work well. Just make sure your bowl is at least double the size of your ingredients because the caramel will bubble up.
- Add the rest of the caramel ingredients, except for the vanilla, and stir with a silicone spatula until well combined.
- Microwave for 2 minutes. Stir.
- Microwave for another 2 minutes. Stir.
- Microwave for yet another 2 minutes. Stir and then take temperature using an instant read thermometer (affiliate link) or an infrared thermometer (affiliate link). At this point, temperature should be between 225-230 degrees F.
- Microwave at 30-second intervals until temperature reaches between 236-242 degrees F. It doesn't need to be precise. Make sure to stir first before taking the temperature.
In less than 8 minutes, you will have gloriously smooth, thick homemade caramel that's perfect for dipping apples into! MIND.BLOWN!!!!
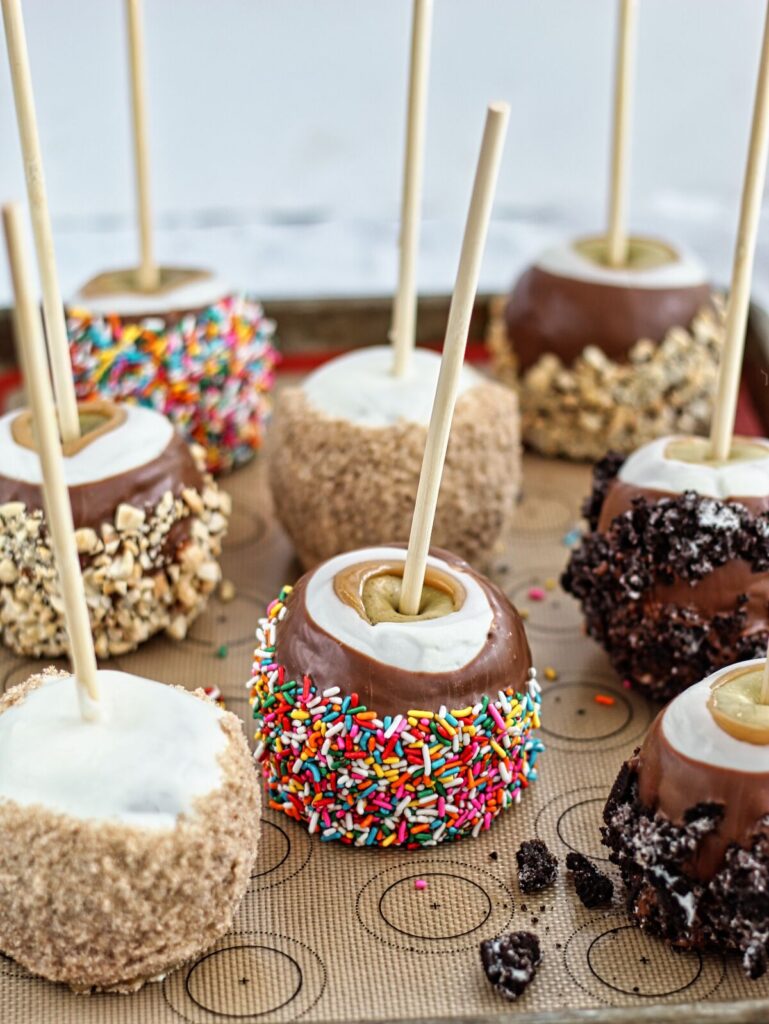
Decorating and Serving Homemade Caramel Apples
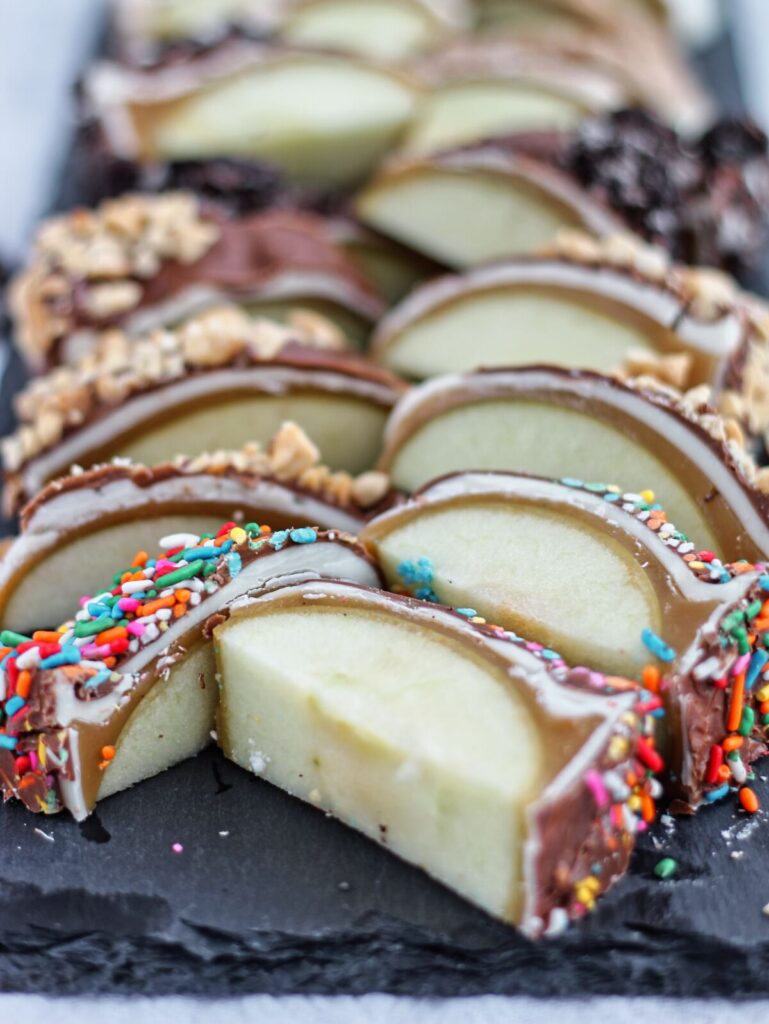
Over the years, I've made every kind of apple imaginable. I've drizzled or dipped them with both white and milk or dark chocolate coating, added different toppings. M&M's, toasted coconut, toasted pecans or peanuts, chopped Oreo's (or gluten free chocolate sandwich cookies for all of us gluten-free people), sprinkles, you name it!! It's all about personal preference.
Of course, if you're like my family, you'll most likely gravitate towards the apple pie apples. Once you taste them, you'll understand. There's something about that crisp, tart apple and smooth, creamy caramel married with the white chocolate and cinnamon and sugar. It's heaven I tell ya! To make these, first dunk your entire caramel-covered apple in melted white chocolate coating. After shaking off the excess chocolate, dip the apple in a mixture of brown sugar, a little bit of granulated sugar, and cinnamon. Roll it around to get a nice coating on the outside and place the apples on a parchment or silicone mat-lined baking sheet. Allow the chocolate to harden completely before serving.
I suppose you could bite into these babies if you really want to, but I suggest cutting them into pieces. It's so much easier to deal with. Remove them from the refrigerator and cut all around the core and into pieces. The cut pieces look stunning on a platter, all laid out for sharing, IF you can manage to part with them!

Caramel Apple FAQs
You can use whatever apple you'd like! However, because Granny Smith apples are so tart, the balance between tart and sweet is perfect.
Homemade caramel apples will keep in the refrigerator for over 2 weeks! You can eat them cold or at room temperature. My favorite way is cold right out of the fridge.
Absolutely! That's how I did it for YEARS!! See the recipe card below for instructions on how to do just that. It will take more patience than dealing with the microwave, but it'll produce the same (best) caramel ever.
Armed with plenty of tips a video, and the best caramel recipe, you're sure to be successful in making your own homemade GOURMET caramel apples! You'll never have to buy them again and will please all of your family and friends. And they'll be amazed with your skills! You don't even have to tell them you made most of it in the microwave 😉

The Best Gourmet Caramel Apples
Ingredients
For the caramel:
- 1 pound (453 g) light or brown sugar
- 1 cup (226 g) butter, at room temperature
- 14 ounces (1 can, 396 g) sweetened condensed milk
- ⅔ cup (160 ml) light or dark corn syrup
- ⅓ cup (80 ml) pure maple syrup
- 1½ teaspoon vanilla extract or vanilla bean paste
- ½ teaspoon kosher salt
For the apples:
- 12 craft or candy making sticks
- 12 medium Granny Smith apples
- melted dark, milk, and/or white chocolate or chocolate coating (such as almond bark or candy coating wafers) (Wilton Candy Melts are NOT guaranteed gluten free! I use Merckens)
- 1 cup (200 g) light brown sugar mixed with 2 tablespoon granulated sugar and 1 tablespoon cinnamon OR assorted toppings of choice (such as chopped toasted nuts, dried fruit, M&M's, toasted coconut, sprinkles, crushed gluten free chocolate sandwich cookies, etc)
Instructions
Preparing the apples:
- Boil water in a Dutch oven or large stockpot over high heat. Turn off the burner and dunk the apples in the hot water, turning over several times to remove the wax. Drain on paper towels and dry off with paper (or cloth) towels until completely dry and free of wax.
- Push the craft sticks or dowels into the center of each apple, but don't push all the way through to the other side. Set apples on parchment or silicone mat-lined baking sheets and refrigerate while you make the caramel.
Making the caramel, microwave method:
- Melt butter in a large 4 quart microwave-safe bowl or pitcher. Add the rest of the caramel ingredients, except for the vanilla extract, and stir with a silicone spatula until well combined. Microwave for 2 minutes and stir. Microwave for two more 2-minute intervals, stirring in between each.
- Check the temperature of the caramel using an infrared thermometer, candy thermometer, or instant read thermometer. If it's between 235-245, the caramel is done. If not, microwave at 30-second intervals, stirring and checking between each interval, until you reach the desired temperature.
- Add the vanilla and stir to combine. It will bubble up, so be careful. Allow the caramel to cool until it's between 200-210 degrees.
Making the caramel, stovetop method:
- Combine all caramel ingredients in 2½ quart saucepan (about 3 inches deep) and stir with a wooden spoon or heat-safe spatula over medium-low heat until sugar dissolves, about 15 minutes. (Occasionally brush down sides of pan with pastry brush dipped in water to remove sugar crystals from sides).
- Once sugar crystals are dissolved, attach clip-on candy thermometer to side of the pan and increase heat to medium-high. Stirring constantly, but slowly, cook caramel at a rolling boil until thermometer reaches 236 degrees, about 12-15 minutes.
- Pour caramel into metal or other heat-safe bowl (do not scrape bottom) and place thermometer into caramel. Let cool for approximately 20 minutes, or until thermometer registers 200 degrees.
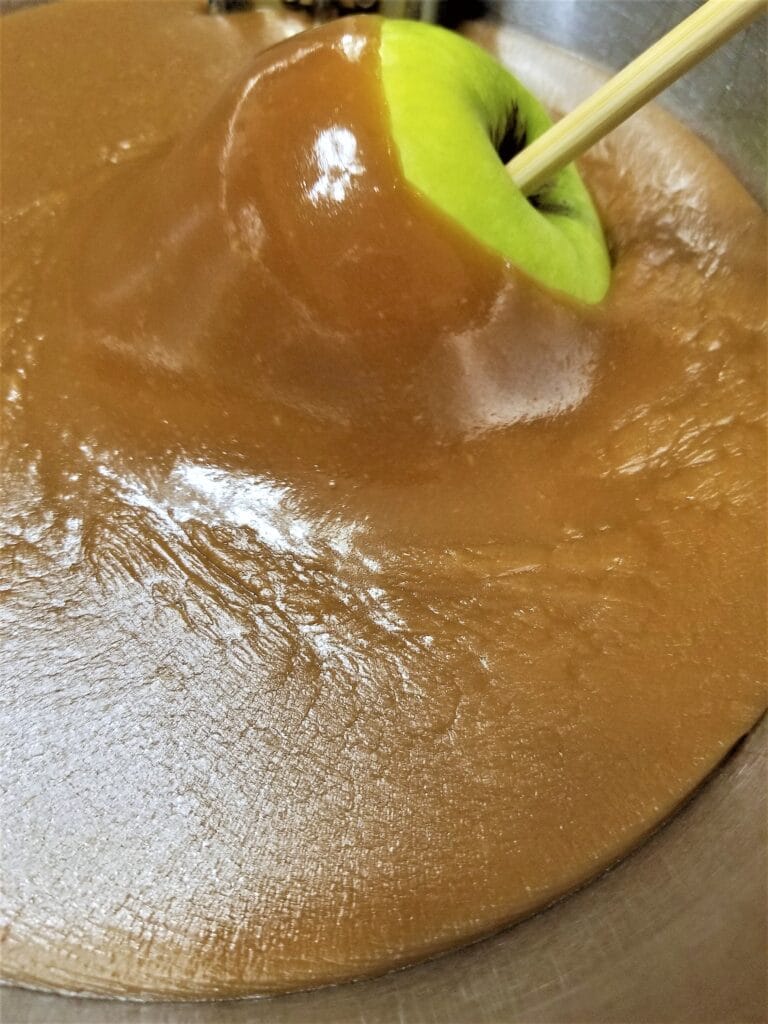
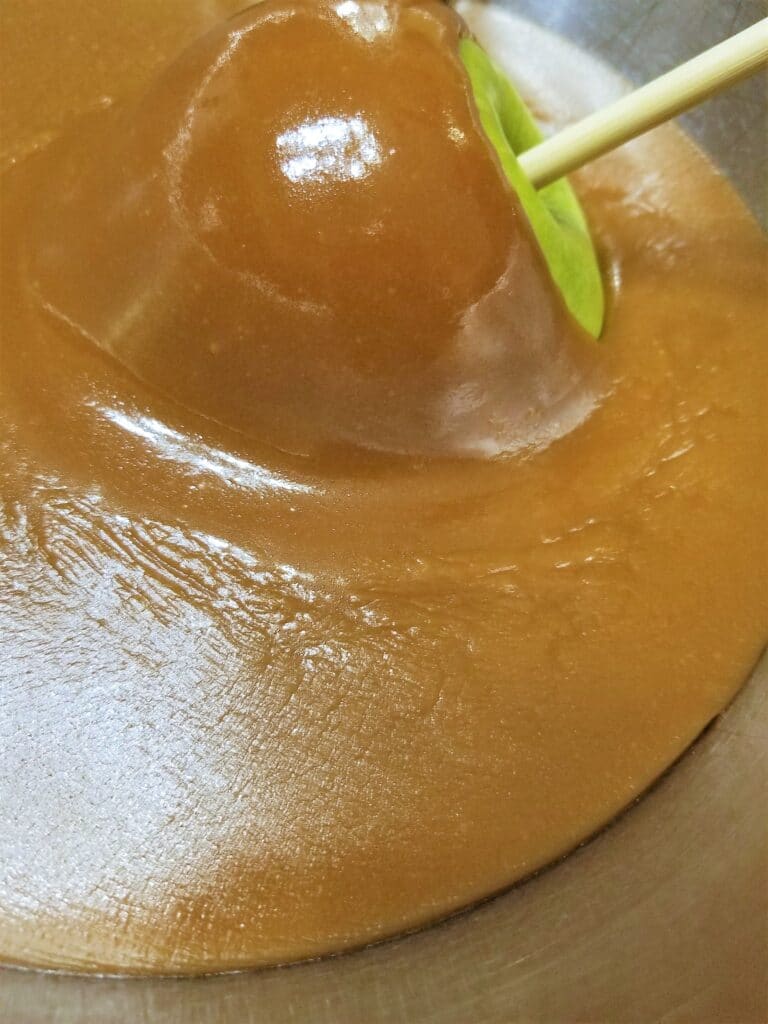
Dipping Apples in Caramel
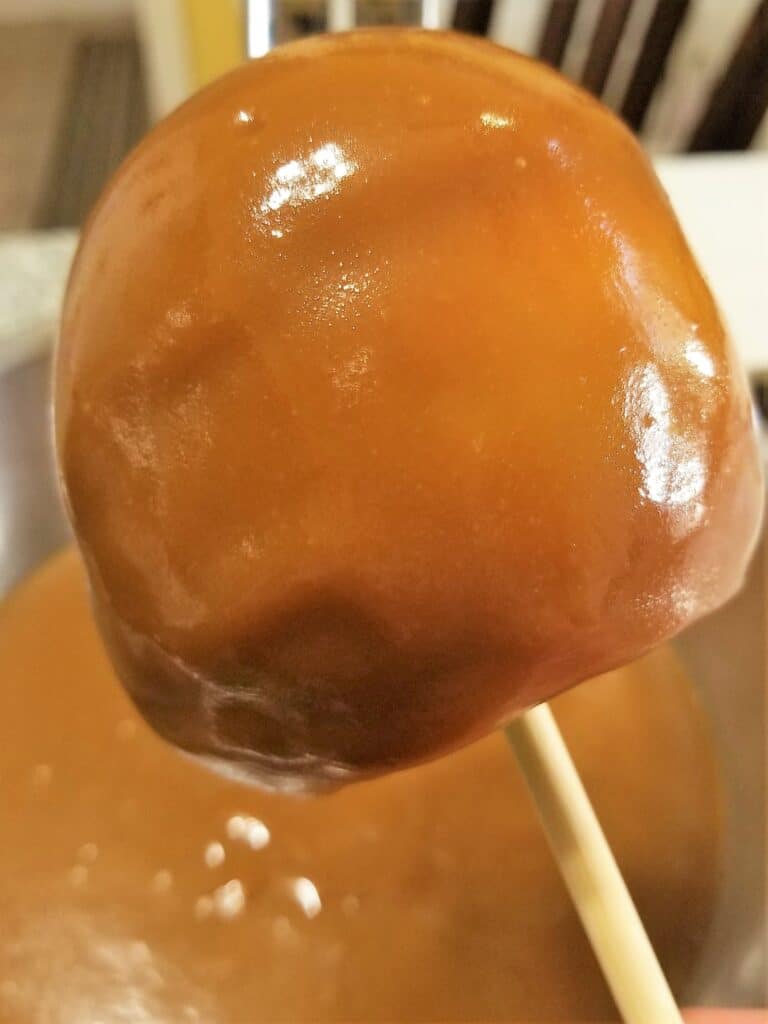
- Holding apple by the stick, dip into the caramel, submerging all but very top of apple (to allow some green to show). Lift apple out and shake carefully to allow excess caramel to drip back into bowl. Turn apple caramel side up and hold for several seconds to allow caramel to set around the apple. Place apple on prepared baking sheets. Repeat, dipping each apple as above. Allow caramel to cool and set completely.
- While caramel is cooling, prepare toppings and melt chocolate(s). Remove apples from refrigerator and dunk or drizzle with chocolate(s) and then dip into desired toppings while chocolate is still wet. Place apples back on prepared baking sheets to completely set.
- Store apples in the refrigerator for up to 2-3 weeks.
Notes
- These make great gifts for teachers, coaches, employees, employers, friends, family, you name it! Wrap in pretty clear or iridescent wrapping plastic and tie with a bow.
- Apples will keep in the fridge for 2-3 weeks, IF they'll last that long. Around my house, they're gone pretty quick!
- You can cut this recipe in half if you only have a microwave-safe bowl or pitcher that's 2-3 quart. You need to make sure you have enough space at the top for the caramel to bubble up without spilling over.
- You can also double this recipe for about 24 apples, but I haven't tried it in the microwave yet. If doing on the stovetop, just be sure to use a 5-quart saucepan/dutch oven, big enough to hold all the caramel so it doesn't boil over. There's nothing worse than cleaning spilled caramel off a stove top :/
- For the white and dark chocolate coating, I use either Almond Bark from any grocery store or Merckens brand white or dark/milk chocolate melting wafers (you'll find a link within the post above). Wilton is NOT gluten free!
This Easy Homemade Caramel Apples post was originally posted on October 10, 2018 and has been updated with new pictures, a video, new tips, and a new microwave method for making the best apples possible!

Leave a Reply