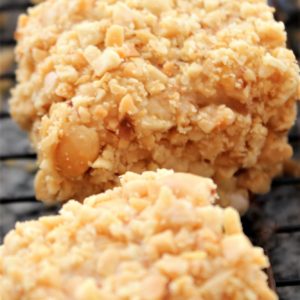
The perfect sweet and salty combo, these gluten free peanut squares are soft vanilla cake dipped in a light glaze and rolled in salted chopped peanuts.
I love a great salty/sweet combo, don't you? Sometimes, especially around the holidays, it's a welcome change of pace when a salty snack is offered. These gluten free peanut squares are just the thing we all need to break up our Christmas sweet attack! They're still sweet, but the peanuts make them salty, too and tame down the sweetness.
What are Gluten Free Peanut Squares?
Peanut squares have been around forever, at least since I was a kid (which is forever ago, haha!). They are an old-fashioned treat, probably made by some of your grandmothers way back in the day. I don't remember either of my grandmas making them, but it's possible they did and I just didn't appreciate it at the time. Your appreciation for the little things grows as you get older.
I set about to change these into gluten free peanut squares because I want to be able to enjoy those nostalgic flavors, too. Swapping out the flour and changing some of the liquid amounts in the recipe made it possible for me (and you) to indulge in these old fashioned treats!
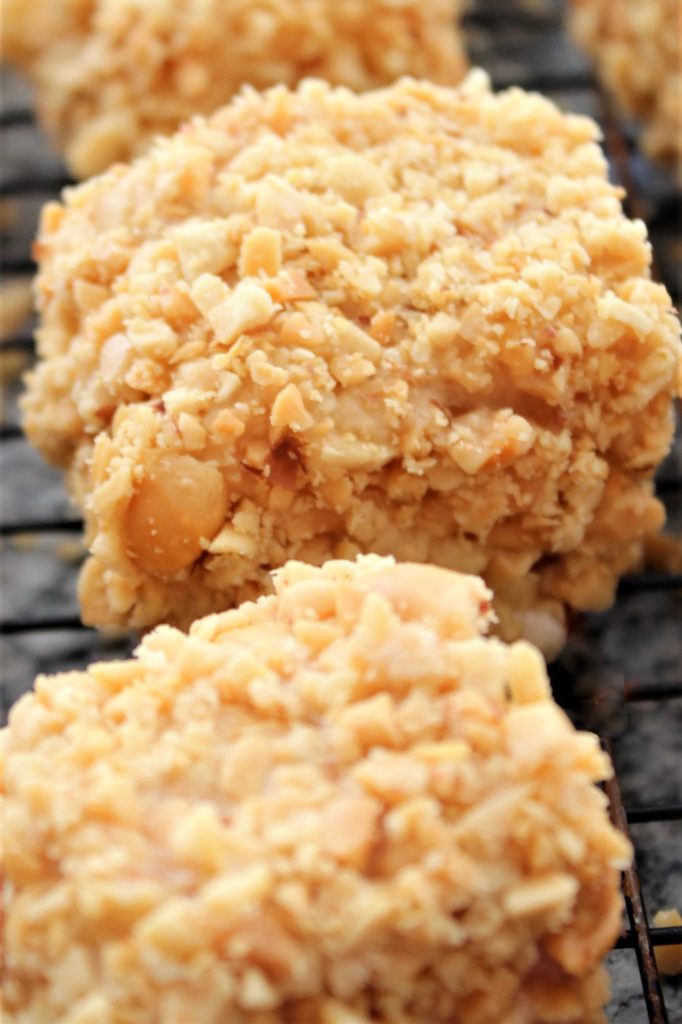
Who doesn't love a great salty/sweet combo? The cake is a very soft, genoise-like vanilla cake that's cut into squares and dipped in a vanilla glaze. That sounds great enough on its own, but roll the just-glazed squares of cake in chopped salty peanuts and you've got yourself a sweet and salty snack that's irresistible!
What You'll Need
- Eggs
- Granulated sugar
- Vanilla extract
- Kim's gluten free flour blend--you can sub a store bought blend, but this recipe has only been tested using my blend.
- Baking powder
- Salt
- Milk
- Butter
- Powdered sugar
- Salted peanuts
Making the Cake and Freezing
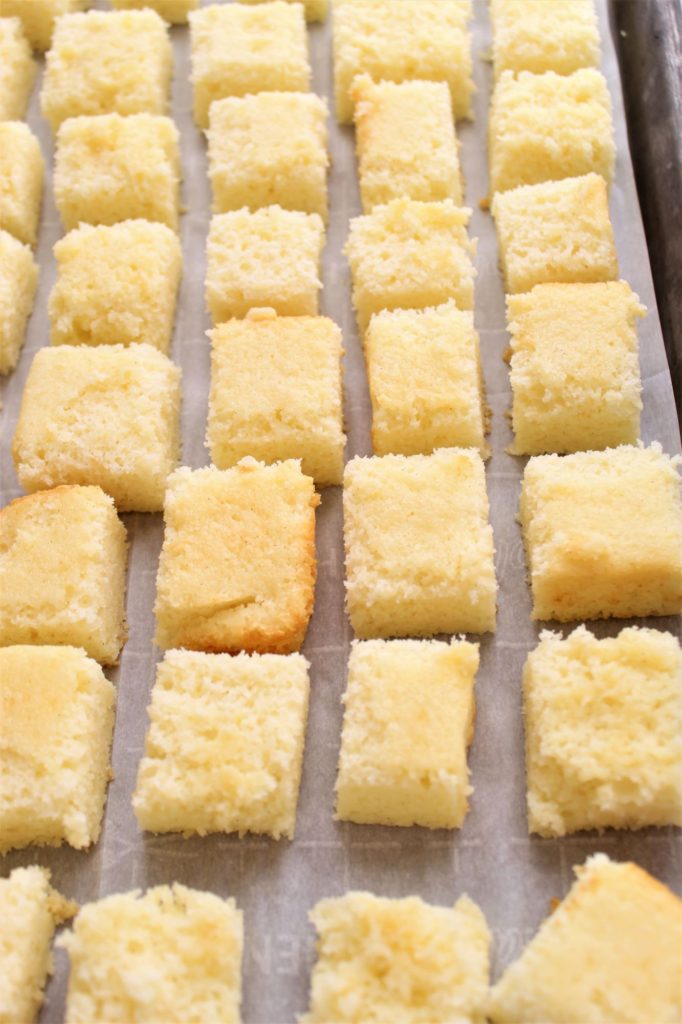
Although these peanut squares are easy to make, there are a few steps you'll need to follow. The cake is similar to a genoise cake. It gets most of its structure from whipping eggs and sugar. Melted butter is then added at the end. It's a very light cake that's moist and flavorful. I could actually eat this cake with nothing on it. You know it's a good cake when you can eat it plain!
In order for the cake to be easier to dip in the glaze, allow it to cool completely and then cut it into equal squares. Freeze the cake squares for at least 2 hours or up to 2 months! When you're ready to coat them, take them out of the freezer and begin dipping and rolling. No need to defrost.
Frosting versus Dipping
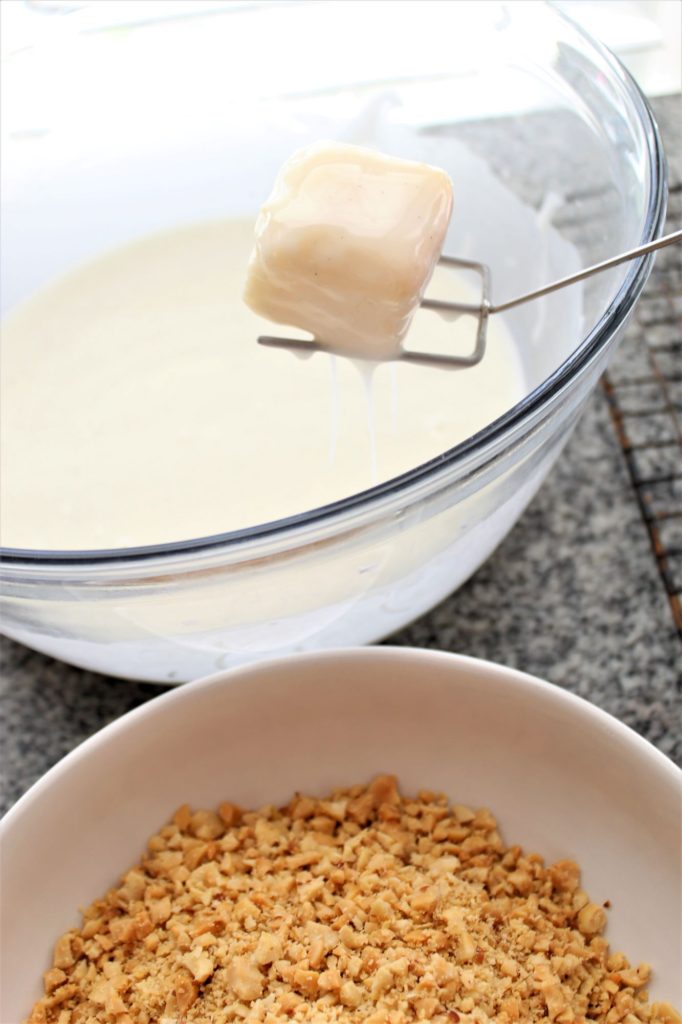
In my search for the ultimate peanut cake recipe, I found most of them made a frosting that would be spread all over the cake squares. Don't you think it would be super messy to frost all sides of a tiny square of cake you're holding? I certainly do.
So for this recipe, we're making a glaze and not a frosting. Whisk together the glaze ingredients, consisting of powdered sugar, milk, and vanilla extract. It will be very thin so dipping the frozen cake squares in the glaze will be easy. I use a dipping fork, such as this one here. But a regular dinner fork, chopsticks, or even a wooden skewer will also work.
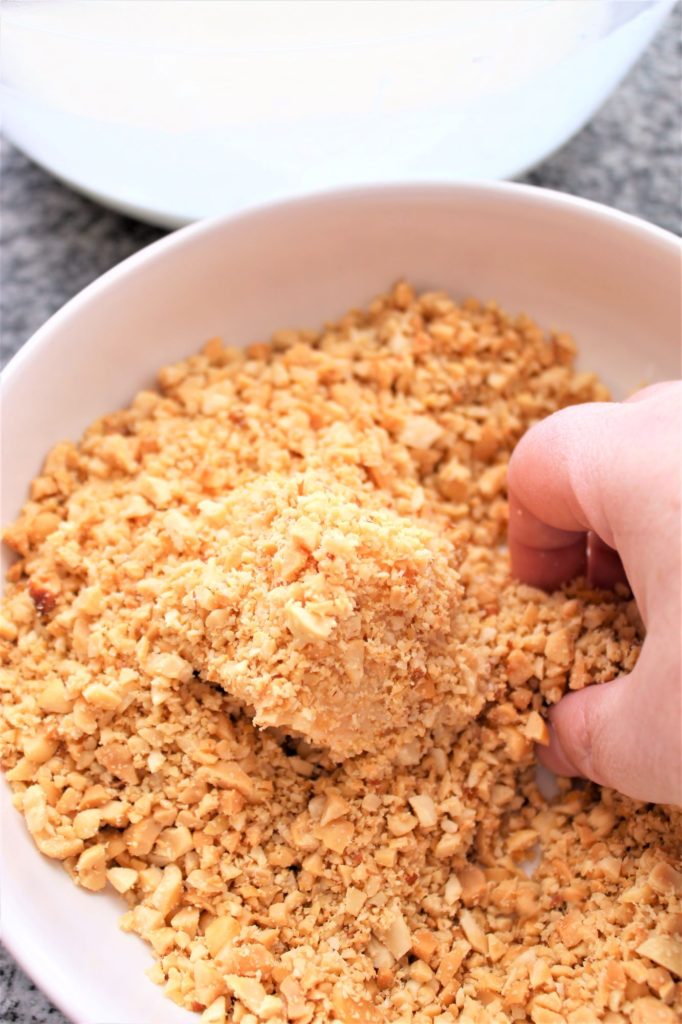
Rolling in Peanuts
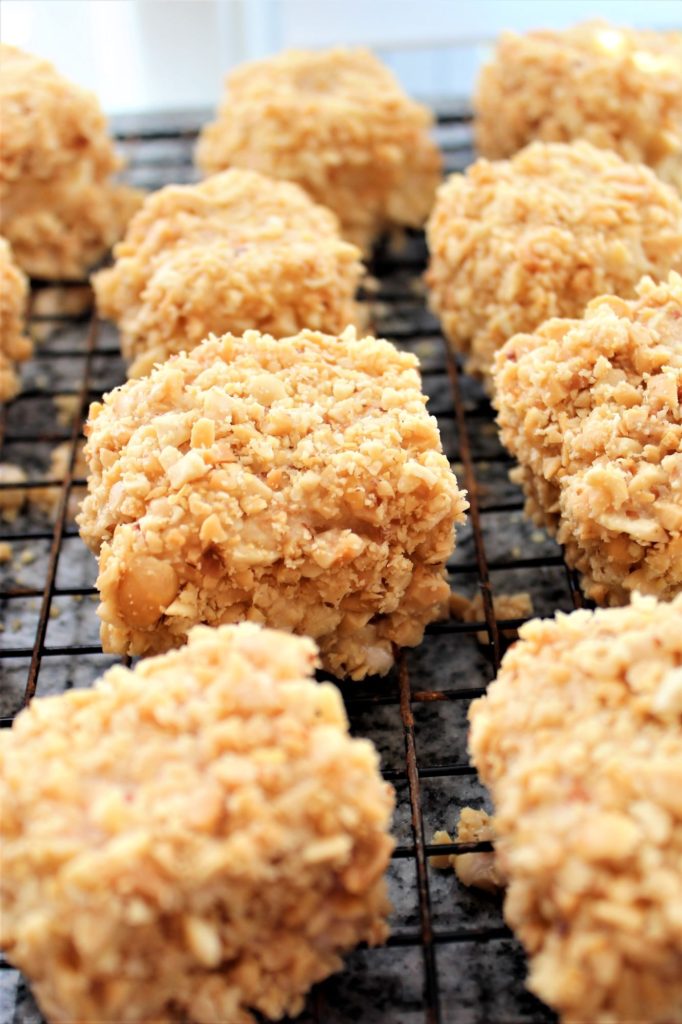
Last, but certainly not least, roll the cake squares in chopped salted peanuts. Lay the freshly dipped cake square in the bed of peanuts. Use your hands to roll it around and gently press the peanuts into the sides of the cake. I like to chop my peanuts pretty fine so there's an even coverage of peanuts on the cake.
If you're wanting something salty and sweet this Christmas season, give these gluten free peanut squares a try. I bet you can't eat just one!
Gluten Free Peanut Squares
Ingredients
- 4 large eggs, at room temperature
- 1¾ cups (350 g) granulated sugar
- 1 teaspoon vanilla extract
- 1¾ cups (245 g) Kim's gluten free flour blend (store bought blend can be substituted, but has not been tested)
- 3 teaspoon baking powder
- ½ teaspoon kosher salt
- 1¼ cups (300 ml) buttermilk or whole milk
- ¼ cup (57 g) butter, melted
Glaze
- 5 cups (625 g) powdered sugar
- ⅔ cup (160 ml) milk
- 2 teaspoon vanilla extract
- ⅛ teaspoon salt
Finish
- 6 cups (about 2 16-oz cans) salted peanuts, finely chopped
Instructions
Make the Cake
- Preheat the oven to 350° F. Combine the flour, baking powder, and salt in a medium bowl and set aside.
- In a large bowl, whisk eggs, sugar, and vanilla until thick and pale-colored, 4 minutes. Add flour mixture to the egg mixture. Beat on low just until combined. Add buttermilk or milk and butter and mix to combine.
- Pour batter into a parchment-lined 9 by 13-inch baking pan and bake for 30-35 minutes, or until a toothpick inserted into the center comes out clean. Cool on a wire rack, then cut into bite-sized squares, about 2 inches in diameter. Freeze squares of cake on parchment-lined baking sheet, covered with plastic wrap, until firm, about 2 hours and up to 2 months (if freezing for longer storage, wrap in foil after plastic wrap).
Make the Glaze and Dip
- Whisk all glaze ingredients together in a large bowl until very thin and runny.
- Using a dipping fork, dinner fork, chopsticks, or skewer, dip cake squares completely in glaze and tap on side of bowl to remove excess.
- Immediately roll dipped cake squares in chopped peanuts and place on wire rack to set.


Leave a Reply