No need to turn on the oven to make this gluten free no bake cheesecake, a smooth and creamy cheesecake that's perfect for when it's too hot to handle!
I remember when I was a young teen, or maybe a little older, my mom would buy those packages of no bake cheesecakes from the grocery store. Do you remember those? The ones in the box that I think were made by Jell-O? You'd add a couple things to them, but otherwise they came with everything needed, including the graham cracker crumbs.
There's nothing quite like a really great piece of cheesecake, though. That is, traditional (baked) cheesecake. Especially my gluten free white chocolate raspberry cheesecake. It's my absolute favorite cheesecake EVER, and it's been requested many times by many people because they all love it, too.
But cheesecakes can take a long time to bake. And who wants that when it's 1000 degrees outside? Lately I've been searching for any way I can make anything without turning on my oven. Our poor AC can't take the oven because it has to work extra hard to recover.
Enter this gluten free no bake cheesecake. It's smooth and creamy, just like you'd want from a cheesecake, but you don't have to turn your oven on at all. Not even for the crust! And it has a lighter texture than a normal cheesecake, which we all need these days when the heat is melting our faces off.
What You'll Need to Make Gluten Free No Bake Cheesecake
Here's what you'll need to make this cheesecake:
- Gluten free graham cracker crumbs--you can either make your own (here) or use store bought
- Butter--to bind with the crumbs for the crust
- Pecans--help add extra crunch and flavor to the crust
- Brown sugar--for the crust
- Salt
- Cream cheese
- Sour cream
- Sweetened condensed milk
- Sugar
- Vanilla extract or vanilla bean
- Whipping cream
The Crust
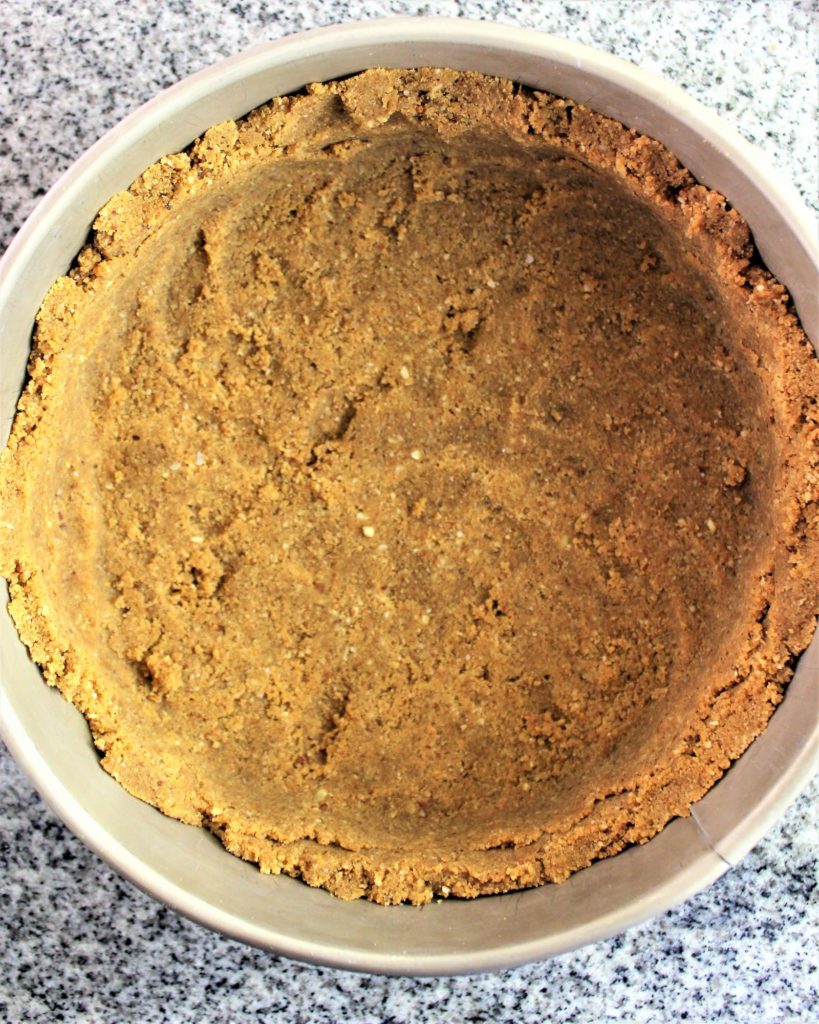
The crust for this no bake cheesecake isn't just your average graham cracker crust. It has pecans mixed in for extra crunch, and brown sugar for a deeper "baked" flavor without the baking.
In a food processor, pulse the gluten free graham crackers into crumbs. Add pecans, brown sugar, and salt and pulse to combine. With the processor running, slowly drizzle in the melted butter until a wet sand-like texture forms.
Press this into the bottom and up the sides of a 9-inch springform pan (affiliate link). I use the bottom of a glass to really press hard so the crust will stay together when the cheesecake is sliced (this is important as this isn't being baked). Freeze the crust while you're making the filling.
The Filling
This filling really mimics the flavor and texture of a real (baked) cheesecake without ever turning on the oven. It's so easy to whip up, I guarantee you'll be making this again and again! And you can top it with different flavors to create a totally different cheesecake every time.
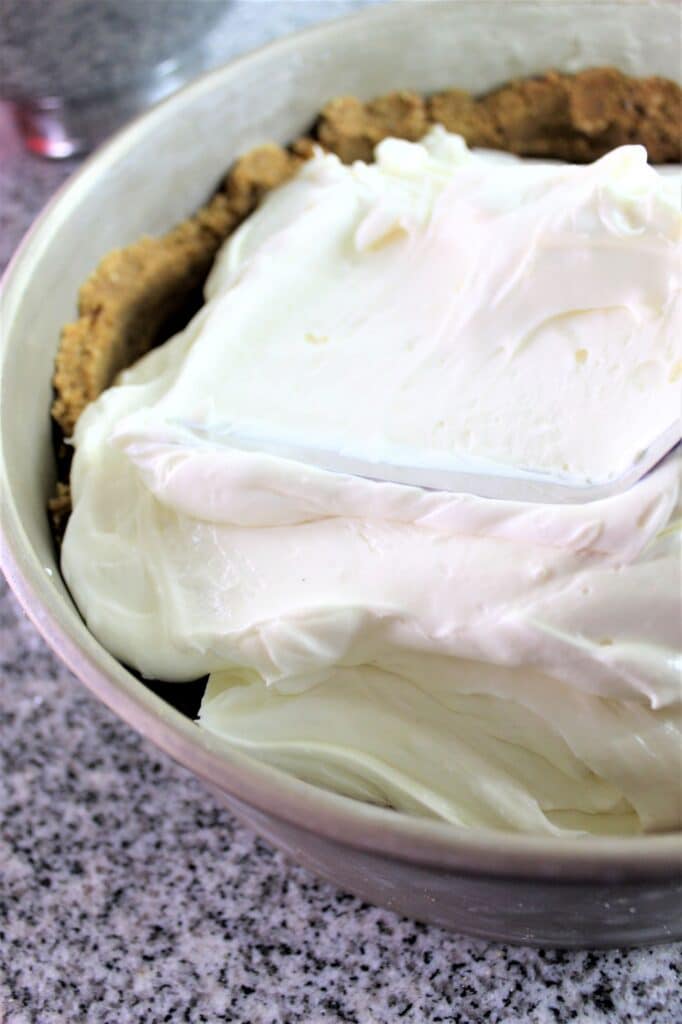
First, whip the heavy cream in the bowl of a stand mixer until stiff peaks form, and then transfer it to a small bowl to add in later. Using the same mixer bowl, beat the cream cheese until smooth. Scrape down the sides and add the sugar and beat until creamy and smooth.
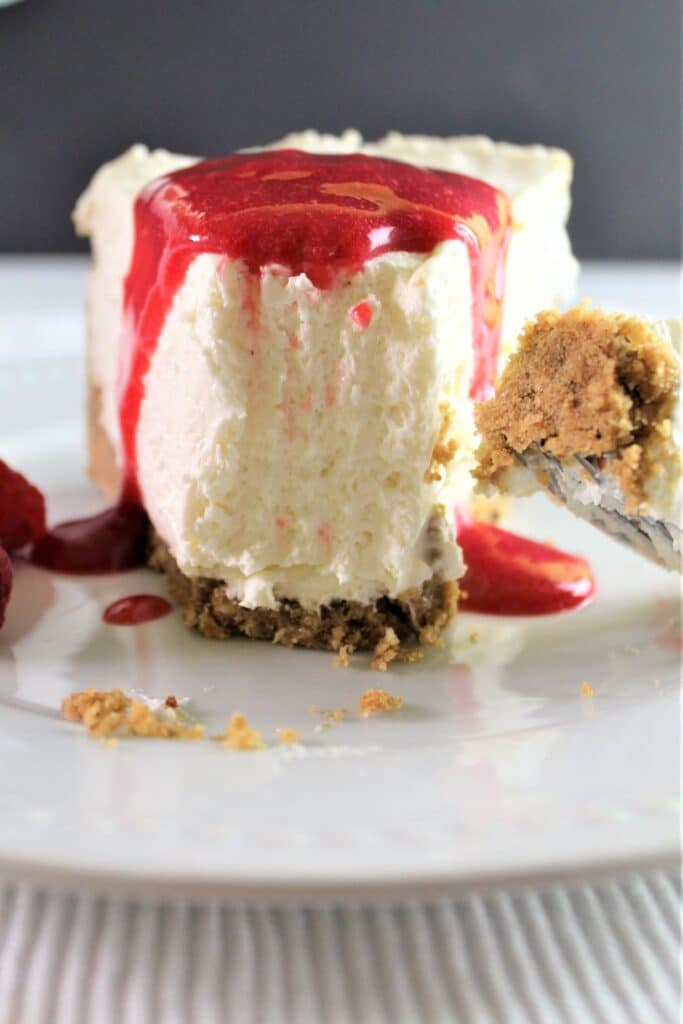
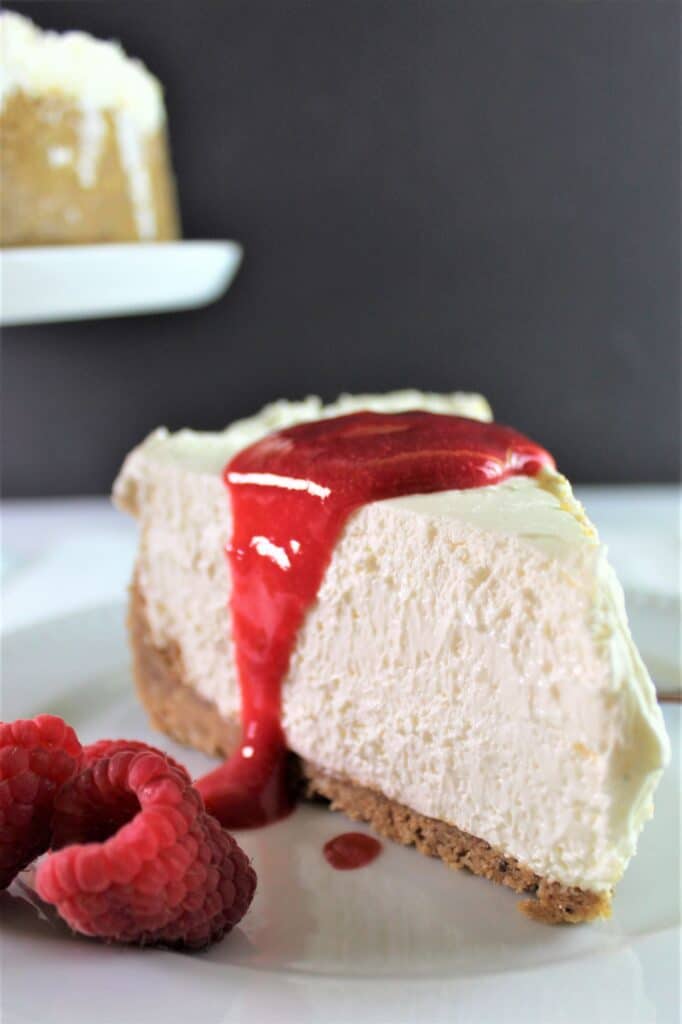
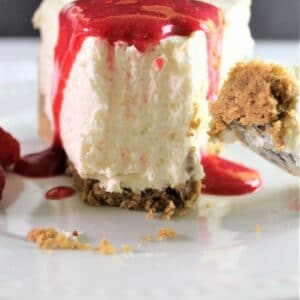
Add the sweetened condensed milk, sour cream, and vanilla and mix until combined. Fold in the whipped cream. Pour the filling into the chilled crust and smooth the top. Cover and refrigerate overnight for best results. Garnish with whipped cream, berries, pie filling, or a sauce (such as my raspberry sauce here).
How Long Will This Cheesecake Last?
This cheesecake lasted in my fridge for about five days, well covered. If you want to keep it any longer than that, you can freeze it by wrapping it well in plastic wrap and then foil. For best results, slice it into individual slices before freezing in the pan. That way you can thaw one slice at a time if you only need a treat for yourself 😋
I Don't Have a Food Processor
That's okay! You can still make the crust. Just crush the graham crackers in a large ziptop baggie (get your aggression out by smacking them with a rolling pin). Make sure to finely chop the pecans before adding them to the crumbs in a large bowl, followed by the brown sugar, salt, and melted butter.
Going through a heat wave right now? Don't turn your oven on! Just whip up this cool and creamy cheesecake and you'll be in cheesecake bliss in no time 🙂
Gluten Free No Bake Cheesecake
Equipment
- 9-inch springform pan
Ingredients
Crust
- 3¾ cups (320g ) graham cracker crumbs, homemade (or store bought)
- 1 cup (70g) pecans, toasted
- ½ cup plus 2 tablespoon (141g) butter, melted
- ½ cup (100g) light brown sugar
- ½ teaspoon kosher salt
FILLING
- 2 lbs (4 8-oz packages or 904g) cream cheese, at room temperature
- ⅓ cup (80g) sour cream, at room temperature
- ¼ cup (76ml) sweetened condensed milk
- ½ cup (100g) granulated sugar
- 1 tablespoon vanilla extract or seeds from one vanilla bean pod
- pinch of salt
- ⅔ cup (160ml) whipping cream, cold
GARNISH
- raspberry sauce (or topping of choice)
Instructions
MAKE THE CRUST
- In the bowl of a food processor, pulse the graham crackers until fine crumbs. Add the pecans, brown sugar, and salt and pulse again to combine well. Slowly drizzle in the melted butter while running the processor on low.
- Dump the crust ingredients into the springform pan and press the crust up the side and into the bottom of the pan with your hands. Then go back and press firmly with an object, such as the bottom of a drinking glass, on the sides and bottom to really compact the crust together.
- Put the crust in the freezer while you make the filling.
MAKE THE FILLING
- In the bowl of a stand mixer, whip the heavy cream using the whisk attachment until stiff peaks form. Transfer this to a small bowl and set aside until needed.
- In the same bowl with the same whisk attachment, whip the cream cheese until soft and fluffy. Add the sugar and continue whipping to incorporate well, about 2-3 minutes. Add the sour cream, sweetened condensed milk, vanilla, and pinch of salt and blend well, about 1-2 minutes.
- Gently fold the whipped cream into the filling just until combined. Pour into the crust and smooth the top with an offset spatula. Cover and refrigerate overnight (for best results and easier slicing).
- Slice and garnish with topping of choice.
Adapted from Preppy Kitchen's No Bake Cheesecake recipe


Leave a Reply