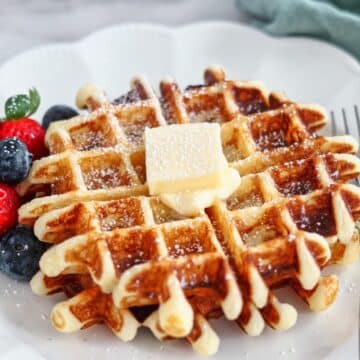
These Gluten Free Buttermilk Waffles are so crisp on the outside, yet light and fluffy on the inside and can be made on weekends OR weekdays!

UPDATE: Gluten free Belgian waffles were originally posted on March 20, 2020 and have been updated with an entirely new and improved recipe, all new pictures, and a new video.
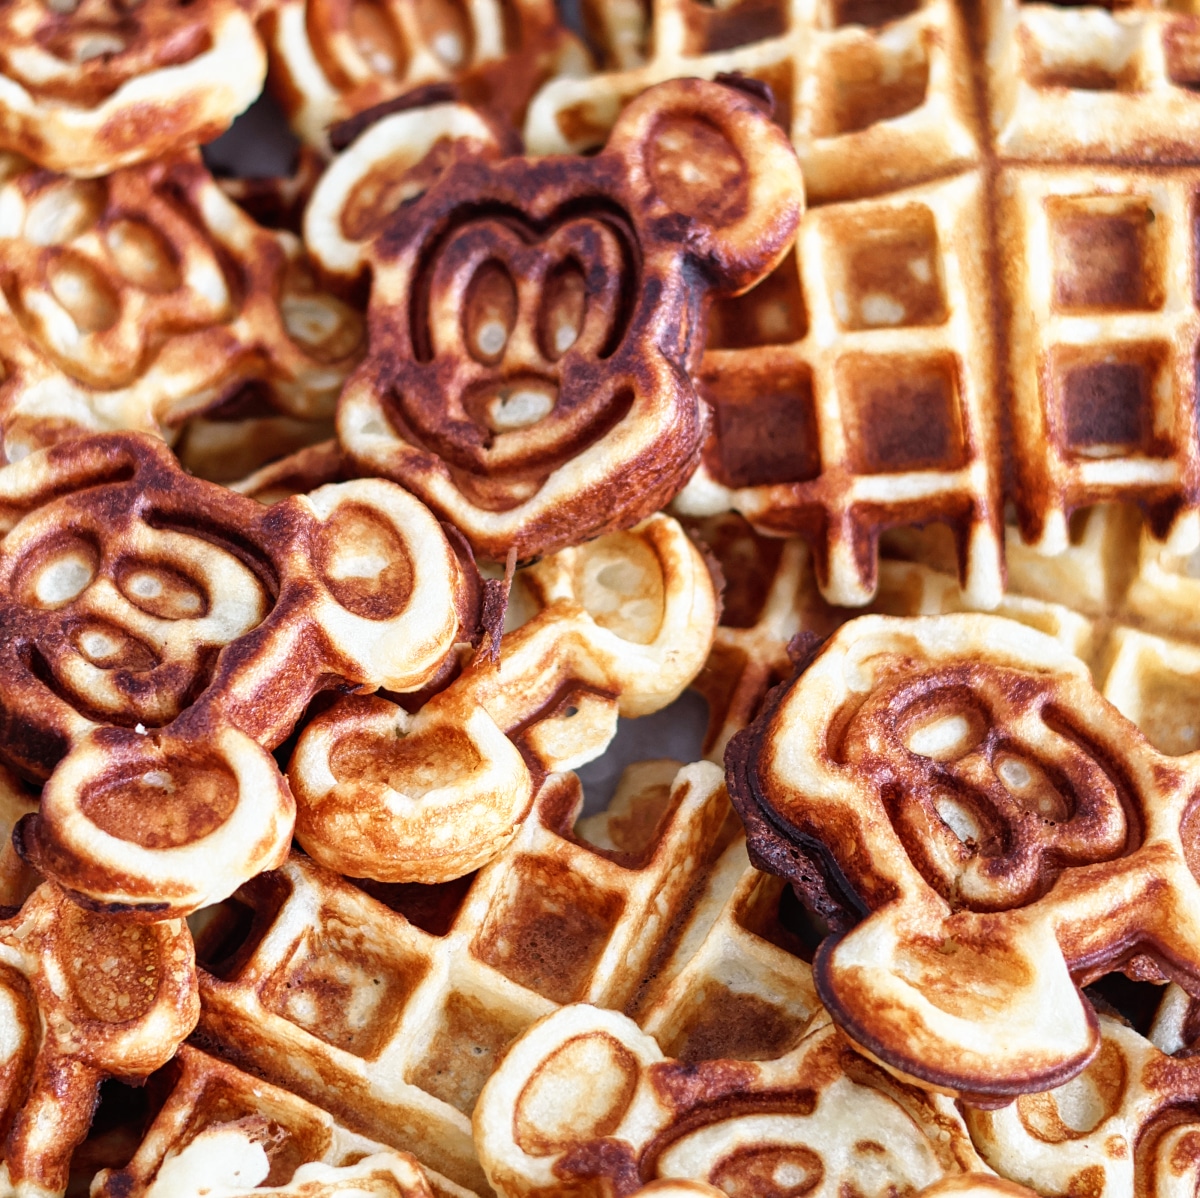
Every time we go to Disney World, I order Mickey waffles 4 out of 5 times for breakfast. Why? Because when you're celiac and you're offered something like waffles, you don't turn them down. There is nowhere in my city that offers gluten free waffles, unless maybe they're the frozen ones, like Van's (and even that's a stretch).
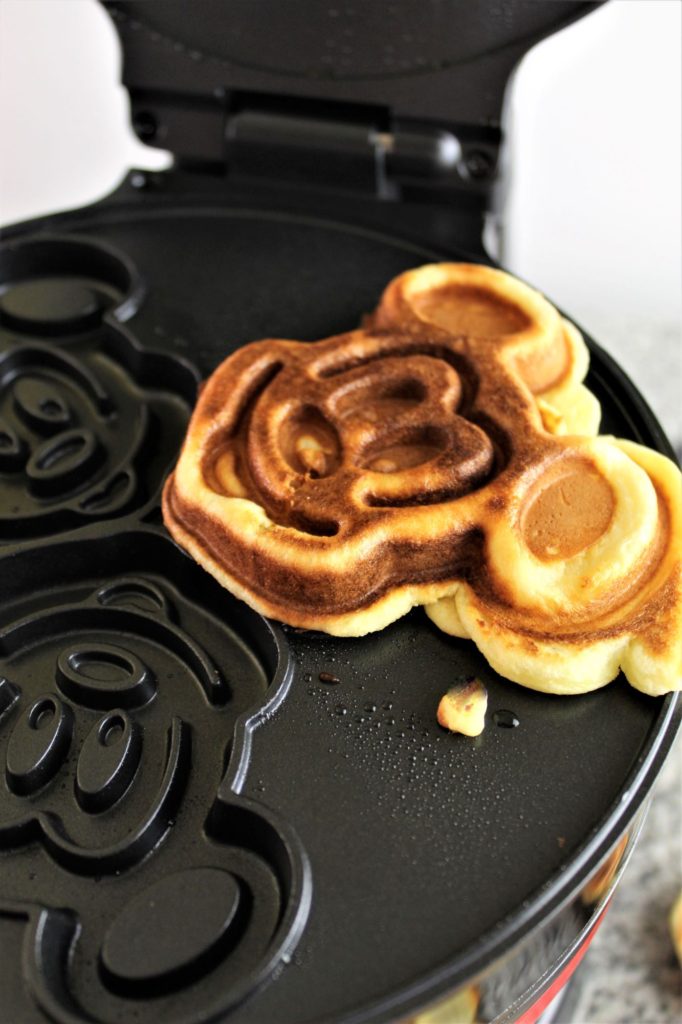
So while I love pretty much all breakfast food, the Mickey waffles at Disney are so darn good that it's really, really hard to pass them up. And when I get home, I can make the next best thing with this Mickey waffle iron.
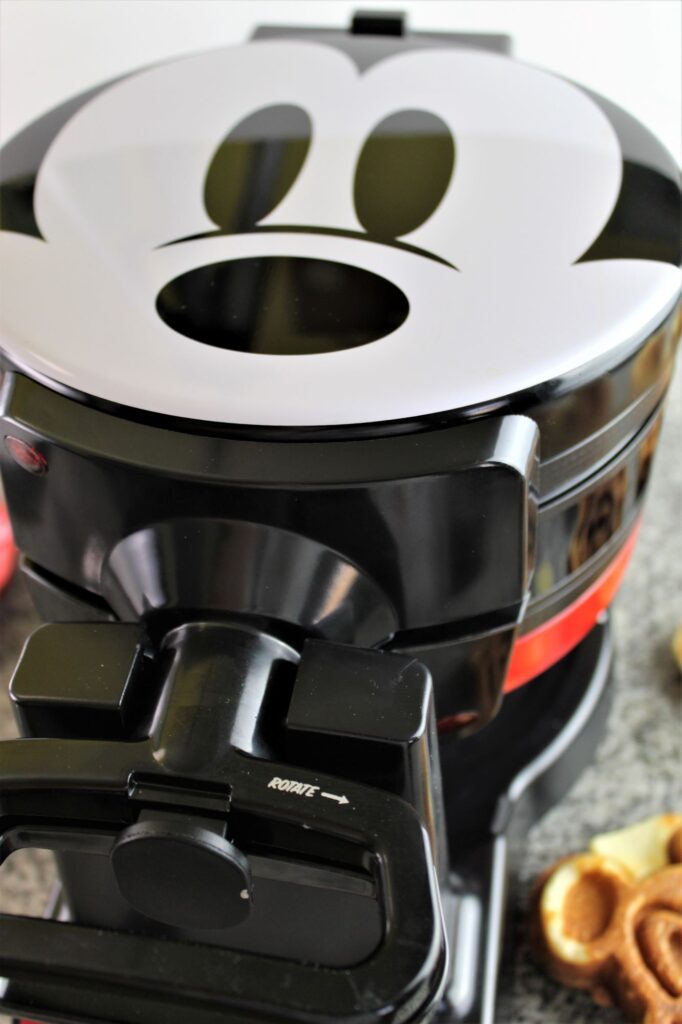
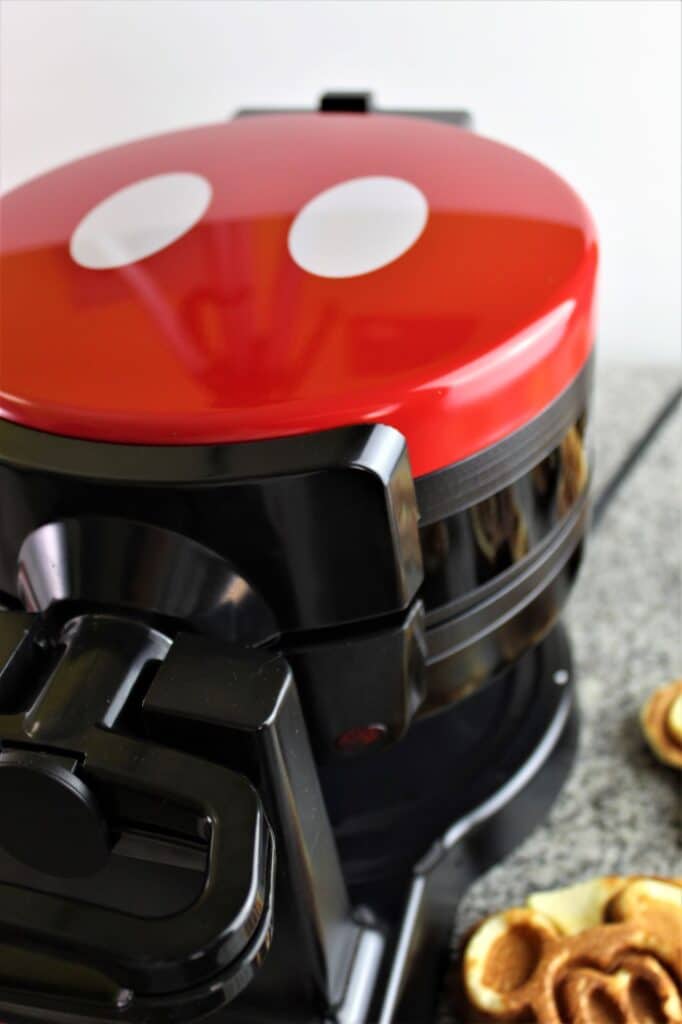
It's a great waffle iron (a bit pricey) and makes the cutest Mickey waffles (not quite as thick as the Disney version). But if you're not as much of a Disney fan as I am, or just want larger waffles and a less expensive waffle iron, here's another waffle iron I have that might suit your needs. It makes nice and deep (thick) waffles that are crisp on the outside and fluffy on the inside.
Whatever waffle iron you decide to use doesn't really matter because these waffles are INSANELY great and you won't care what shape they're in once you bite into them! The best thing about them (other than the flavor and texture)??? NO WHIPPING EGG WHITES!! And no need to whip egg whites! You still get that incredibly fluffy texture without the extra step of separating and beating egg whites. That's a real bonus if I do say so myself.
what you'll need to make buttermilk waffles
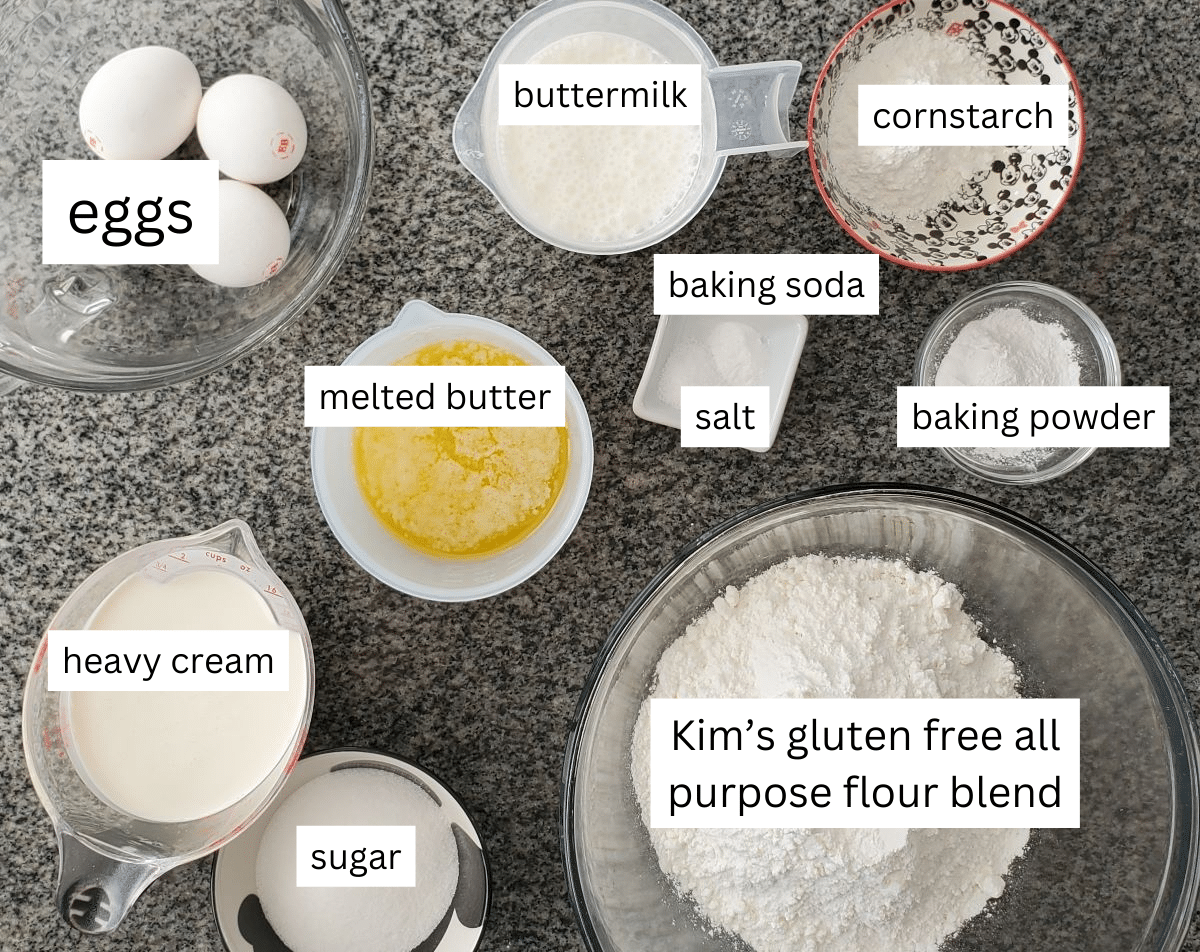
- Eggs - no separation of eggs required!
- Kim's gluten free flour blend - a store bought blend may be substituted, but has not been tested.
- Butter - melted and cooled
- Buttermilk - full-fat buttermilk is best, but you can sub with low fat if necessary. Note that this may change the consistency of your batter as full-fat buttermilk is quite thick.
- Heavy cream - this is an unusual addition to waffle batter, but is necessary to get the crisp texture of these waffles.
how to make gluten free waffles
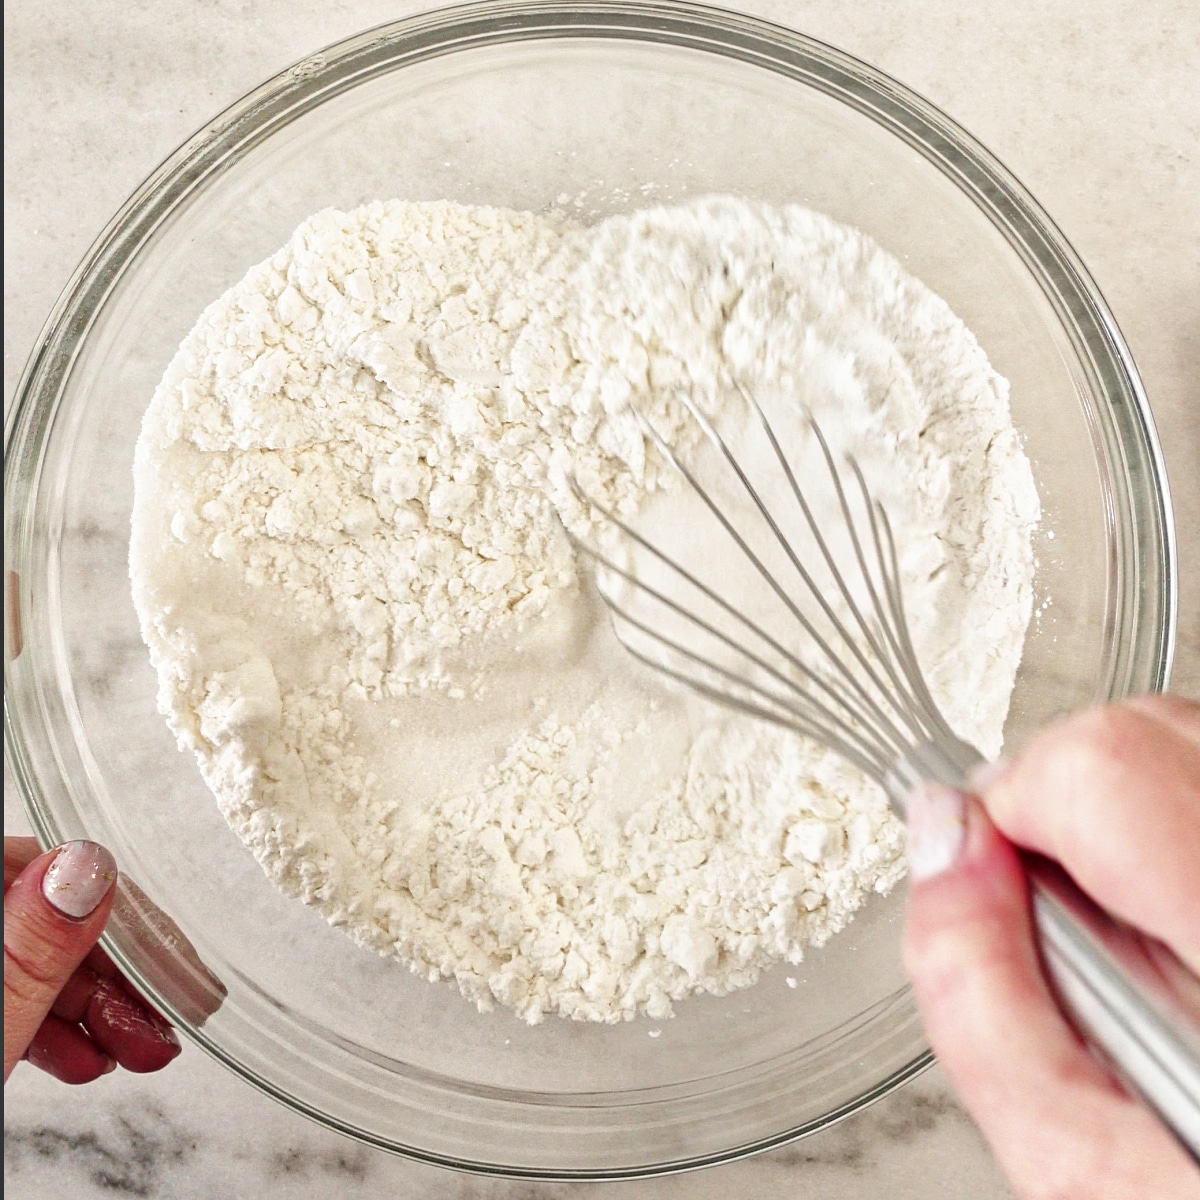
Whisk together the dry ingredients in a large bowl. Set aside.
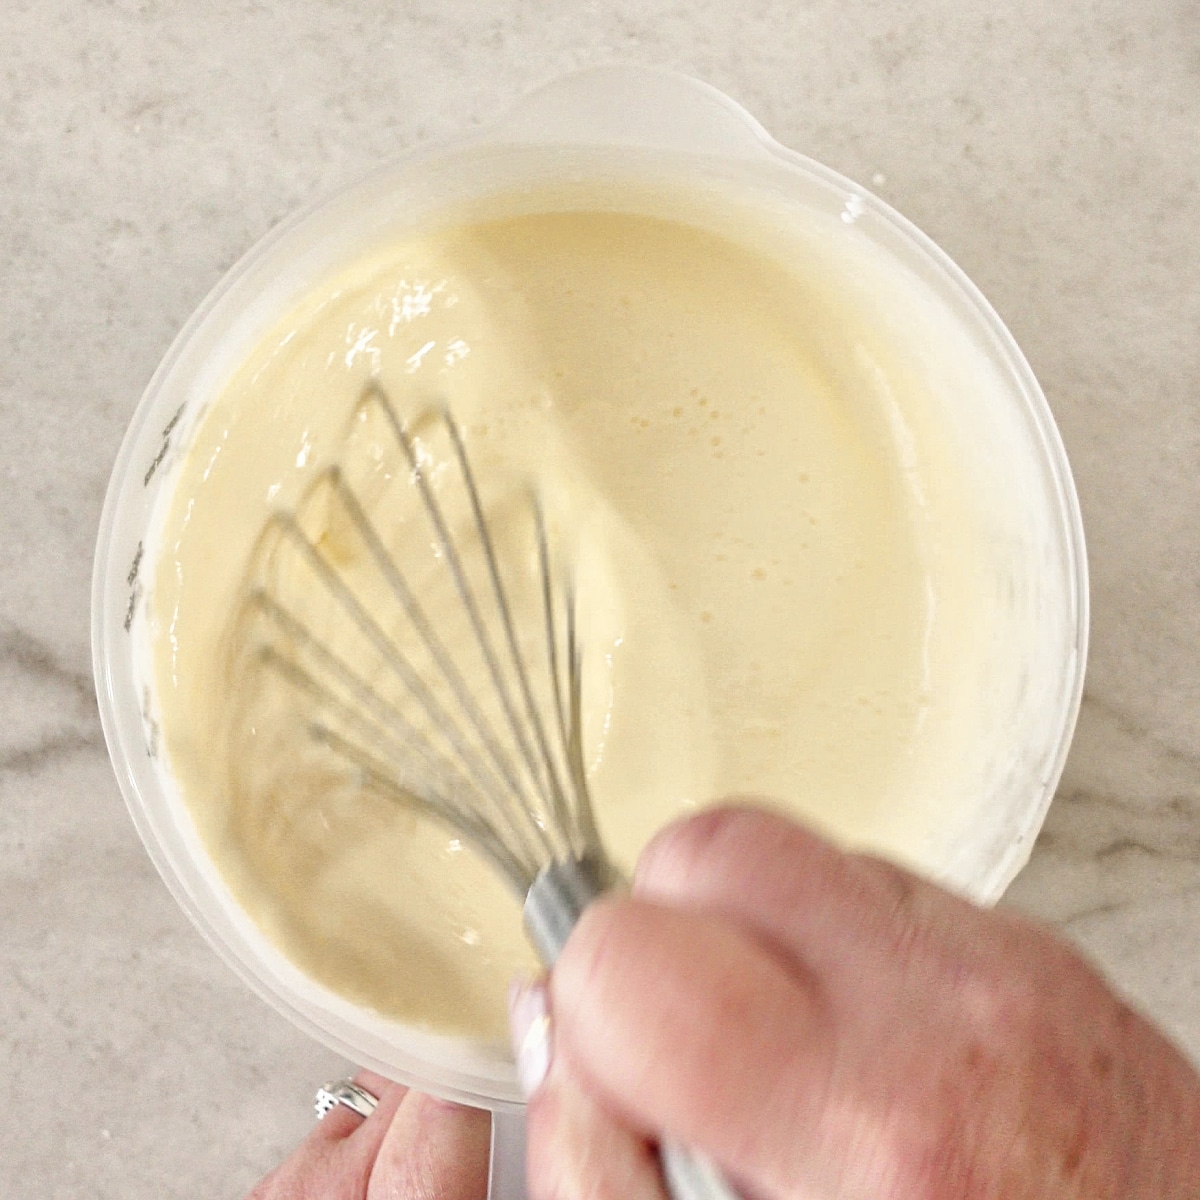
Whisk together the wet ingredients in a large measuring cup or medium bowl.
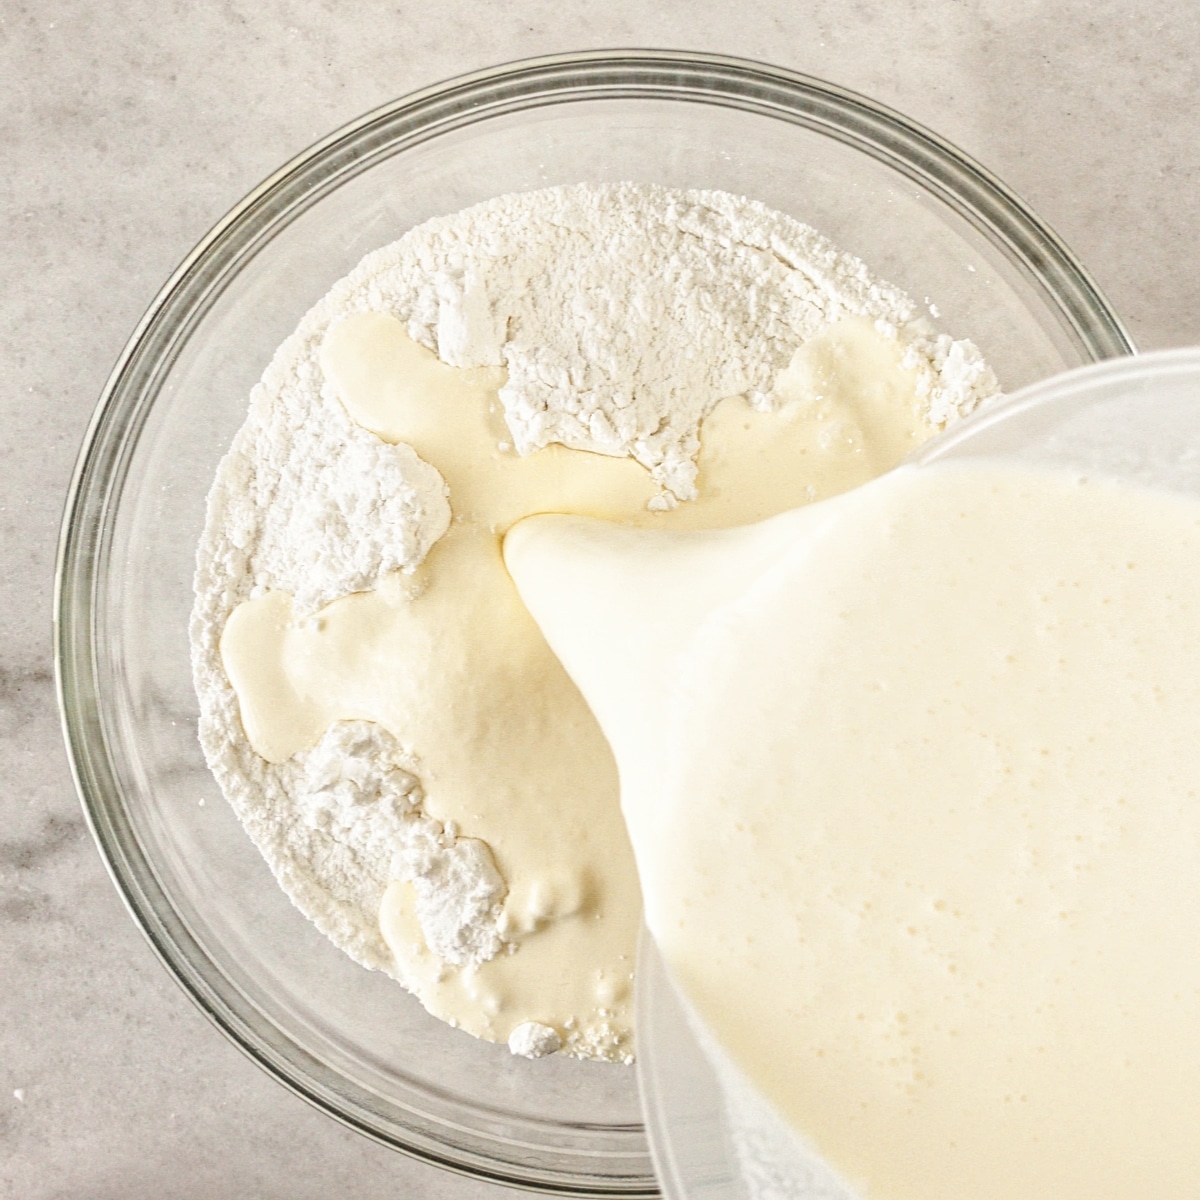
Pour the wet mixture into the dry ingredients and whisk until smooth. A few lumps remaining is okay.
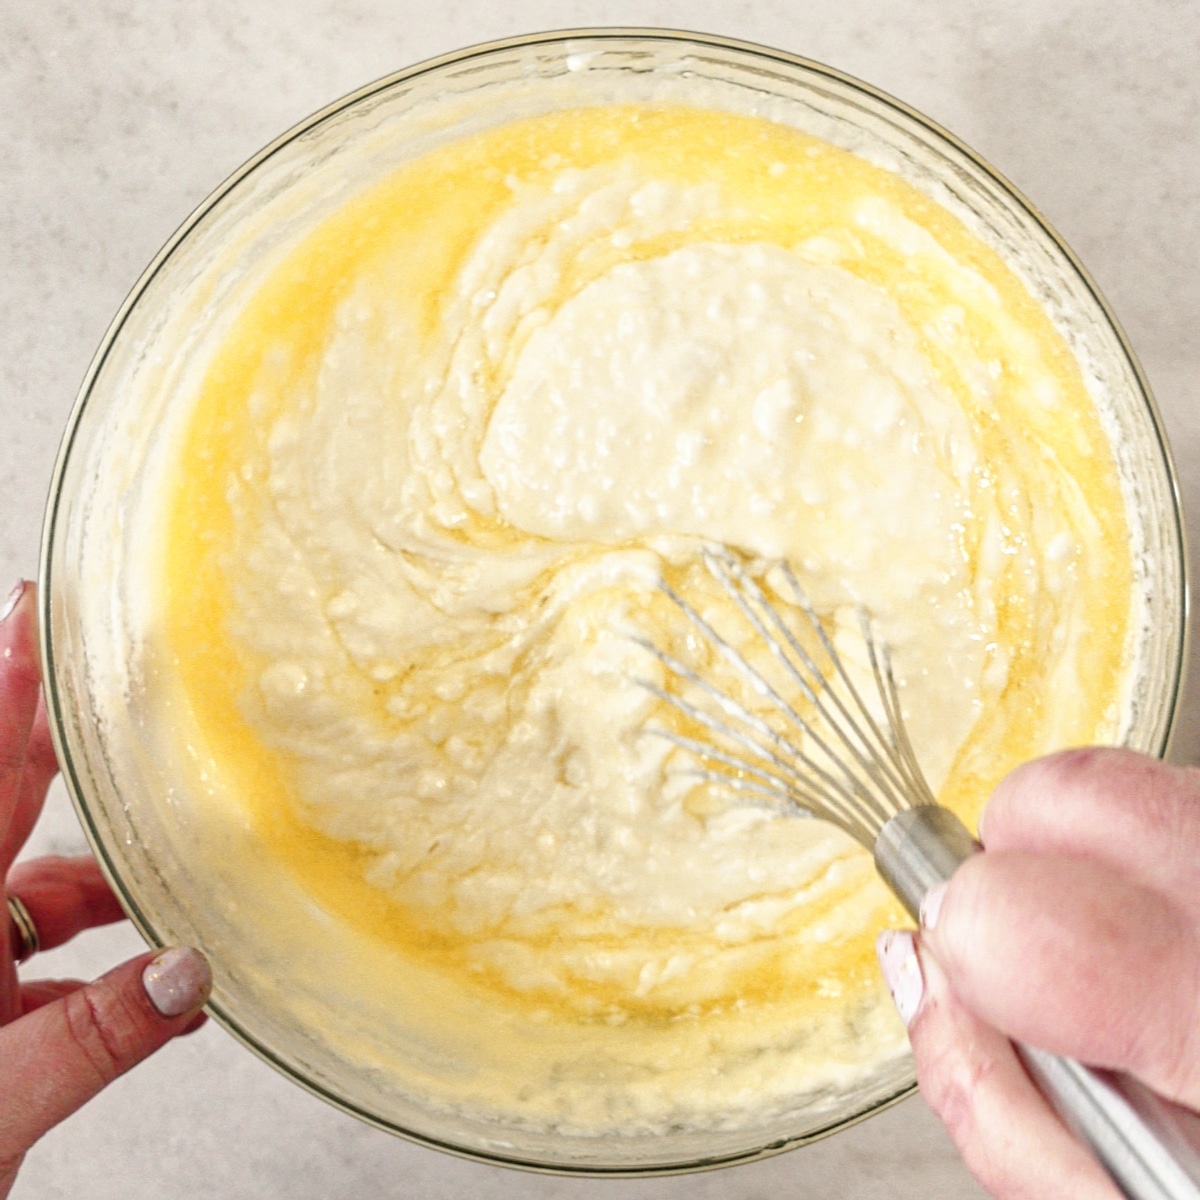
Gently whisk or fold the melted butter into waffle batter. Cover and let batter sit for 20-25 minutes.
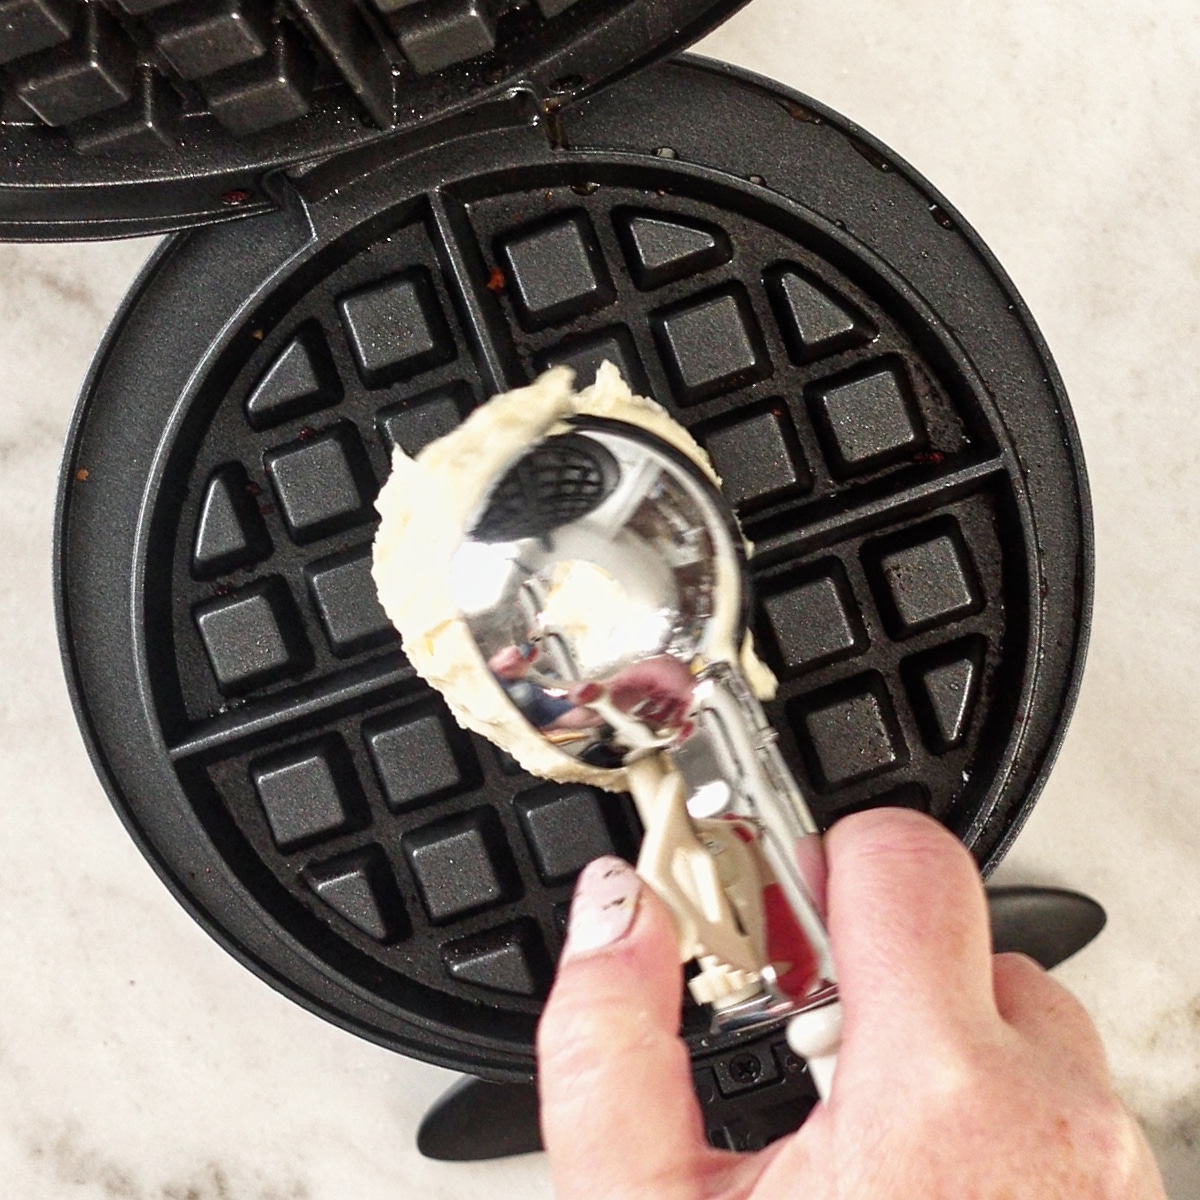
Scoop batter onto waffle iron and close the lid. Bake according to your waffle iron manufacturer's instructions.
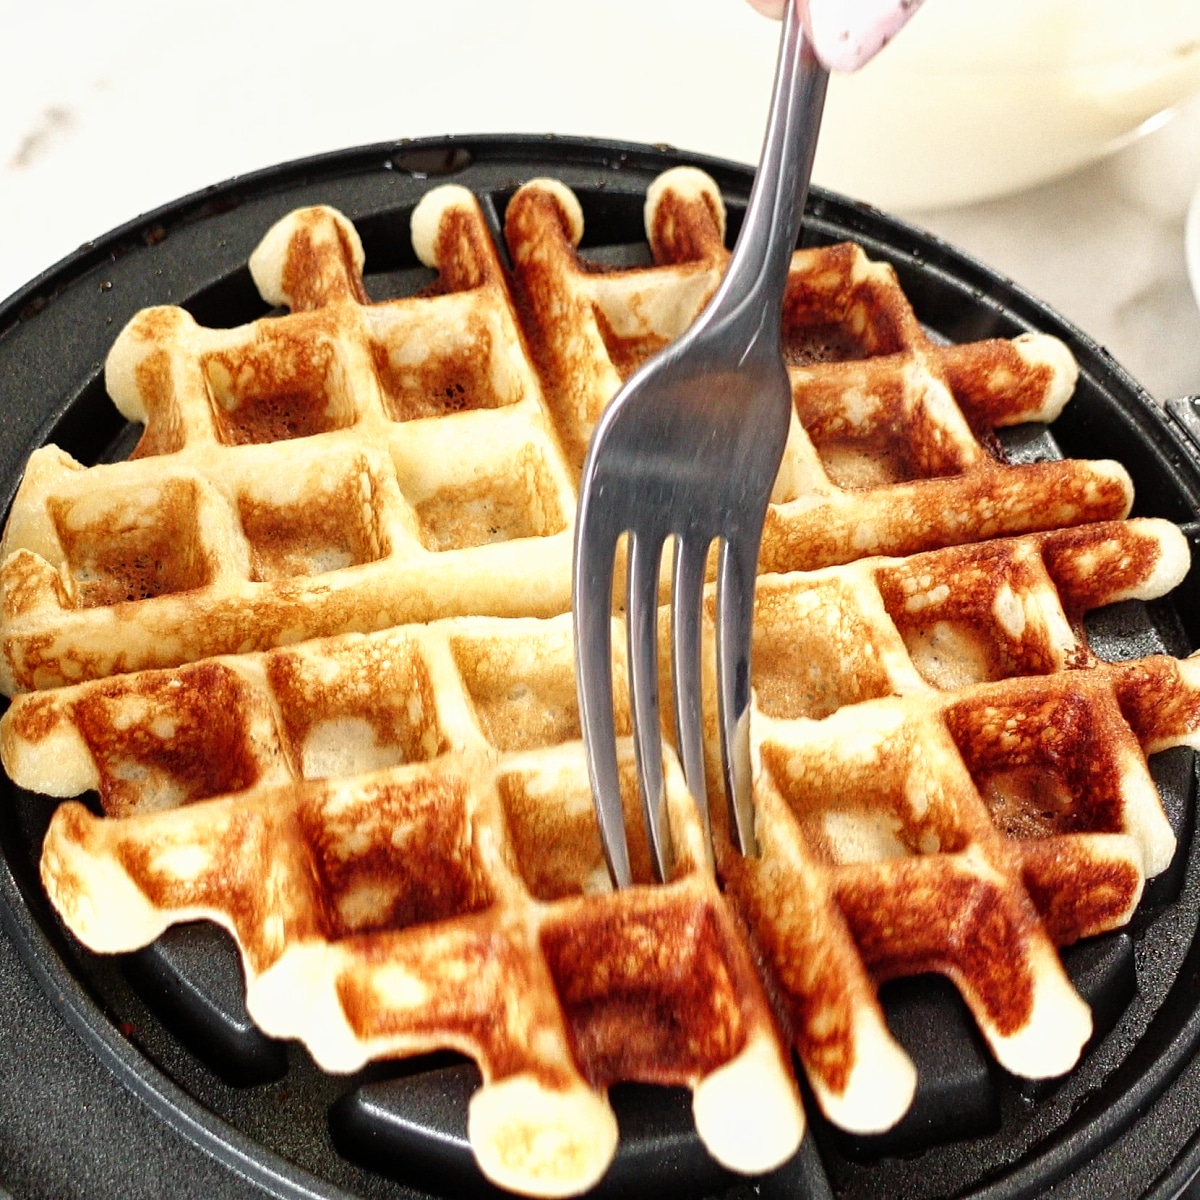
Remove each waffle from waffle iron and place on a wire rack set over a baking sheet. To keep warm and crisp, place waffles in a 200-degree oven until ready to serve.
gluten free buttermilk waffles FAQs
No, it is not necessary to grease a waffle iron. Most recipes tell you to spray it with nonstick spray or brush with melted butter prior to using, but if your waffle iron is nonstick, there is enough butter in the batter that will help the waffle release. Also, a non-greased waffle iron actually makes the waffles crispier.
You can make your own! There are a few different methods, but in my opinion the best method is to add ½ cup milk to one cup of yogurt or sour cream and stir. You may need to add a little more milk if your yogurt is Greek style.
Yes, these are a great make-ahead breakfast option! They will last in the refrigerator for up to 3 days, but the best way to store them is in the freezer. Flash freeze first on a parchment-lined baking sheet for one hour, and then pop them into a ziptop bag and freeze for up to 3 months. Reheat in a toaster or toaster oven until hot and crisp!
more gluten free breakfast recipes
- homemade gluten free bagels
- gluten free orange rolls
- gluten free sourdough cinnamon rolls
- fluffy gluten free buttermilk pancakes
- gluten free quiche Lorraine
- gluten free bakery style blueberry muffins
- fluffy gluten free yeast donuts
- ultimate gluten free cinnamon rolls
This made-from-scratch gluten free buttermilk waffles recipe is the ONLY waffle recipe you'll need! They're so easy to make and are truly the fluffiest and crispiest waffles ever.
Gluten Free Buttermilk Waffles
Ingredients
- 1¾ cups (245g) Kim's gluten free flour blend (a store bought blend may be substituted, but hasn't been tested)
- 2¼ teaspoon baking powder
- ¼ teaspoon baking soda
- 2 tbsp (20g) cornstarch
- 4 tbsp (50g) granulated sugar
- ½ teaspoon salt
- 3 large eggs, at room temperature
- 1 cup (240g) buttermilk (dairy-free homemade buttermilk can be substituted)
- 1 cup (240g) heavy cream (a dairy-free cream may be substituted, but hasn't been tested)
- ½ cup (113g) butter, melted and cooled slightly (a dairy-free butter may be substituted)
Instructions
- In a large mixing bowl, whisk together the flour, baking powder, baking soda, cornstarch, sugar, and salt. In a medium bowl, whisk together the eggs, buttermilk, and heavy cream until combined.
- Pour the wet ingredients into the dry and whisk until a thick batter forms. Gently whisk in the melted butter just until combined.
- Let batter rest for 20 minutes. Heat waffle iron.
- When ready, dollop large spoonfuls into waffle impressions and close the lid. Bake for recommended time per waffle iron instructions.
- Remove waffles carefully from iron and place on a wire rack over a baking sheet. To keep warm and crisp, set waffles in a 200° F oven in one single layer while baking the rest of the waffles.
- To freeze, lay in a single layer on a parchment-lined baking sheet and freeze until solid. Place frozen waffles in a galllon ziptop bag and remove as much air as possible. To reheat, place in a toaster or toaster oven and heat until warmed through and crisp.
Carla Cox
Hi,
Love your AP flour recipe! I use it in all your recipes.
Everything has turned out wonderfully until the waffles. When I added the dry to the liquid and began mixing, it seized up. I added more milk to loosen it so I could add the egg whites. It was never smooth like pancake/waffle batter. I added an additional 1/2 cup of milk and still had to use a spoon and force the batter off the spoon into the waffle iron.
Any idea what I might I have done wrong?
Thanks for all your work putting these recipes together!
Kim
Oh no! I'm not sure what in the world might have happened. Possibly the ingredients were too cold? That sometimes happens to me when I'm making my pancake batter and everything isn't at room temperature.
Keeks
So so so SO GOOD!!! I have made these twice in the last few weeks - once with Kim's GF flour mix and once with Better Batter. They were both delicious waffles with a great texture - can't tell they're GF at all. Incidentally, I don't typically have buttermilk on hand so I subbed with a 1:1 combo of Greek yogurt and milk. So yummy and SO much better than any type of frozen waffle, ever.
Stacy
This recipe made the most delicious waffles I ever ate period gluten or gluten free. Just a question, can I leave the batte, batter in the fridge and if so for how long? I want to make like 4 waffles a day instead of all at once. Is this possible? If not I’ll just make all at once like I did this time. Thanks in advance.
Kim
I think it'll do okay for 3-4 days in the fridge, max 😊
Jen
Great recipe! No grittiness at all, and the flavor was just what you want in a waffle. They did take a long time to cook, maybe because the batter is pretty thick. We'll be making these again for sure!
Sara Kalt
Hooray! I’ve been searching for a from scratch waffle recipe since we went GF and this is it! Made your flour blend too - thanks so much! Added chocolate chips to make my kids happy. Delish!
Samantha Griffin
How can we turn these into pancakes instead?? Seems super yummy!!
Kim
They're so yummy! I just made them this morning, haha!
I actually have a pancake recipe that is so good, too! Here's the link for that: https://www.letthemeatgfcake.com/gluten-free-pancakes/ 🙂