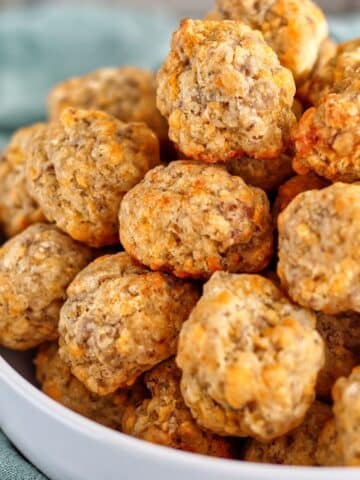
Move over, Thomas' English Muffins! We got tired of waiting for you to come up with a gluten free muffin, so we made one ourselves! These gluten free English muffins rival yours with all the nooks and crannies we've been missing 🙂
My husband grew up in Pennsylvania, which is a huge area for English muffins, specifically Thomas' English muffins. He couldn't stop oohing and ahhing when I made my own gluten free version and served them for breakfast one morning. He said they were "amazing!!"
Then he went on to state "you should contact Thomas' and tell them you have a gluten free version of their English muffins they should sell." Haha! I love how much he supports me in everything I do! (On a side note, he does not need to eat gluten free, just loves what I make gf so he eats it willingly)!
What Are English Muffins?
If you've been living under a rock or aren't in America, you don't know what an English muffin is. But where in the world did they come from? Samuel Thomas, an Englishman who emigrated to the US many years ago, opened a bakery. He invented "toaster crumpets," which were like regular English crumpets but pre-cut (fork split) so that they could pull apart easily.
The toaster crumpets were a huge hit and Thomas' English Muffins were born! Many people have made homemade versions of these, but the Thomas' recipe is closely guarded.
Big name commercial bakeries rarely devote time to making gluten free versions of their products (maybe one day they will-fingers crossed), so we've got to come up with our own plan. And these gluten free English muffins are just perfect, and technically could also be called Thomas' English Muffins (my last name is Thomas)!
My Favorite Tools for Making English Muffins
Neither of these are absolutely necessary in making gluten free English muffins. However, I do feel they make things a lot easier in creating the best muffins possible.
- An electric skillet. I've used an electric skillet for many years, just like my mom, mainly for braising meats. For the sake of English muffins, it works so well because it almost acts like an oven and skillet all in one. It's absolutely perfect for making English muffins. However, if you don't have an electric skillet, you can always use a skillet that has a tight-fitting lid. I personally like the fact that you can know the exact temperature of what you're cooking with an electric skillet.
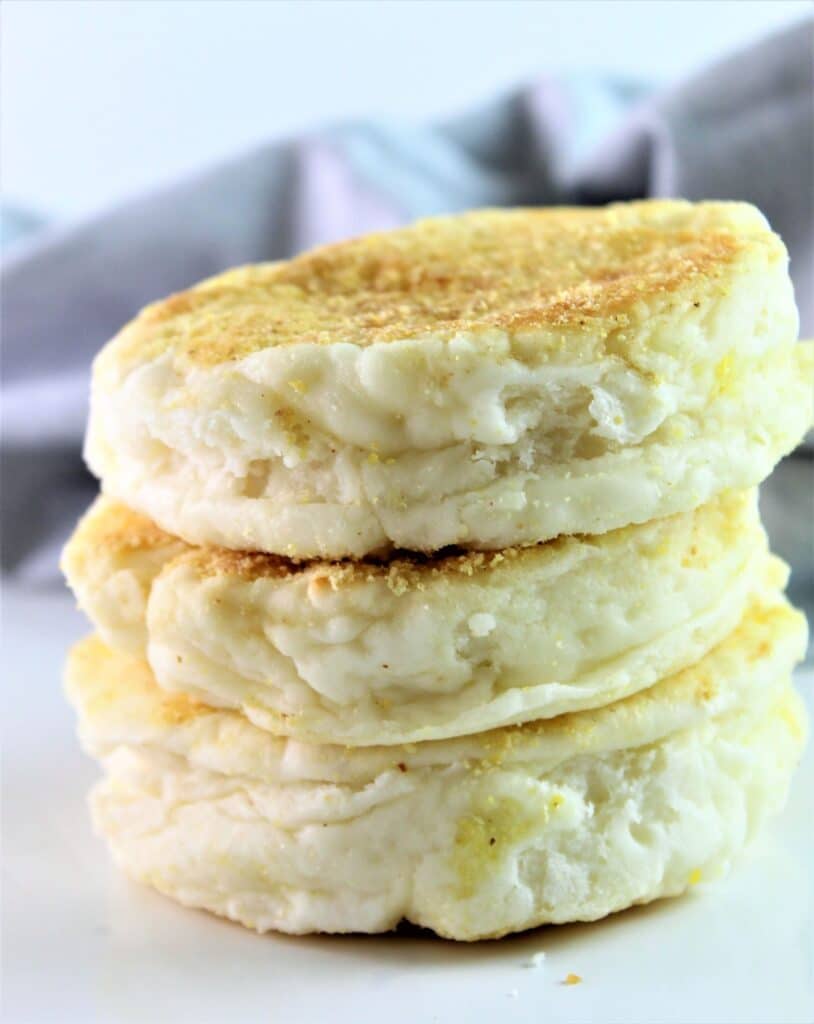
- English muffin rings. These rings help make your homemade gluten free English muffins neat and tidy and perfectly round. Of course, it doesn't really matter as long as they taste great. If you want nice and round muffins, I'd suggest getting these, though. They're cheap, and they're great for other uses as well, such as perfect pancakes or as an egg mold.
How To Make Gluten Free English Muffins
You really won't believe how incredibly easy it is to make these English muffins! There's no kneading of the dough after initial mixing, and there's no second rise. Take the dough straight from the fridge and scoop it into your skillet (electric or otherwise). In less than 20 minutes you'll have freshly "baked" English muffins!
Mix the dough in a stand mixer OR with a handheld mixer. This is such a loose high-hydration dough that it can even be mixed with a spoon by hand (you'll get a workout for sure). Let the dough rise in a warm-draft free area for two hours or until doubled in size. It will be very puffy and filled with holes. Refrigerate the dough for at least 4 hours.
Heat an electric skillet to 250 degrees F (or a skillet on your stove top over medium low heat). Melt a couple tablespoons of butter in skillet and place pre-greased muffin rings in skillet. Sprinkle bottoms with gluten free cornmeal and spoon dough into molds. Sprinkle tops with cornmeal. Cover with lid of electric skillet or tight-fitting lid and "bake" for about 7-8 minutes.
Remove cover, carefully flip rings and muffins over and "bake" for another 7-8 minutes. You can divide and add the other 1 tablespoon of butter over the tops of the muffins before you flip them if you'd like, but it's not necessary.
Remove the cover and carefully remove the rings from the muffins using tongs. They should slide right out if you sprayed them with cooking spray before baking. Replace lid and continue to "bake" for another couple of minutes.
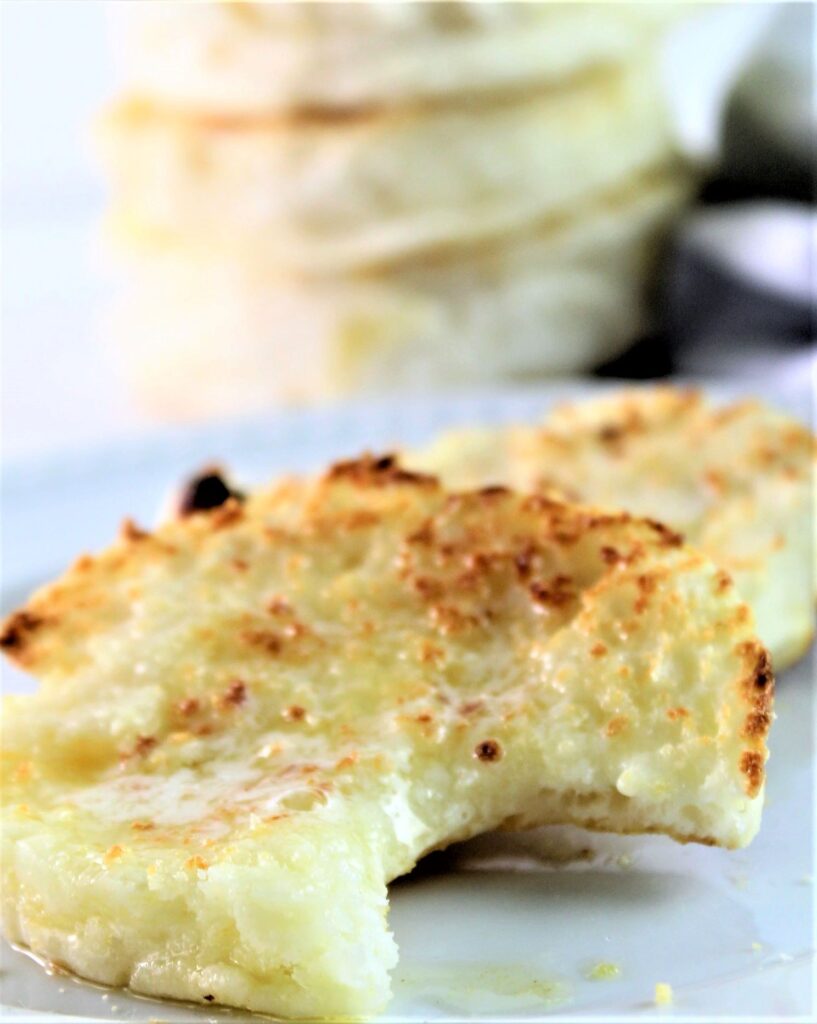
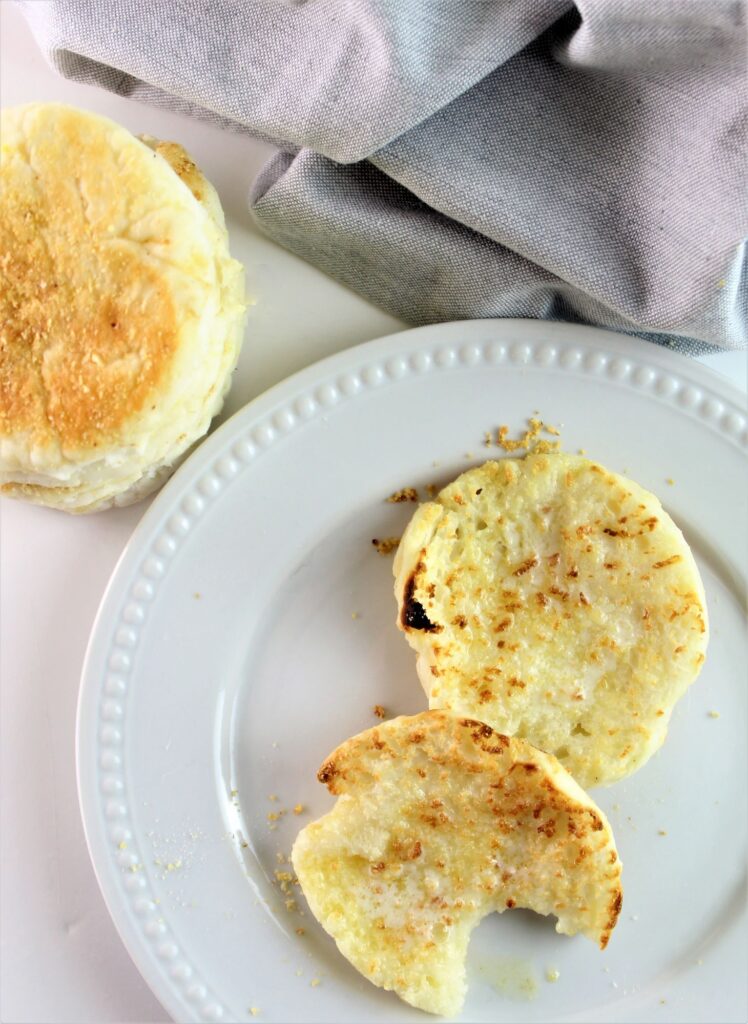
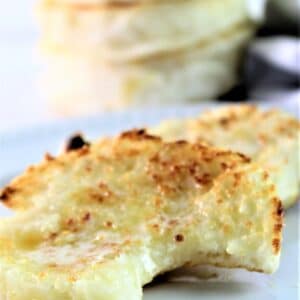
Make sure to fork split your gluten free English muffins so you'll get all those great nooks and crannies. That's the best part of an English muffin wouldn't you say? They're like little pockets for holding melted butter or anything else you wanna put on 'em 🙂
Gluten Free English Muffins
Ingredients
- 3¼ cups (455 g) Kim's gluten free bread flour blend
- 1 tbsp plus 1 teaspoon (16 g) granulated sugar
- 2 teaspoon kosher salt
- 2 teaspoon rapid rise (instant or bread machine) yeast
- 2½ cups (600 ml) whole milk
- 4 tablespoon butter, melted
- about ½ cup gluten free cornmeal for sprinkling
- 2 tablespoon butter, for frying/baking
Instructions
- In a large bowl, weigh bread flour, sugar, salt, and yeast. Whisk to combine. Using a stand mixer with the beater blade or a handheld mixer, turn on low and slowly pour in milk and butter. Increase speed to medium and beat for 5 minutes.
- Cover the bowl with plastic wrap and place in a warm, draft-free area until doubled in volume, about 2 hours. Refrigerate for at least 4 hours or up to 7 days.
- Spray insides of muffin rings(if using) with nonstick spray. Heat an electric skillet (or a skillet with a lid) to medium low (about 200-250) and add 1 tablespoon butter. Place muffin rings on top of melted butter and sprinkle each with cornmeal. Spoon dough into muffin rings (don't fill completely to the top as the muffins will expand to fill the rings). Sprinkle more cornmeal on top of dough in each ring. Cover the skillet and cook for about 7-8 minutes. When bottoms are browned, divide 1 tablespoon of butter over tops of muffins, if desired, and carefully flip over and, using tongs. Place lid back on skillet and continue to cook for another 7-8 minutes.
- Remove the lid and, using tongs, carefully remove the rings from each muffin. They should slide out easily if you greased the rings. Replace the lid and continue to cook for another 1-2 minutes, just to get the sides fully "baked."
- Remove the muffins from the skillet and allow to cool fully before fork splitting and toasting.


Jan
I haven’t baked this yet, however, I made the dough, let it rise, and placed it in the fridge. It seems very liquidy, is this normal?
Jan
Ok, I see that the dough thickened up the next day. The muffins came out perfectly and delicious after toasting. I’m not sure why they are still doughy in the middle. Will bake them in the oven wrapped in foil to see if I can fix that. I have a brand new LG gas stove and cooked them in a Lodge cast iron pan and I added extra cook time so that didn’t really make much difference. Any other thoughts?
Randy
Made one batch of your dough and made 5 english muffins, small pizza and a small facoccia pan as well out of batch. All were excellent. Especially impressed with your english muffins as it is a tall order to accomplish desired texture and taste for these. My wife has celiac and prepares her food but does not like to scratch bake. I try to help with baking for her and you know how hard it is to nail gluten free baking. Well done and thank you for giving me additional solid menu items for her. Your recipes and directions are spot on!
Kim
Awe, thank you so much, Randy 🥰
Don R
I have successfully substituted two ingredients in your english muffin recipe:
- I use Almond Milk instead of whole milk with the same quantity
- I use cream of Rice instead of cornmeal for the "crunch"
Also cannot use whey protein in your Gluten Free Bread Flour Blend
- I have been using an Egg Protein powder (black large container from Amazon) with same recipe weight without any change in taste or baking effect!
GREAT RECIPES YOU ARE DEVELOPING! MY FAMILY AND FRIENDS LOVE THEM ALL!
Lydia
This recipe is unbelievable! I don't have an electric skillet or metal round molds so I used a silicone rounds tray in the oven instead, cooking at 325 for 20 minutes. They are incredibly fluffy, it was hard to wait for them to fully cool down but I waited as long as I could and they were still so good. I used the same dough for the pan pizza last night to make a mini pizza. I'm going to try making a full size cast iron pan pizza tonight for dinner. I'm so thankful I found your website and recipes, I always thought Schar was a decent gluten free brand but I'm not sure I'll ever be able to buy any GF products off the shelf again. Thank you for taking your time to perfect your flour blends!
Marcella
These were incredible! I’ve made gf English muffins before, and they were ok, but these are the real deal— so much better! I even bought an electric skillet to make them, and I’m glad I did. For me personally, I think a skillet would have been more difficult. My first batch registered 208 on an instant read thermometer, but even though I cooked the next two batches much longer after taking the rings off, they never got over 200. I think the plug came loose after the first batch, but I plugged it back in, so I don’t think that’s the whole problem. Is there an optimum temperature? I’ve only eaten one, and it was great, but I don’t know which batch it came from— I should have separated them to see if there was a difference. One other thing is that the dough rose quite a bit further in the fridge and I ended up getting 11 muffins! Thanks so much for this great recipe!
Shelley
Kim, These are wonderful! What I really love is that I can keep dough in the fridge for several days and bake as needed. THANK YOU!
Gillie
Wow! These were fantastic! So tasty, I’ll most likely keep a container of dough ready to go all the time. Especially since my gluten eating hubs loves them. Oddly enough he doesn’t like the commercial ones.
Merry
The gf English muffins turned out very good. I will definitely make them again. The only thingi is that they were a bit heavy.They rose up nicely, but were more like bread on inside, I fork-split them,but not many nooks and crannies as I was expecting. They have a nice flavor, especially when toasted and accompanied by strawberry preserves. I have come to know that no amount of tweaking with gf baked goods will ever duplicate the gluten-filled products we miss, however your recipes come pretty darn close. Thanks for developing your flour blends and recipes. Have enjoyed many of them.
Kim
Hmmm. Ours have never been heavy and always have the nooks and crannies, especially after toasting. Did you use my flour blend?
dyn
Incredibly curious to try this recipe, thank you for giving me hope. One quick question, the link for the type of electric skillet recommended goes to silicone cupcake cups age, could you kindly update the link? Thank you.
Kim
Thank you for alerting me to that. It's corrected 👍
Karen Schwarzer
Hi Kim, I am NOT a baker and I need advice. I don't have a Stand mixer or even a hand mixer so I mixed it by hand. I need to know how much I should mix it. What am I looking for. I may get a stand mixer (used) I just can't right now until I need it more than I do. I did make them - they seemed dense to me and I think it's the mixing thing! SOS. BUT the ones I made I am happy with to start! Thanks for whatever advice you can share!
Kim
You'll need to mix it very vigorously for several minutes. If you have a Danish dough whisk, that can help and they're very cheap, or a handheld mixer with dough hooks, which are also not too expensive. But honestly, a mixer is really the best bet for getting the right texture of the dough.
Holly
Can you tell me the reason for the refrigeration time? BTW these are amazing. Ive made them twice without the refrigeration time and they've been great. Just wondering what Im missing. Thanks!!
Linda Wilkes
Kim, I don’t have an electric skillet. Would a cast iron skillet with a cover and in the oven work?
Deborah K Schaffer
Kim, These muffins are outstanding - my husband is celiac and I have tried many recipes and many flour blends with some level of success most of the time - however, I believe your bread flour blend is my absolute favorite for yeast bread recipes. Using this dough I made a pan pizza, focaccia and the english muffins - all 3 were absolutely wonderful. For folks who do not have an electric skillet (I do not), here is how I made them and they turned out perfect - I used a double burner griddle with my english muffin rings - I sprinkled corn meal inside the oiled muffin rings, filled the rings about 2/3 full, and spread the dough around as best I could into a kind of circle (they are not perfectly round in all cases - but this worked out ok, since I am not entering them in any beauty contests ;). I cooked them for 2 minutes on each side, then placed them on a parchment paper lined baking sheet and baked them for approx 5 to 6 minutes at 350 degrees F. I tested the internal temp and pulled them when they were 205 degrees. I would have shared a picture of them, but could not figure out how to do that. These muffins do taste like I remember Thomas' English Muffins tasted. Bless you for all the work you do to provide us with proven recipes that really do taste great. ❤
Kim
Thank you so much, Deborah!! I appreciate your kind words and I'm thrilled that you and your husband like them 😍
katherine
Does brown rice protein or other plant protein work? Thank you.
Kim
I have several substitution examples with links to them in the chart 🙂