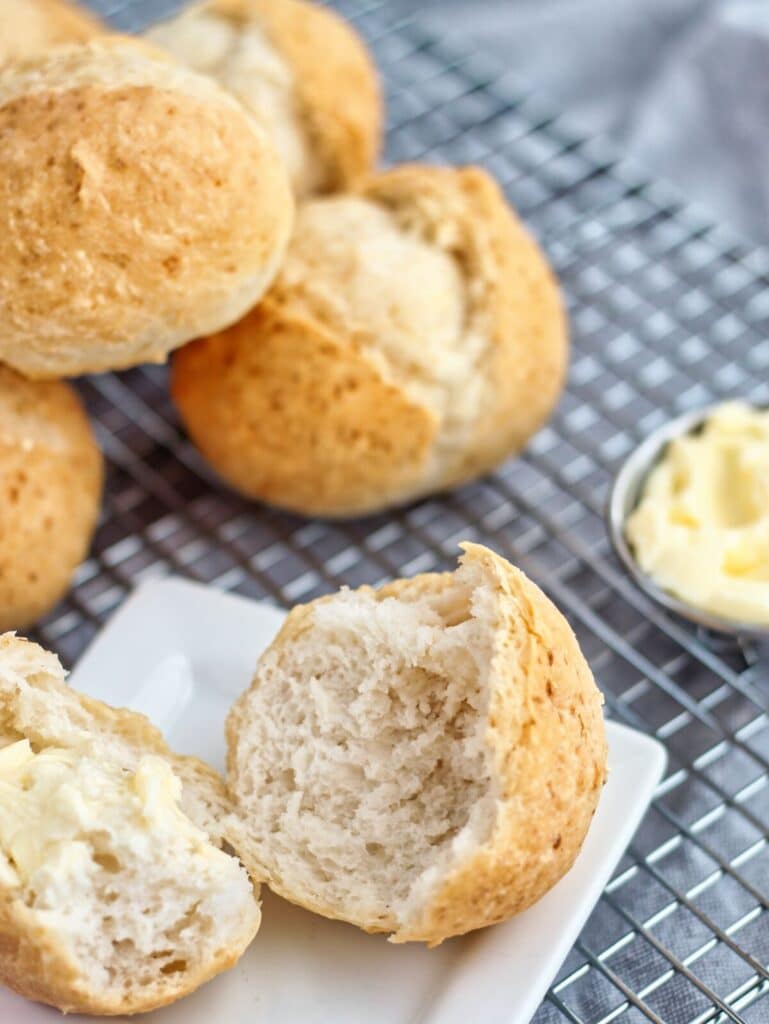
These Gluten Free Crusty French Rolls are the perfect rolls to serve with any dinner. They're crusty on the outside, fluffy on the inside, and so easy to make!
Some of the items linked in this post are affiliate links, meaning, at no additional cost to you, if you click through and make a purchase, I will earn a small commission.
I love my Gluten Free Hawaiian Rolls. They are soft and squishy and absolutely perfect, and no one ever believes me when I tell them they're gluten free. They're a little bit sweet, just like a good Hawaiian roll should be. Nine times out of ten these are the rolls I make when we're having a meal with rolls. But occasionally I'd like a different kind of roll. Something that's not the usual soft and squishy enriched roll. Something that would be sturdy enough to hold up to perhaps mashed potatoes and gravy.
If you've made my Gluten Free Artisan Bread, you already know that it's a very crusty bread. So it would only make sense to use that very same dough to make these crusty French rolls. I love how we get the best of both worlds with these rolls all in one bite. They still have that crustiness that's so beloved from the original bread recipe, but at the same time you get the softness of the interior of the roll. Slathered with butter or maybe dipped in gravy, these crusty rolls are the perfect roll to compliment any meal.
here's what you'll need
- Kim's gluten free bread flour blend -- the main ingredient in all of my gluten free breads, it's required to get results just like what I demonstrate.
- Honey -- this little bit of honey helps feed the yeast. It's not normally in lean bread doughs, but this is gluten free baking and sometimes we need a little extra boost to get things going.
- Olive oil -- also not typical in lean doughs, but the little bit of fat adds flavor to the dough and helps tenderize the crumb.
- Xanthan gum -- a small amount of additional xanthan gum added to this dough recipe helps with the stretch of the dough.
- Whole psyllium husks -- this is actually an optional ingredient, and you can also substitute whole psyllium husks with psyllium husk powder (see the recipe card for amounts). Some other gluten free bloggers may tell you that you can't knead gluten free bread dough without it, but I'm here to tell you that you can IF you use my bread flour blend. However, psyllium husks do add a little extra oomph to the dough, allowing it to be stretched a little further.
- Instant yeast -- I always use instant yeast in all my breads, unless I'm making sourdough. If you can't get your hands on instant yeast, you can substitute with active dry yeast, but you'll need to activate it first. Make sure you use warm water (between 100-110 F) and dissolve the yeast with the honey in the warm water until foamy. Otherwise, your water can be at room temperature. No need to warm it.
- Kosher salt -- I've heard from several people stating there's not enough salt in this recipe, so I've tested it with one teaspoon more salt and it made a big difference.
divide and conquer
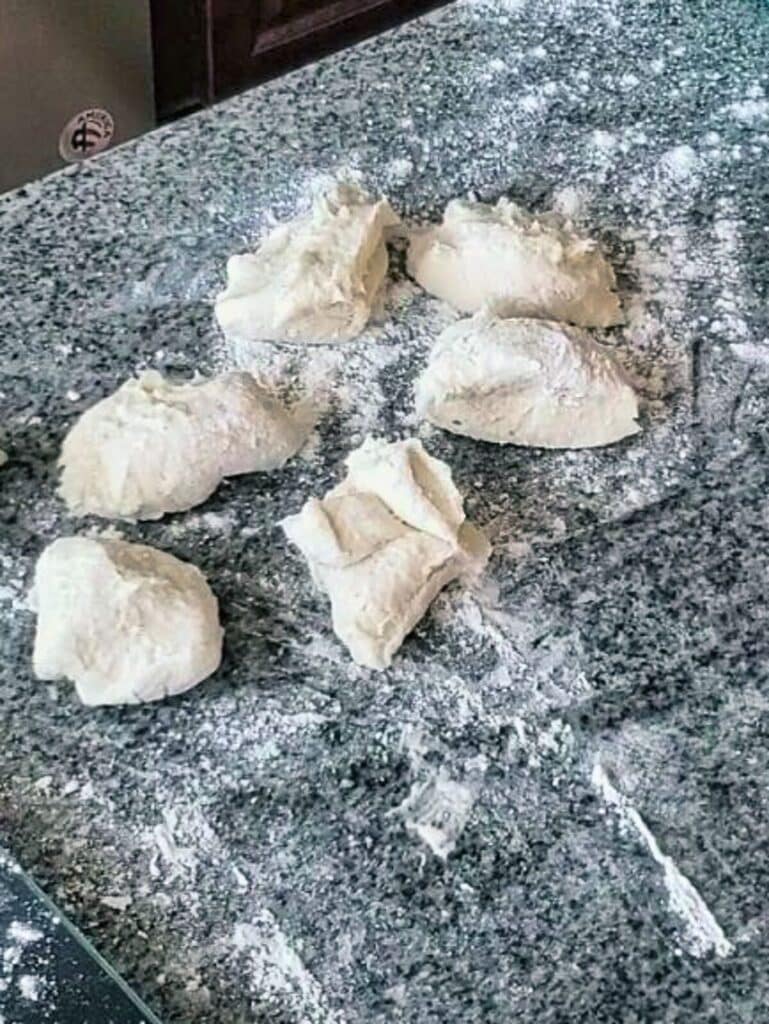
After you've made the dough, it literally takes about 5-10 minutes to divide the dough and shape the rolls. Then it's all just about inactive time waiting for the rolls to rise.
- Divide the dough into equal amounts. I prefer a smaller roll for dinner rolls (2 ounces), but you can also make these larger for use as, say, a burger or sandwich bun (4 ounces). It helps to use your scale to weigh each, but you can also eyeball it if you're good at that sort of thing (I'm not, lol!)
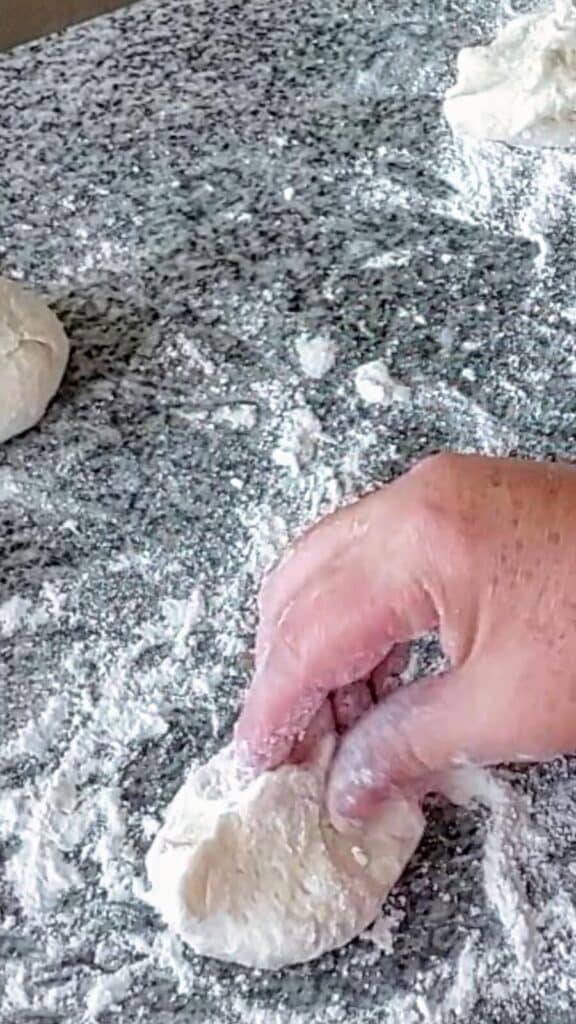
- Shape each into a tight roll using a non-floured surface (you need the friction between the roll and the surface). Cup your hand around the dough, like a backwards "C", and push and roll it around within your cupped hand until it forms a tight round ball.
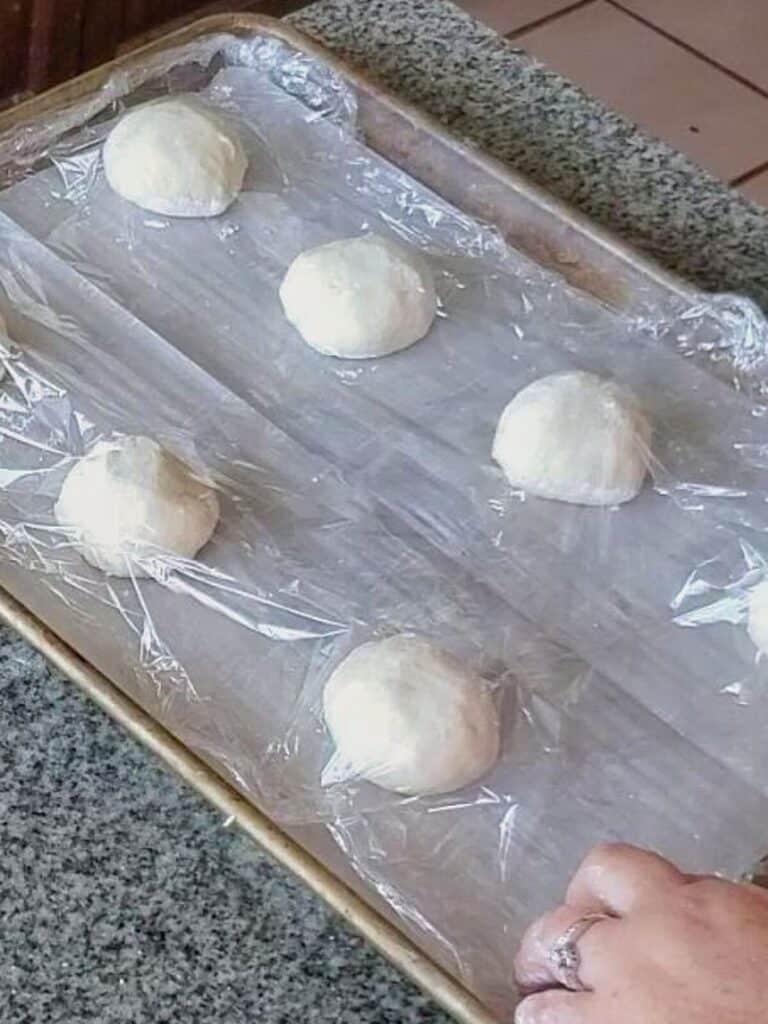
- Place rolls about 4 inches apart on a parchment-lined baking sheet and cover loosely with plastic wrap. Allow the rolls to rise until doubled in size in a warm place, such as a turned off oven (turn your oven on to the lowest setting for a few minutes and then turn off).
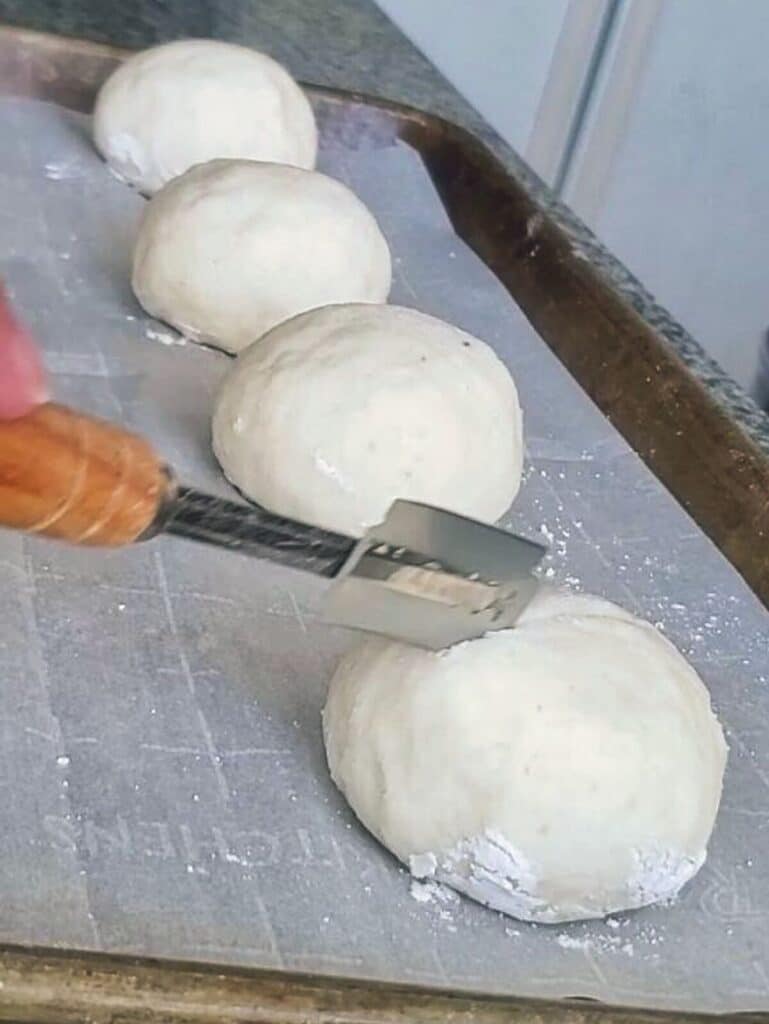
- When fully risen, slash the top of each roll with a sharp knife or a bread lame (affiliate link). Place sheet tray in the oven and spray the rolls liberally with water (to create steam). Bake at 450 degrees F for 10-12 minutes, or until golden brown and crusty.
crusty rolls faqs
Usually it's a lean bread, meaning there are little to no enrichments, such as butter, eggs, etc.
Steam. It's all about adding steam to the oven. In commercial ovens, they have steam injectors. In our home ovens, there are several ways to add steam. Toss a few ice cubes on the bottom of your oven, add very hot water to a shallow pan on the bottom rack, and/or spray the rolls directly with water using a spray bottle.
Here's the best method I've found. It sounds weird, but it totally works. Run each of the rolls under your kitchen faucet very briefly, just to wet the exterior. Place in a hot oven (400 degrees F) for just a few minutes (5 tops). They will crisp right up!
more gluten free rolls recipes
- Pumpkin dinner rolls
- Potato brioche buns
- Pillowy soft dinner rolls
- Mexican conchas
- Hot cross buns
- Hamburger and hot dog buns
- Brioche au chocolat
- Hawaiian rolls
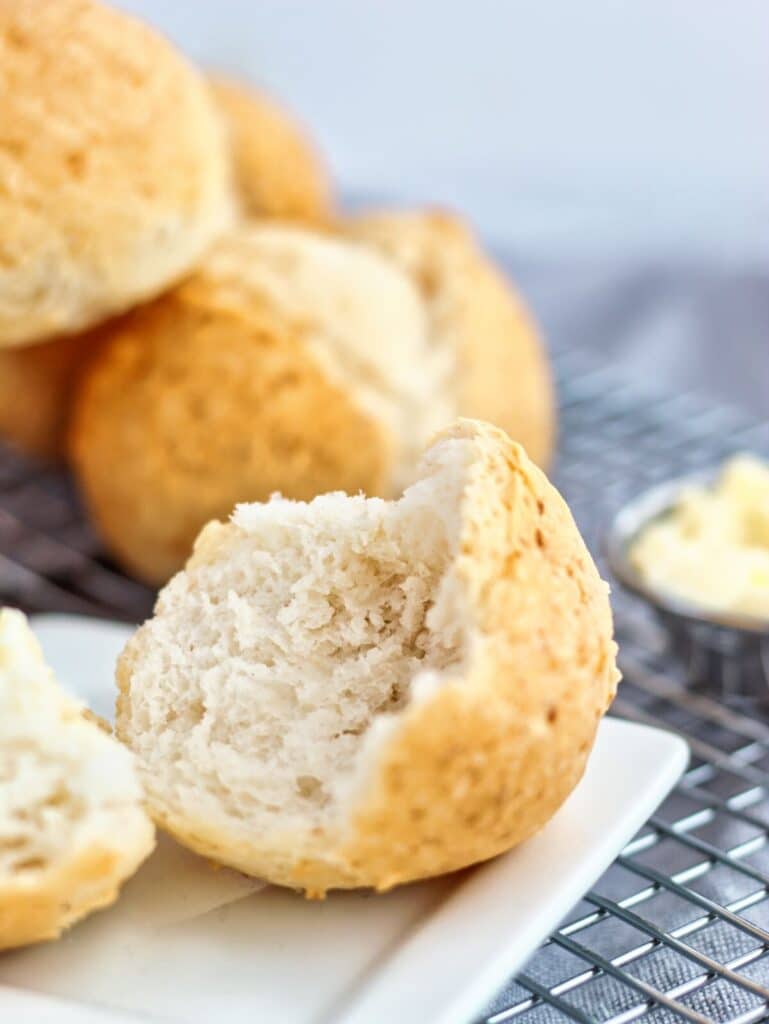
Take some of that dough that's already sitting in your fridge and try these Gluten Free Crusty French Rolls with your next meal. You'll be glad you did when you take that first bite!
Gluten Free Crusty French Rolls
Ingredients
- ½ recipe Gluten Free Artisan Bread dough (recipe follows)
Artisan Bread Dough
- 3 cups (420g) Kim's gluten free bread flour blend
- 1½ teaspoon xanthan gum (in addition to what's already in the blend)
- 1 tbsp (5g) whole psyllium husks (or 1½ teaspoon psyllium husk powder)
- 1 tbsp (9g) instant yeast
- 1 teaspoon kosher salt
- 1¾ cups (420ml) water
- 2 tbsp (26ml) olive oil
- 1 tbsp (21g) honey
Instructions
Make Bread Dough
- In the bowl of a stand mixer fitted with the dough hook, add all dry ingredients and whisk using a handheld wire whisk. Add the honey, olive oil, and water. Place on mixer and mix briefly to incorporate. Turn the mixer up to medium high and knead for 5 minutes. Remove the dough hook and scrape the dough into a cohesive mass using a plastic dough scraper or a rubber spatula (or scrape into another bowl). Cover and place the bowl in a warm, draft-free area and allow it to rise (proof) for 1-2 hours, or until doubled in volume.
- Refrigerate for at least 6 hours, preferably overnight, but up to 10 days.
- Remove half of the dough from the fridge (or more) and knead it until smooth on a well-floured surface. Divide the dough into 2-4 ounce pieces (2 ounce for small rolls and 4 ounce for larger rolls to be used as buns).
- Flatten each piece slightly and pull in the dough from the sides to create a taut dough. Pinch the dough together and turn over to where the pinched dough (the seam) is on the bottom. Put ball of dough on a smooth surface that isn't floured (the flour will cause the dough to slide around and you want friction). Put your hand over the dough with the outer edge of your palm where your pinky finger is creating a "cage" over the roll (the side of your hand should always touch the surface of the counter). Move your hand in a counter clockwise direction, pushing the dough around inside the "cage" until the roll is nice and round. If it sticks a little, that's okay. Just use your bench scraper to release it from the surface.
- Place rolls 3-4 inches apart on a parchment-lined baking sheet and cover loosely with plastic wrap. Allow to rise in a warm, draft-free area until puffed, but not necessarily doubled in size. This will take anywhere from 30 minutes to an hour or possibly two, depending on the temperature of your proofing area (don't be surprised in winter months if it takes longer--this is perfectly normal, especially considering the rolls come straight out of the fridge before shaping).
- Preheat oven to 450° F. When rolls have risen, slash the tops of each with a bread lame or sharp knife.
- After placing the rolls in the oven, immediately create steam. This can be done by pouring very hot water into a shallow pan on a lower rack, throwing a couple of ice cubes directly onto the floor of your oven, or spraying the rolls directly with water using a spray bottle. Immediately shut the oven door and bake the rolls for 10-12 minutes, or until golden brown and crusty.
Notes
Did you make this recipe? Snap a pic and tag @letthemeatglutenfreecake on Instagram so I can see your creation!



SHA
HI KIM, I CANNOT FIND HOW OR WHERE TO FIND THE GLUTEN FREE BREAD DOUGH? I HAVE TYPED IT IN AND LOOKED EVERYWHERE JUST FOR THE RECIPE.....NOPE. CANNOT FIND IT. REFERRENCE: I WANT TO MAKE YOUR GLUTEN FREE ARTISIAN BREAD BUT IT STATES ON INGRED. 1/2 RECIPE FOR THE GLUTEN FREE ARTISIAN BREAD. THEN IT GOES TO INSTRUCTIONS: #1 FOLLOW INSTRUCTIONS FOR MAKING THE BREAD DOUGH THRU STEP #2 ...BUT....WHERE DO I FIND THAT BREAD DOUGH RECIPE? PLEASE HELP....EITHER I AM BLIND OR I AM HAVING A SENIOR MOMENT - HEY, MAYBE BOTH!
HELP!!!!
SHA
SORRY FOR THE CAPS- I HAVE CATARACTS AND ISSUES WITH MY SITE~
Kim
I'm so sorry, Sha. The term "Gluten Free Artisan Bread Dough" is actually the link directly to the recipe, but I realized recently that a lot of people don't understand that so I'm trying to go through all my older recipes and just add the recipe right on each one instead of linking it. It is there now and I hope you're able to see it.
By the way, the bread flour blend IS still linked, as that would be too hard to put on each recipe. So where it says "Kim's gluten free bread flour blend", just tap or click right on those words and it will take you to the bread flour blend recipe.
Susan Cahill
I have made the artisan dough for the first time yesterday to make rolls for Easter Sunday. I have made several recipes and they've all turned out great using your flour blends. My question is can I make the artisan rolls ahead of time, freeze them, and bring them to room temperature before baking?
Kim
Yes!
Susan Cahill
Thank you for your response. I did freeze the rolls and brought to room temperature before baking, however I missed a very important step! I forgot to add the water to the oven for the added moisture. They still tastes good but I don't think they were as fluffy on the inside. I will pay better attention next v time! I'm making the potato brioche buns today for memorial day! My second time trying these because they are so good! Thanks Kim!
Barbara
My rolls came out a gray purple from the psyllium husk powder. How do you keep them from turning color?
Tina R.
It’s the brand of psyllium husk - it can’t be avoided. Now brand psyllium doesn’t give the purple hue.
Benn
Kim!
You have made me a HERO with this recipe. I surprised my wife who is celiac with these gems tonight at dinner. She was over the moon! I got out loading the dishwasher and everything!
With huge gratitude;
Benn
Kim
Oh, haha! Your comment made me literally laugh out loud, the part about loading the dishwasher!!
I'm absolutely thrilled for you (and your wife of course)! Thank you so much for trying my recipe 🥰
Amy
So good! I’ve a question though. You say in some of the bread videos that the dough can take the extra flour and to mix it so it’s not sticky. You’re close to sea level and I’m at 4800 feet. I seem to add way more flour than you do and my hands are coated with a thin layer of flour. Are yours too? It keeps sticking and I keep adding flour. The bread is delicious, but dense.
Amy
These were delicious! I’ve 2 kids with celiac so it was great that we all enjoyed them. I cannot keep up the pace of trying to make both and keep it separate to prevent cross contamination. Thank you so much.
Rebecca
You did it again! These are fabulous! Adding it to my regular rotation that already include your cinnamon rolls and beignets! Made a full recipe of dough and used 1/2 for buns and other half I made a baguette for fondue.
Kim
I'm so glad you liked them, Rebecca 🥰
Patricia Haught
Do you use psyllium husk powder
Kim
I personally use the whole psyllium husks as opposed to the powder because I like the way they seem to make the dough and bread a little more "wheat like" in flavor. But either will work just fine (in their respective amounts).