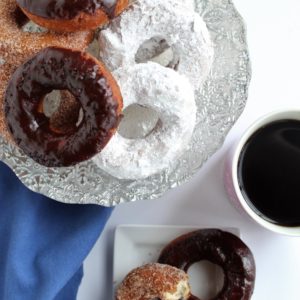
When was the last time you had a really great fried cake donut? Before you were gluten free, you say? Yeah, me too...until NOW! Slightly crunchy on the outside with a soft cake-like interior, these gluten free buttermilk cake donuts will bring back the nostaglia of an old-fashioned donut!
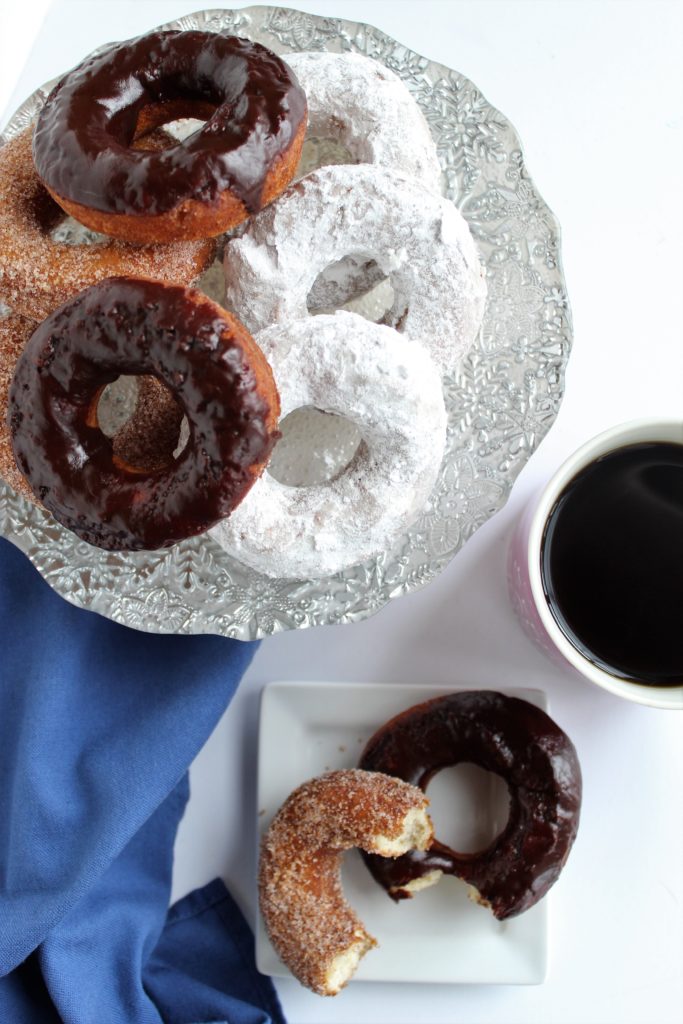
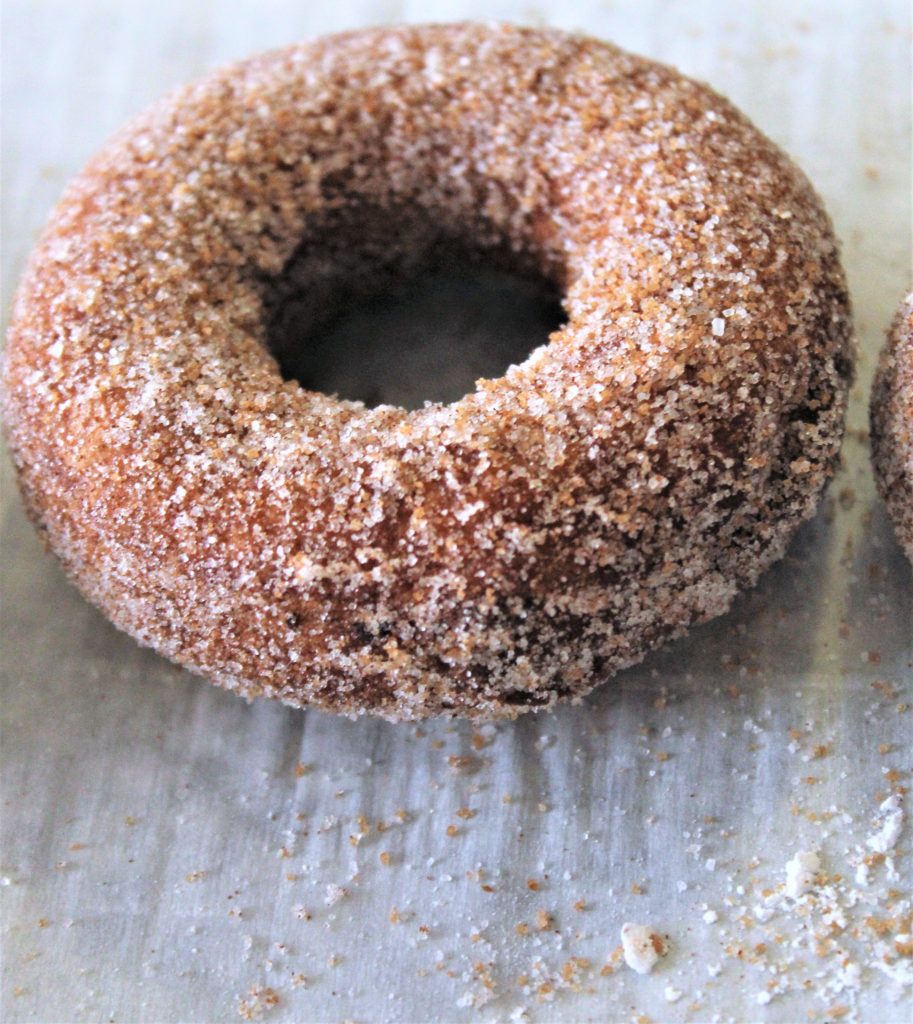
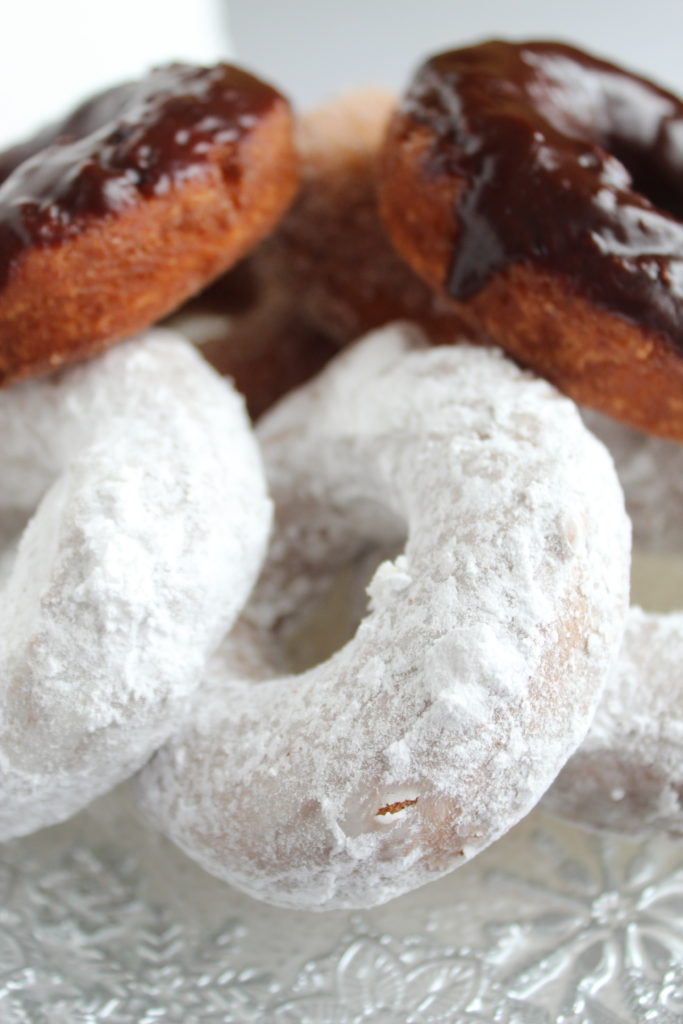
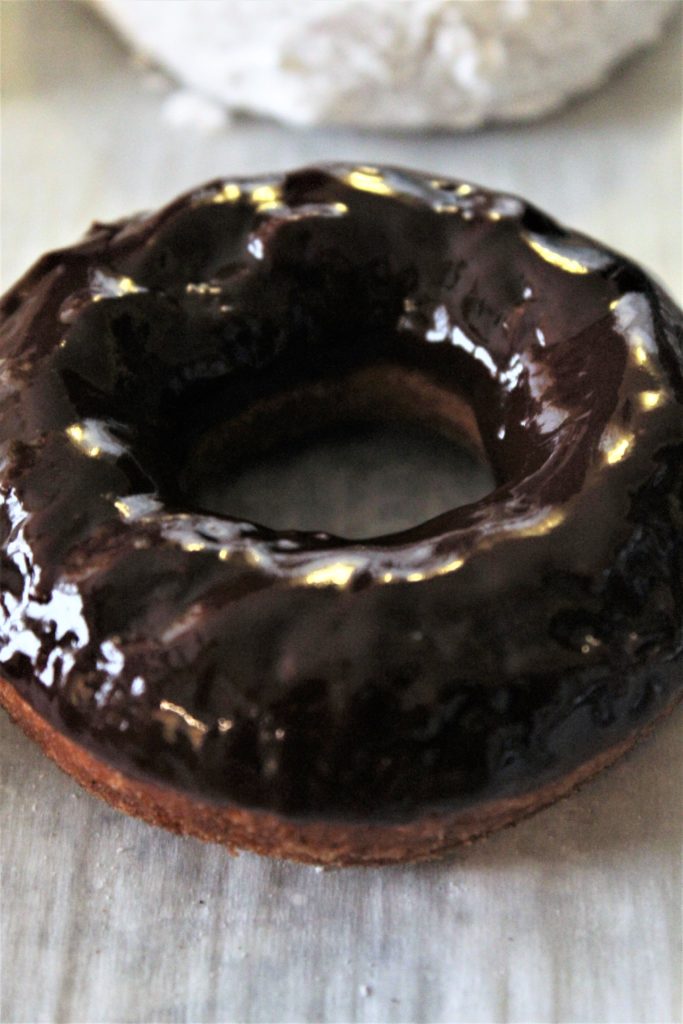
I used to be a yeast-only donut lover, but as I matured my taste buds changed and I'm finding some of those old-fashioned things I used to not think much of really coming back into my food radar. Enter cake donuts. They have a slightly crunchy, crispy "shell" and a soft, cake-y interior that has a hint of nutmeg. The nutmeg just gives it a little flavor without overpowering the whole donut. What I love so much about donuts is all the different flavors that can be thought up; however, sometimes simple is just what the doctor ordered and I love the simplicity of powdered sugar, cinnamon sugar, or chocolate dipped.
What You'll Need to Make These Donuts
Making donuts might seem daunting, but they're actually very easy to make once you have the right equipment and setup. I always take a few minutes before and set up everything beforehand so it goes smoothly.
- Mixer. I couldn't live without my Kitchen Aid mixer, but of course if you don't have a stand mixer, a handheld will totally work.
- A sheet tray and cooling rack. The sheet tray will be used for the raw donuts and the cooling rack for the fried donuts.
- A donut cutter. If you don't have one, using a larger round biscuit cutter and smaller round cutter will work.
- A deep fryer. If you don't have a deep fryer, you can definitely use a dutch oven. Just make sure it's deep enough.
- Chopsticks or a spider frying strainer. Yep, you read that right. Chopsticks work great to flip over donuts in the oil and take them out. If you don't have them, a spider or even a slotted metal spoon will work just fine.
- Bowls for glazes and sugars.
We CAN have those nostalgic donuts of our yesterdays. We just have to fry them ourselves. Don't worry. I'll walk you through it and it'll be a breeze!
Gluten Free Buttermilk Cake Donuts
Ingredients
- 2 cups (280 g) gluten free flour blend (I use my flour blend)
- ½ cup (55 g) cornstarch
- 1 teaspoon baking powder
- ½ teaspoon baking soda
- ½ teaspoon nutmeg
- ½ teaspoon salt
- 1 large egg
- ½ cup (100 g) granulated sugar
- 1 cup (250 ml) buttermilk, full fat
- 1 tablespoon butter, melted
- 1 teaspoon vanilla extract
- canola or peanut oil for deep frying
- powdered sugar and/or cinnamon sugar for coating
- chocolate glaze, if desired (see notes)
Instructions
- In large bowl, sift together the flours, baking powder, baking soda, nutmeg, and salt.
- In bowl of electric mixer (or large bowl if using handheld mixer) beat the egg and granulated sugar until creamy and pale in color, about 3 minutes. Add the buttermilk, melted butter, and vanilla and beat until well combined. Slowly add the flour mixture and beat just until the mixture comes together into a soft ball.
- Cover and refrigerate the dough for 30 minutes to an hour, until firm. It is a slightly sticky dough.
- Line baking sheet with parchment paper and pour oil to depth of two inches in deep fryer or heavy dutch oven. Heat oil over medium-high heat until thermometer reads 360 degrees.
- On a well-floured surface, roll out dough to about ½-inch thick. Cut with donut cutter or large and small round cutters. You should get about 10 donuts and donut holes, rerolling scraps and repeating cutting. Place on baking sheet.
- Carefully lower 2-4 donuts at a time into hot oil. Fry on first side for about 1 to 1 ½ minutes. Turn donuts over and fry on the other side for about another minute. Donuts should be deep golden brown.
- Transfer donuts to cooling rack set over paper towels. Cool slightly and then dip in powdered sugar, cinnamon sugar, or chocolate glaze. Enjoy!!
Notes
This post contains Amazon affiliate links.

Arly
Another brilliant recipe, these were so simply and delicious, thank you * tears of joy*
what is the best way to store there please?
Kim
Thank you so much, Arly!!
As with any deep fried goodie, they're best fresh. They should keep for a day or two at room temperature and can be reheated briefly in the microwave (at 15-second intervals). You could try to freeze them, but they will lose that freshly fried texture.
Megan
Hi Kim,
I have not tried these yet but they look delicious. Any thoughts on how to turn these into apple cider donuts? Now that fall is approaching I’m in the mood for some but I’d prefer this type of donut vs a baked lighter donut.
Kim
You're in luck, Megan! I have a recipe right on the blog for apple cider donuts! Here's the link: https://www.letthemeatgfcake.com/gluten-free-apple-cider-donuts/
I also have one for pumpkin cake-style donuts if that's an option for you, too: https://www.letthemeatgfcake.com/gluten-free-pumpkin-donuts/
Tammi Perong
Hi! We love this recipe so much. My girls have been begging for it for weeks but it’s been too hot to fry anything lately! We are finally making them today...I had a question though. I have a big batch of your bread flour mixed up. Would that work in this recipe do you think? I’ve made it with your regular flour blend and they came out great, I was just trying to avoid mixing up another batch of flour for one batch of donuts 😊. Thanks!!
Kim
Hi, Tammi! I think it might work, but they may not be quite as tender. I'd give it a shot, though. If the dough seems a little thicker or drier, add a little more liquid (start with 1/4 cup).
I hope it works 🙂
Addy
Could you use this recipe to pipe into doughnut pan and bake them rather than fry? If so, would you need to adjust any of the ingredients? Thank you!
Kim
You might be able to if you don't refrigerate the dough right after mixing it. Otherwise, it will most likely be too stiff to pipe. You could probably still cut them out, though, into donut shapes and place on a baking sheet and bake them that way!
DebS
These look amazing! Could you use with an Air Fryer?
Kim
I think you could! I haven't tried it yet, but all the things I've fried I want to go back and try to airfry. If you get to it before me, please let me know how they turn out!
April Schutt
Can anything be used in place of the buttermilk in your recipes? We are dairy free as well...
Kim
I haven't tried it but I'm sure almond milk would work well.
Sarah
Can I make the dough the day before and store it in the fridge? You mention it has to be refrigerated for 30 minutes anyway. But I wasn't sure if it somewhat deactivates the baking powder & soda from sitting too long.
Kim
Yes, you can!