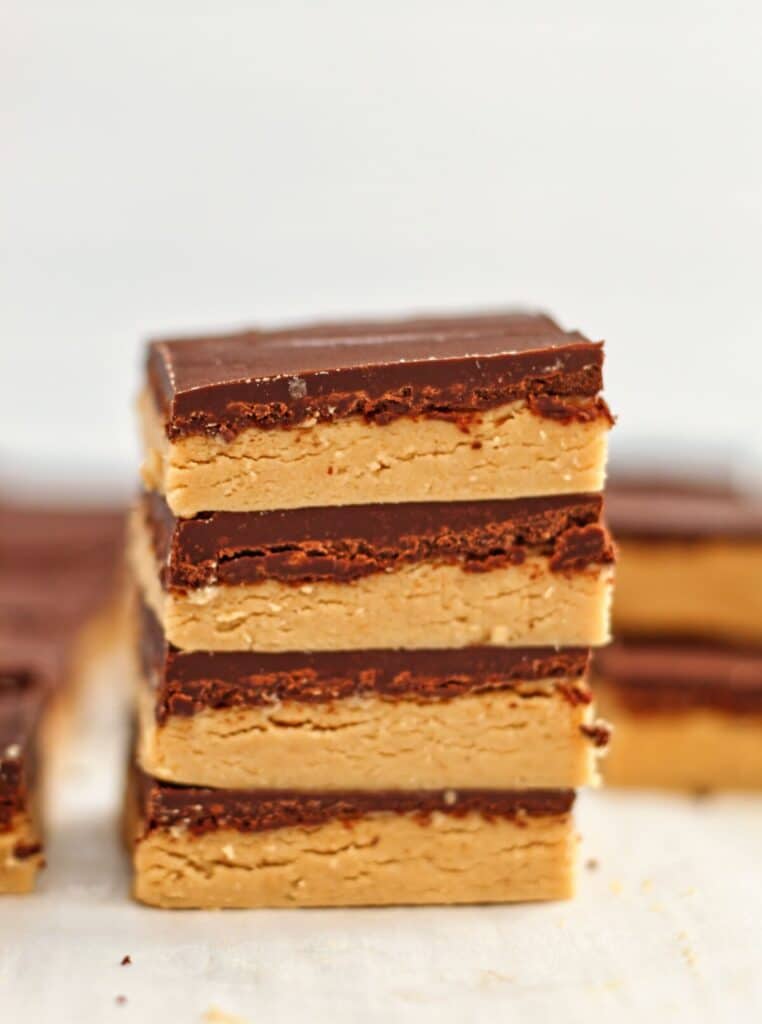
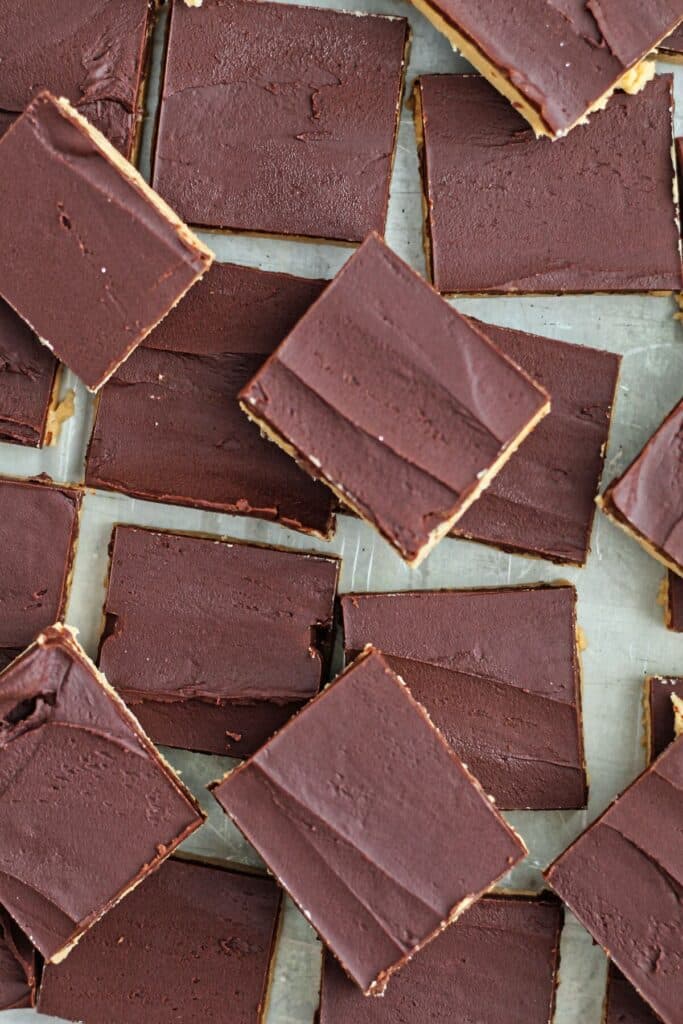
In 30 minutes and only four ingredients, these easy and super addictive No Bake Peanut Butter Bars are just like a Reese's cup in bar form!
Some of the items linked in this post are affiliate links, meaning, at no additional cost to you, if you click through and make a purchase, I will earn a small commission.
My mom used to do a lot of baking in my childhood. There was never a time without something freshly baked in our home. These peanut butter bars (or as we call them, peanut butter cups) were ALWAYS in our house. So much so that even my childhood friends remember how much they loved them. They're just so addictive that no one could possibly forget. If you're the one making them, they're so easy and fast, you can make them in about 30 minutes. My mom has been making these for as long as I can remember and they are a family favorite.
The Four Ingredients
You most likely have most, if not all, of these ingredients in your kitchen right now so you could make these TODAY!!
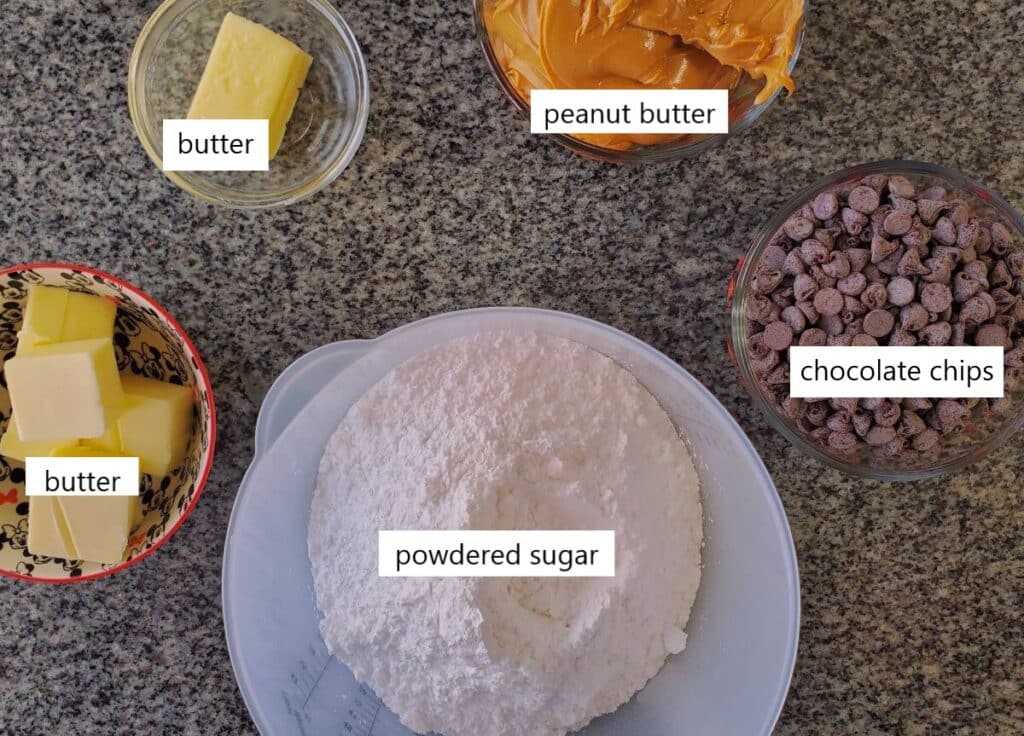
- Peanut Butter--Don't use natural peanut butter. It won't set up properly. I always use Skippy, but any other brand will work as long as it's not natural. You can even use chunky (I like mine smooth).
- Semi-sweet Chocolate Chips--the original recipe called for semi-sweet and it balances nicely with the peanut butter mixture. For vegans, use either Enjoy Life or the new Nestle Toll House allergen free chocolate chips.
how to make peanut butter bars
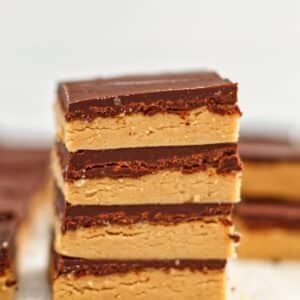
- Mix stick of butter and peanut butter until smooth.
- Add powdered sugar and mix until well combined.
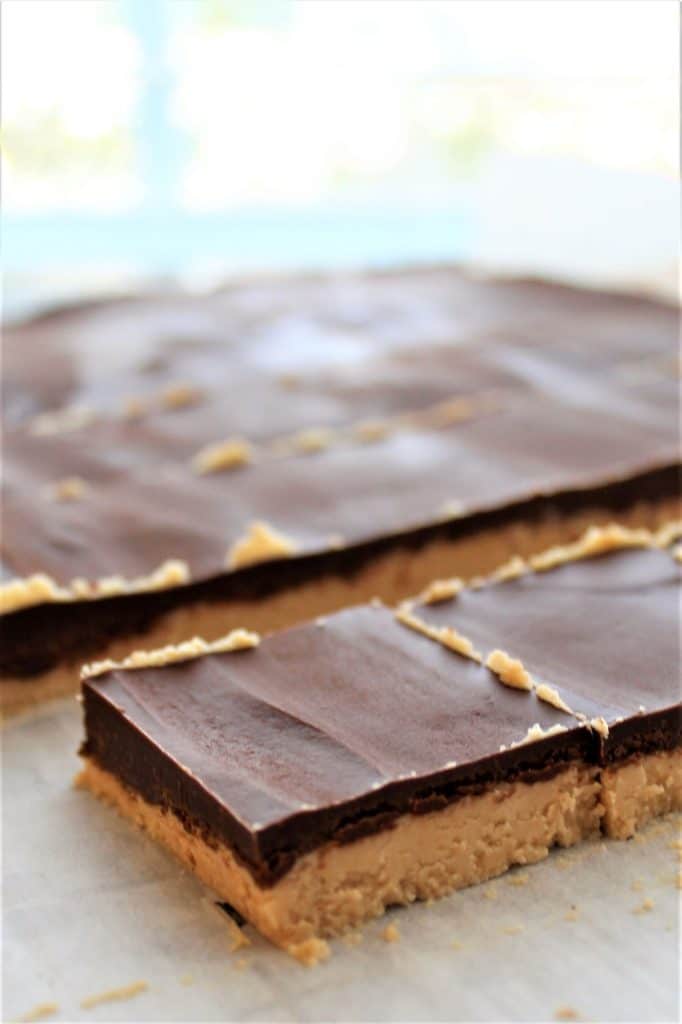
- Press into bottom of 9 by 13-inch baking pan.
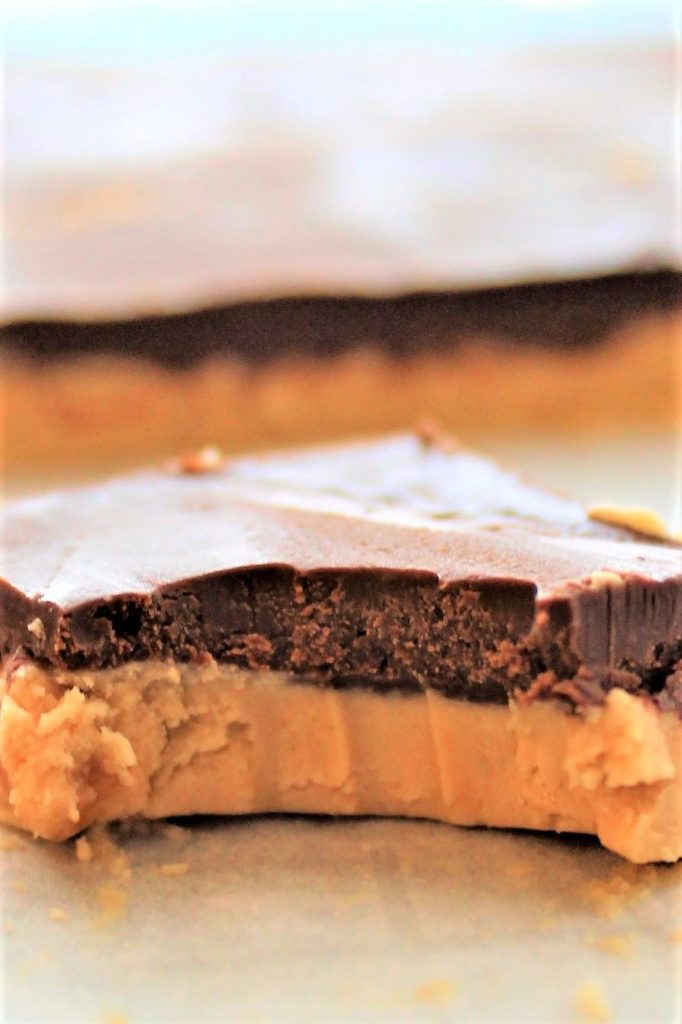
- Melt chocolate chips with remaining butter in a saucepan or in the microwave until thick and smooth.
- Spread over peanut butter mixture in an even layer.
- Chill until set, about 30 minutes.
Frequently asked questions about peanut butter bars
Yes, you can make these into peanut butter cups, but you'll need to change the chocolate layer by either using tempered chocolate or chocolate coating.
No bake peanut butter bars can be stored at room temperature or in the refrigerator for up to a week (although they won't last that long)! They can also be frozen for up to 3 months.
I haven't tried it, but I'm sure you could use equal amounts of coconut oil in lieu of the butter in peanut butter bars. I would use refined coconut oil, unless you want a slight coconut taste.
more gluten free peanut butter pleasures
- Peanut butter blossoms
- Peanut butter brownies
- Peanut butter pie
- Ultimate peanut butter cookies
- The best peanut butter fudge
- Chocolate dipped Easter eggs
- Tagalongs (a Girl Scout cookie copycat recipe)
- Flourless fluffernutter cookies
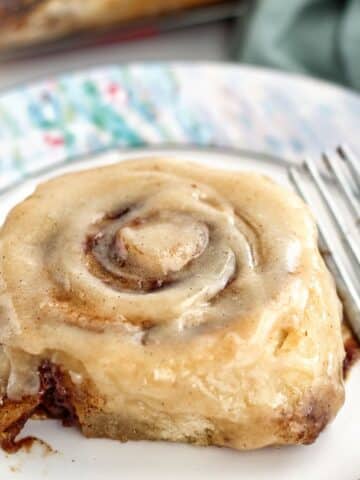
Love buckeyes but don't have the time to make them? Try these No Bake Peanut Butter Bars. They taste exactly the same but are so much easier (and quicker) to make!
No Bake Peanut Butter Bars
Ingredients
- 1 stick (113g) plus 3 tablespoon (42g) softened butter, separated
- 1½ cups (375g) creamy or chunky peanut butter (not natural)
- 3 cups (375g) powdered sugar
- 1 12-ounce bag (340g) semi-sweet chocolate chips
Instructions
- Place the one stick of butter and the peanut butter in a large bowl and beat on medium high until well combined and creamy.
- Slowly add the powdered sugar on low speed until combined. Mix on medium high until well combined. It will look like large crumbs that will stay together when squeezed.
- Remove the "dough" from the bowl and press it into a 9 x 13-inch dish, pushing to the corners until the bottom is completely covered. Smooth the top as best you can.
- Melt the chocolate chips with the remaining 3 tablespoon of butter in the microwave (or a small saucepan) until all the chips have been melted and the mixture is thick and smooth. Dollop spoonfuls of the chocolate mixture all over the peanut butter mixture and spread it to the corners using an offset spatula.
- Chill until set, about 30 minutes. Remove from refrigerator, cut into squares, and serve. Store at cool room temperature( or in the refrigerator) for up to one week (if they last that long)!
Notes
The recipe for No Bake Peanut Butter Bars was originally posted in December 2020 and has been updated with new copy, a new name, a new video, and new pictures.

JR
Delicious !!! but I have a question. Is there any way to put a chocolate layer on the bottom too? What about making a chocolate layer and letting it set up. Then add the peanut butter and the chocolate topping in original recipe? (I just think it might be easier to eat without getting the peanut butter on your fingers.)
Kathy
So you have any nutritional info on these bars
Kim
I don't, I'm sorry. The package to add the nutrition counter onto my website is costly.
Jodie
My son and his boyfriend came to dinner last and the boyfriend is gluten-free and I wanted to make dessert. The bars were a big hit and delicious. I'm just learning to bake gluten free, your website is great. My next is to make chocolate babka (gluten-free)
J'Marinde
Oleo was just another name for margarine, which - - as I remember - -started out as "oleo-margarine". It was not a brand, it was the common name of this product. I live in MN and, when I was a kid of about 8 years-old it used to be considered contraband, when locals would drive over to Wisconsin and buy cases of it. They would go about the neighborhood taking orders of who wanted how much, then paid the driver when they got back - - if they weren't arrested at the border. Ours used to come in a plastic bag with a small button-shaped "coloring" agent that we would break open and then we all would take turns mixing it in by squeezing the bag over and over until all was yellow. Then we would cut the bag open at the top and squeeze it all into a container for storage in the refrigerator. Nowadays, it's much less primitive and no longer "criminal" contraband. It's even sold in the stores in neat packaging and it's already colored. I use Earth Balance dairy free, soy free and gluten free margarine. It comes in tubs and sticks. 'LOVE IT! Please see my article on making my own margarine in 'Living Without' Magazine, June/July 2011, P. 8.
Kim
I have to ask her, but it seems like my mom told me the same kind of story about mixing the dye into "oleo." There are several recipes from our childhood that have Oleo as an ingredient in lieu of real butter! I only use real butter, but it is a pretty interesting story 🙂
Karen Schmitt
I will have to make these soon! They sound awesome! Your mom must have been great at making sweets!
Kim
Thanks, Karen! She was and still is an awesome baker!!